

What is Network Time Protocol (NTP)?
FIrst off, network Time Protocol (NTP) is a protocol used to synchronize computer clock times in a network.
Why is it important to synchronize computer clock times?
It is important to synchronize computer clock times via the network time protocol (NTP) on server clocks across your network as this helps t prevent data loss and eliminate SSL problems .
How to Set the Network Time Protocol (NTP) on your servers with Puppet Enterprise (PE)
How you can use Puppet Enterprise software to set the same time for your servers across your network with the network time protocol.
Specifically I will be showing you how you can use Puppet Enterprise software to manage your network time protocol across your network. This includes:
- Install NTP module from the PuppetForge
- Create an NTP node group
- Add the NTP class from the module to your agent nodes
- View changes to infrastructure on the events page
- Edit parameters of the main NTP class
Prerequisites:
- Puppet Enterprise version 2018.1 or later
- Test or staging environment with an internet connection (e.g. AWS, GCP, Azure)
- At least one agent server node running Linux or Windows
To manage your NTP (network time protocol) with Puppet Enterprise, you will need access to the following modules from Puppet Forge.
- On Linux, puppetlabs-ntp module.
- On Windows, tse-winntp module.
How to set Network Time Protocol on your servers with Puppet Enterprise
In this guide, I will show you how to do this for your Linux server nodes.
Step 1 - Install the Linux NTP module onto your server with Puppet Enterprise installed
Step 2 - Create the Linux NTP node group in your Puppet Enterprise
Step 3 - Add a NTP class to the Linux NTP node group that you have created
Step 4 - Confirm that the NTP changes are reflected in your Puppet Enterprise
Step 5 - Let's set our preferred NTP servers by editing our class parameters
Step 6 - Check to see that our NTP servers have been updated to our preferences
Step 1 - Install the Linux NTP module onto your server with Puppet Enterprise installed
Install the Linux NTP module onto your server where you have Puppet Enterprise installed. If you have not installed Puppet Enterprise, you can follow my guide on installing Puppet Enterprise on your Linux Server.
We will run the following commands on our server with Puppet Enterprise installed. For simplicity, I will call this server the, "Puppet Master server".
On your Puppet Master server, run the following commands:
$ puppet module install puppetlabs/stdlib
$ puppet module install puppetlabs/ntp

By running these commands we are installing the stdlib module first, and then our NTP module. As the NTP has dependency requirements that are met when we install the stdlib dependency library first.
You can check that it is installed by running the modules list command.
$ puppet module list --tree
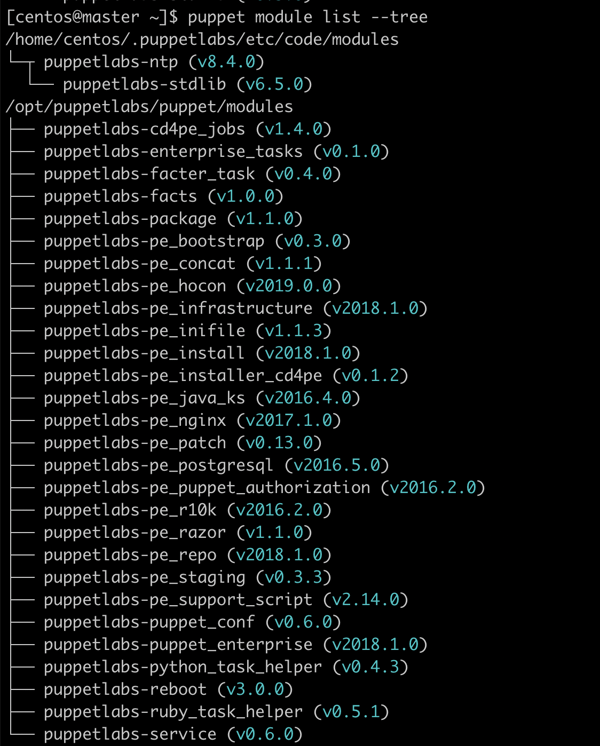
We can also run this command to see where the module path is:
$ puppet config print modulepath

/home/centos/.puppetlabs/etc/code/modules:/opt/puppetlabs/puppet/modules
Step 2 - Create the Linux NTP node group in your Puppet Enterprise
We will now create a Linux NTP node group to our Puppet Master server. We will do this using our Puppet Enterprise (PE) console in our web browser.
So in your Puppet Enterprise console on your web browser, we will want to find Node groups* (It is under "Inventory> Node Groups").

*Note - "Node Groups" in previous versions of Puppet Enterprise may be referred to as "Classification" option. Previously this was located under the "Configure" header. That is, "Configure> Classification".
Click on Add Group link
Name the new node group to "Linux NTP" or similar. You can leave the default values for the other settings.
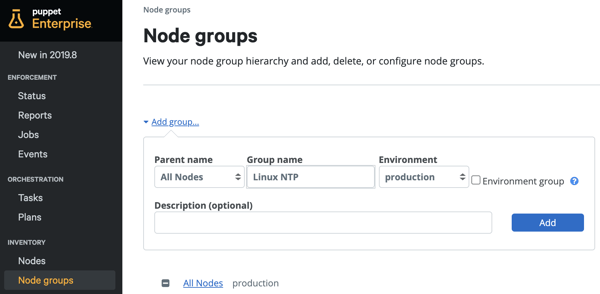
Click Add button.
Click the name of the group you just created.
On the Rules tab, enter "kernel" in the Fact Field and enter Linux in the Value field.
Note - The word "Linux" is case sensitive, please make sure you have capital L for Linux (and not "linux")
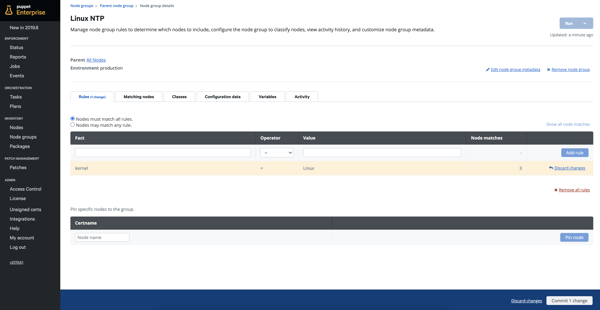

Click Add rule button
Click Commit 1 change button at the bottom right of the page.
Step 3 - Add a NTP class to the Linux NTP node group that you have created
Let's add a NTP class to the Linux NTP node group that you have created.
In the Puppet Enterprise (PE) console, click Node Groups
Select the name of the node group you created in the previous step.
On the Class tab, let's add a new class.
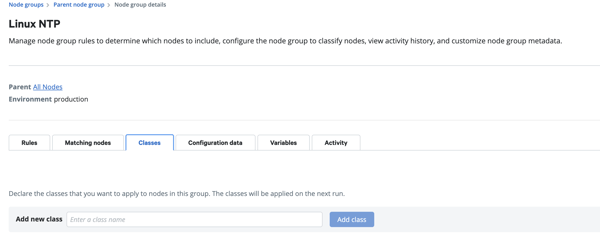
In the Add new class field, enter ntp.

If you do not see any ntp class listed, click the refresh link on the right.

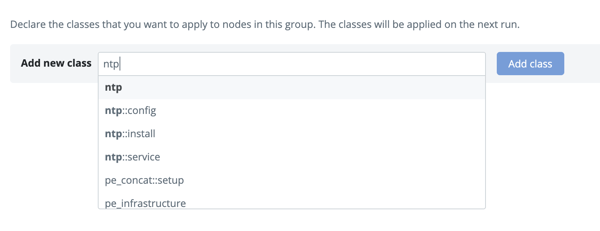

Click Add class
Click Commit 1 change button at the bottom right of the page.
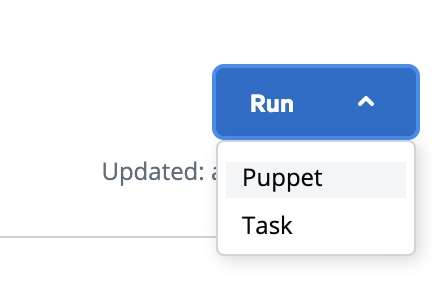
We will now run Puppet run by going to the Run menu near the upper right, select Puppet, and then selecting Puppet. (Run> Puppet).

On the "Run Puppet" page, review details and when you are ready.
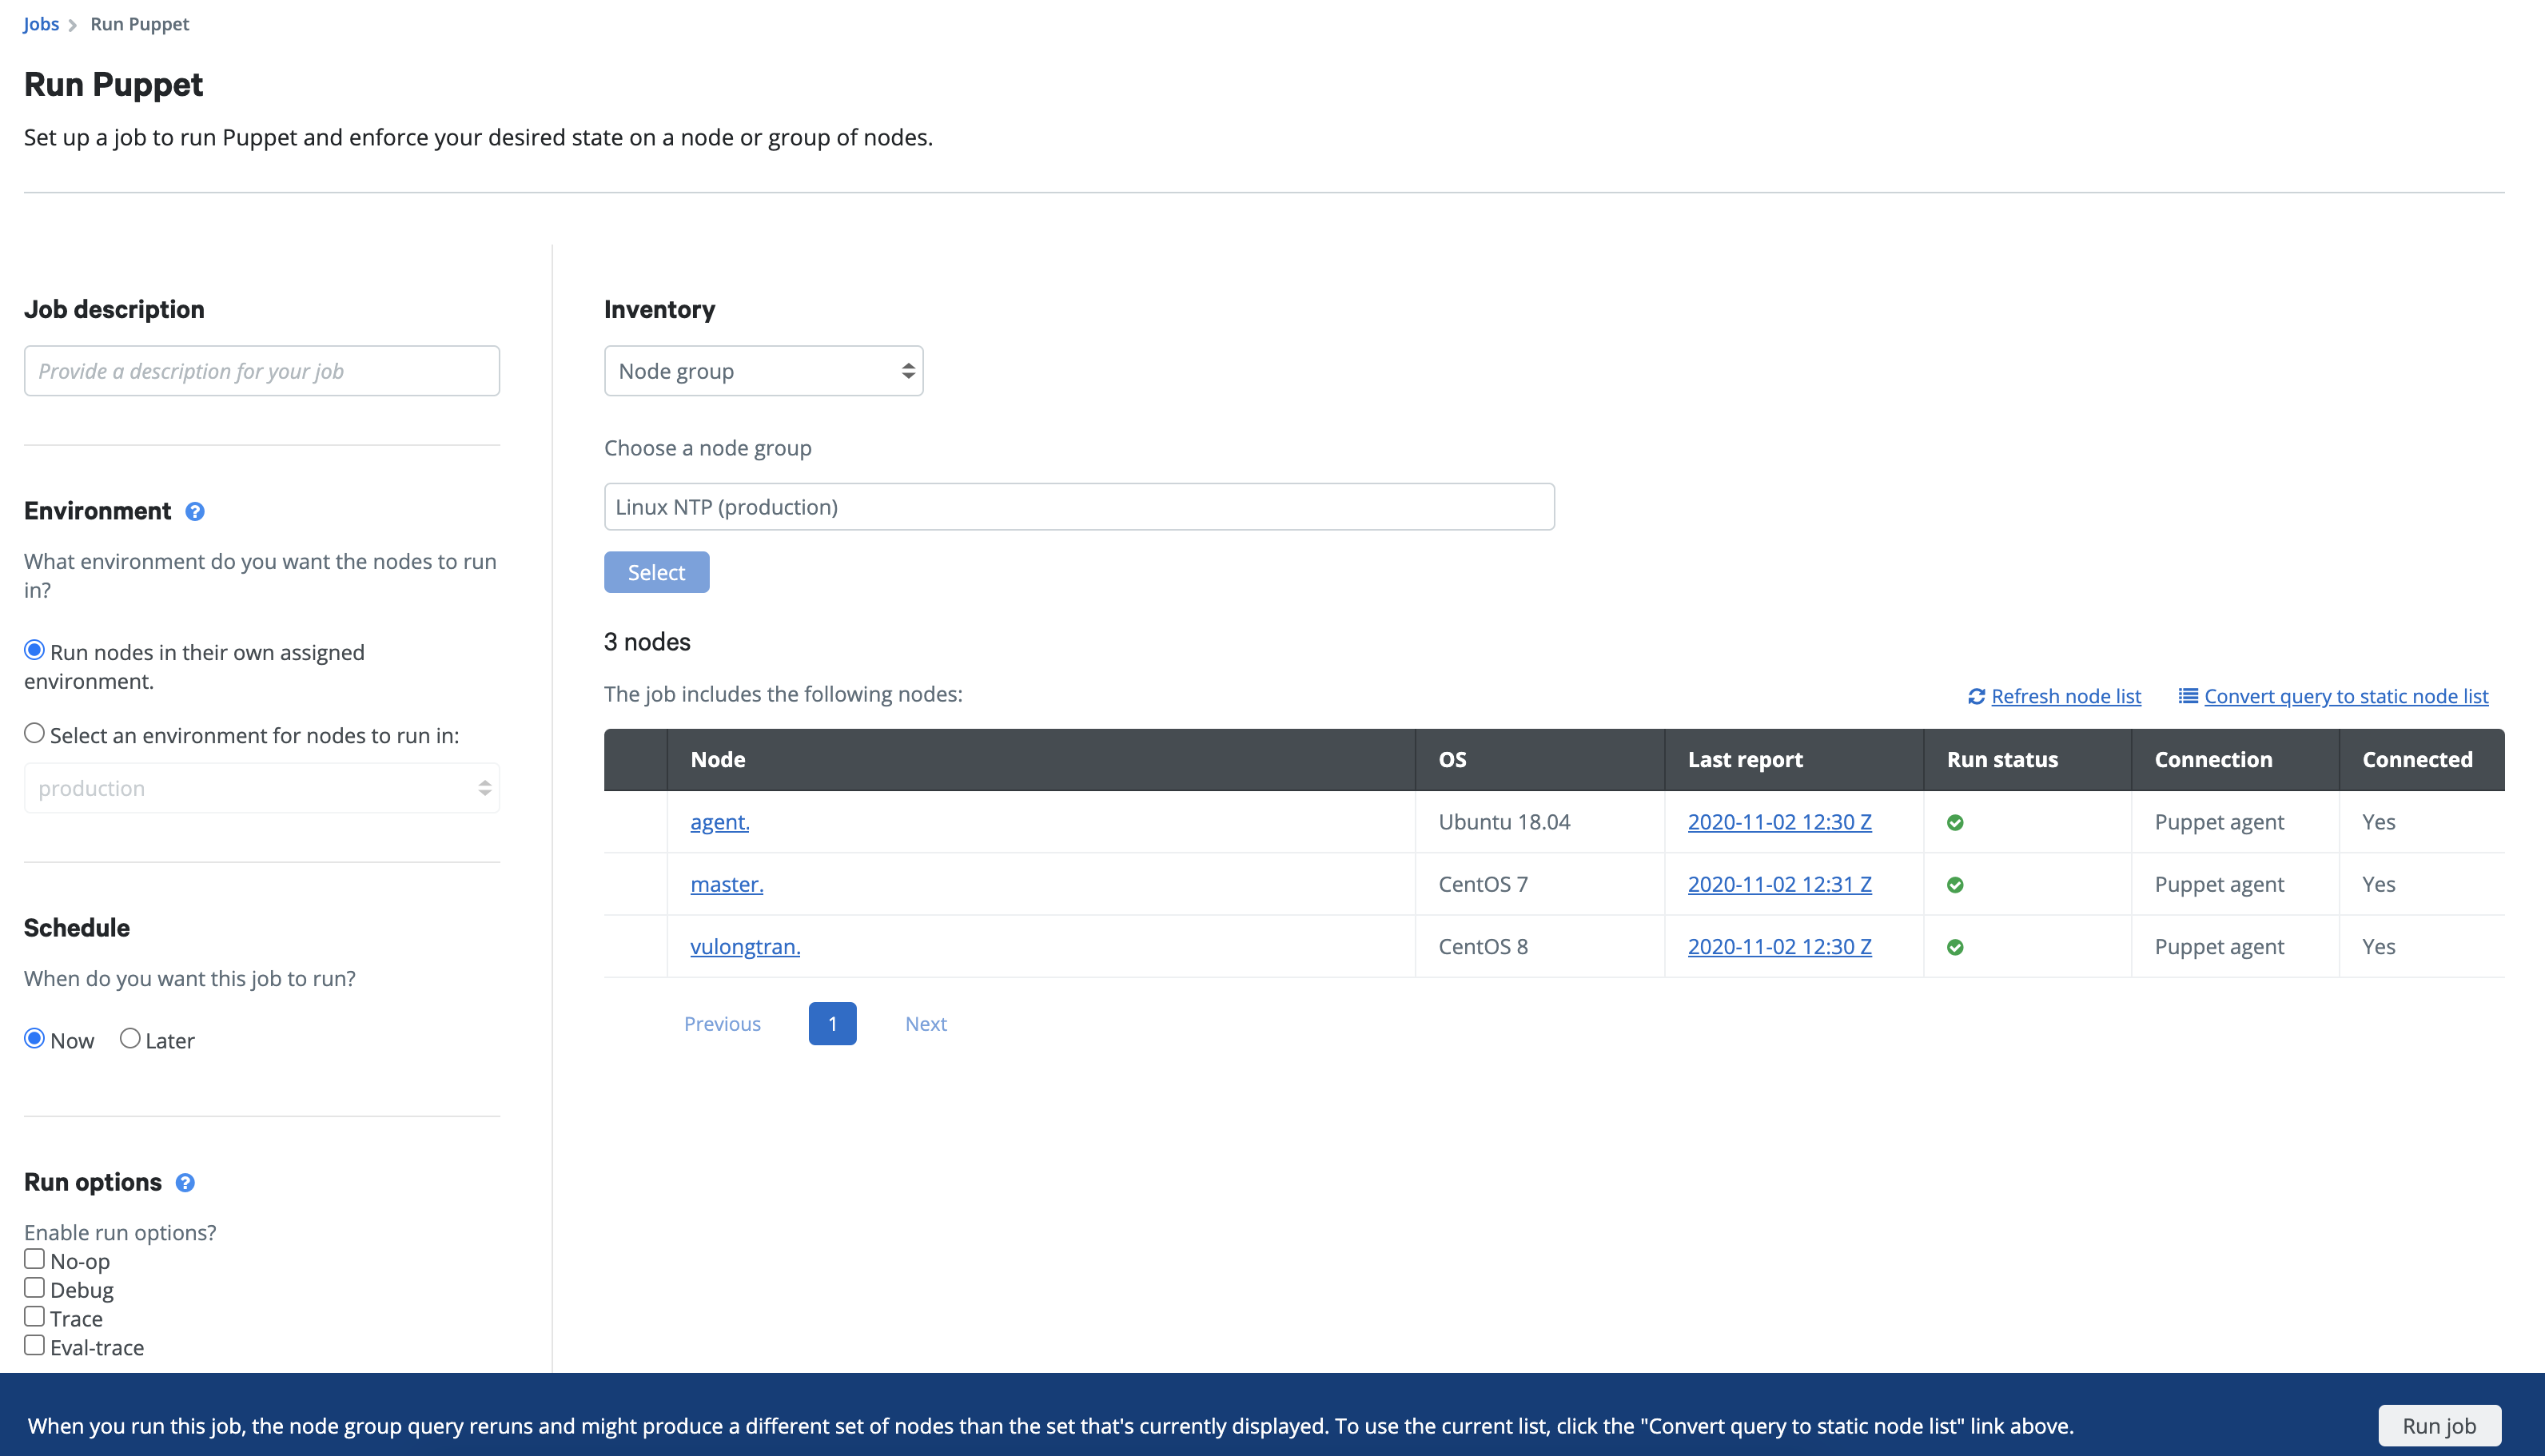
Click Run job button.

Then you will see the job details page (Jobs > Job details).

Step 4 - Confirm that the NTP changes are reflected in your Puppet Enterprise
In the Puppet Enterprise (PE) console sidebar, click Events.
Click Intentional Changes under Classes with events.
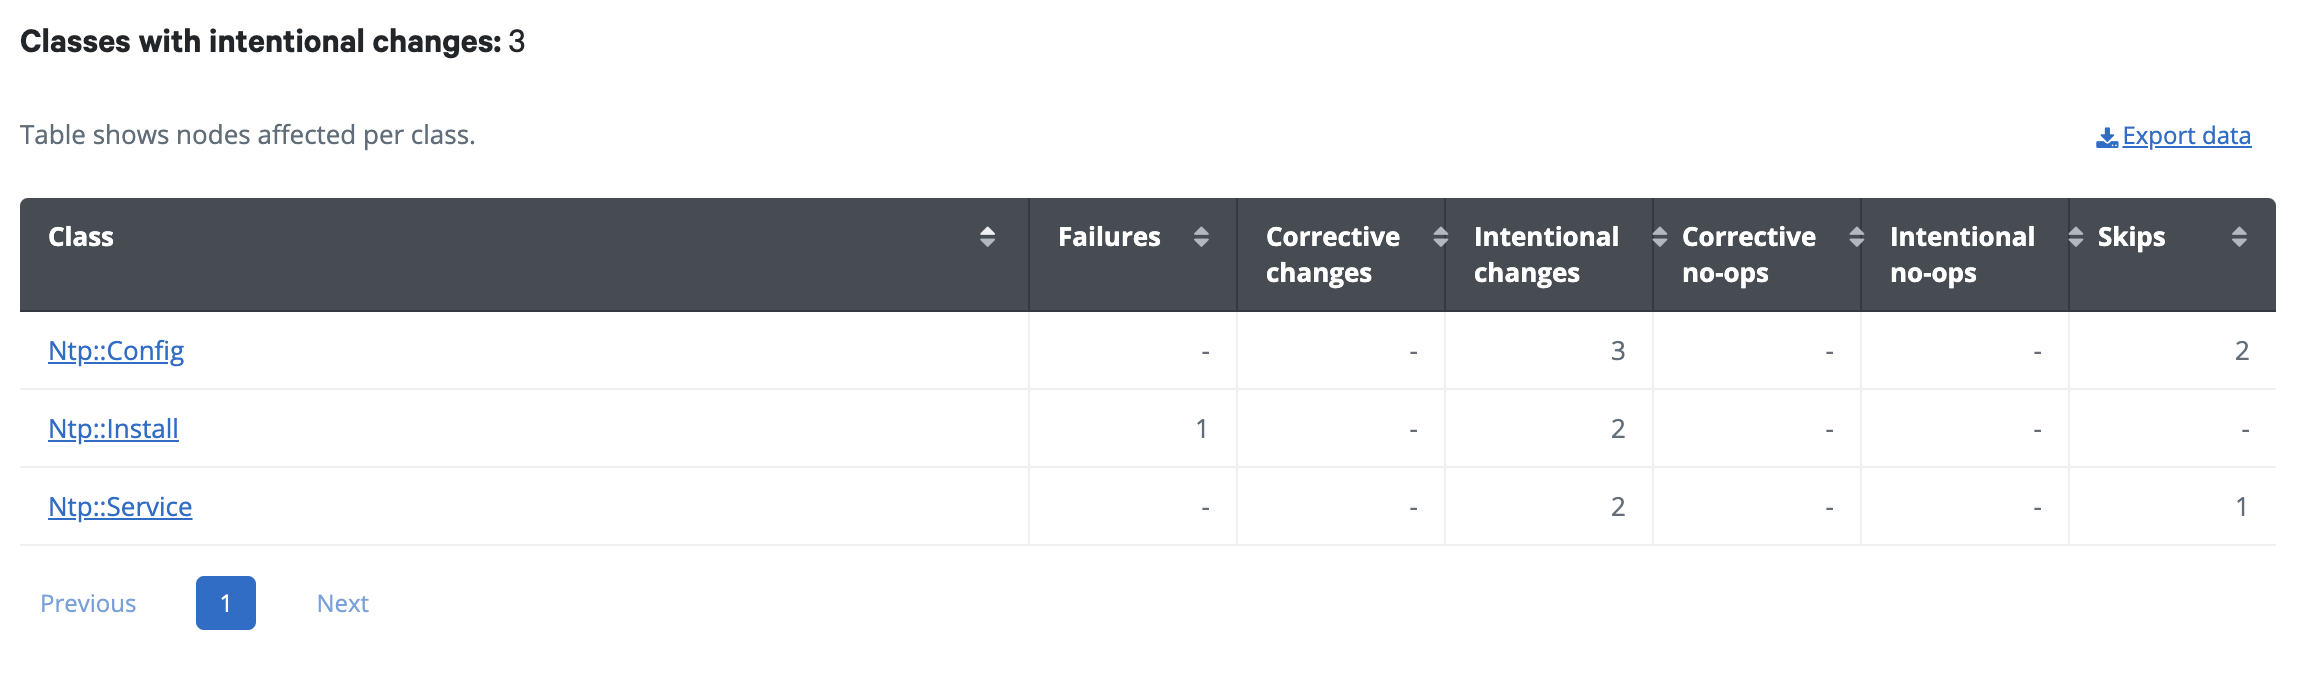
As needed, you can adjust the settings so you can focus on the new NTP changes we have made. This includes:
- the time period by using the Show list until the number of events is not zero
- In the Filter by class name field enter ntp and click Apply.
Explore the events by clicking one of the class names as you would like. To view more details, you can click on a class name, you can view the nodes where the class was applied.
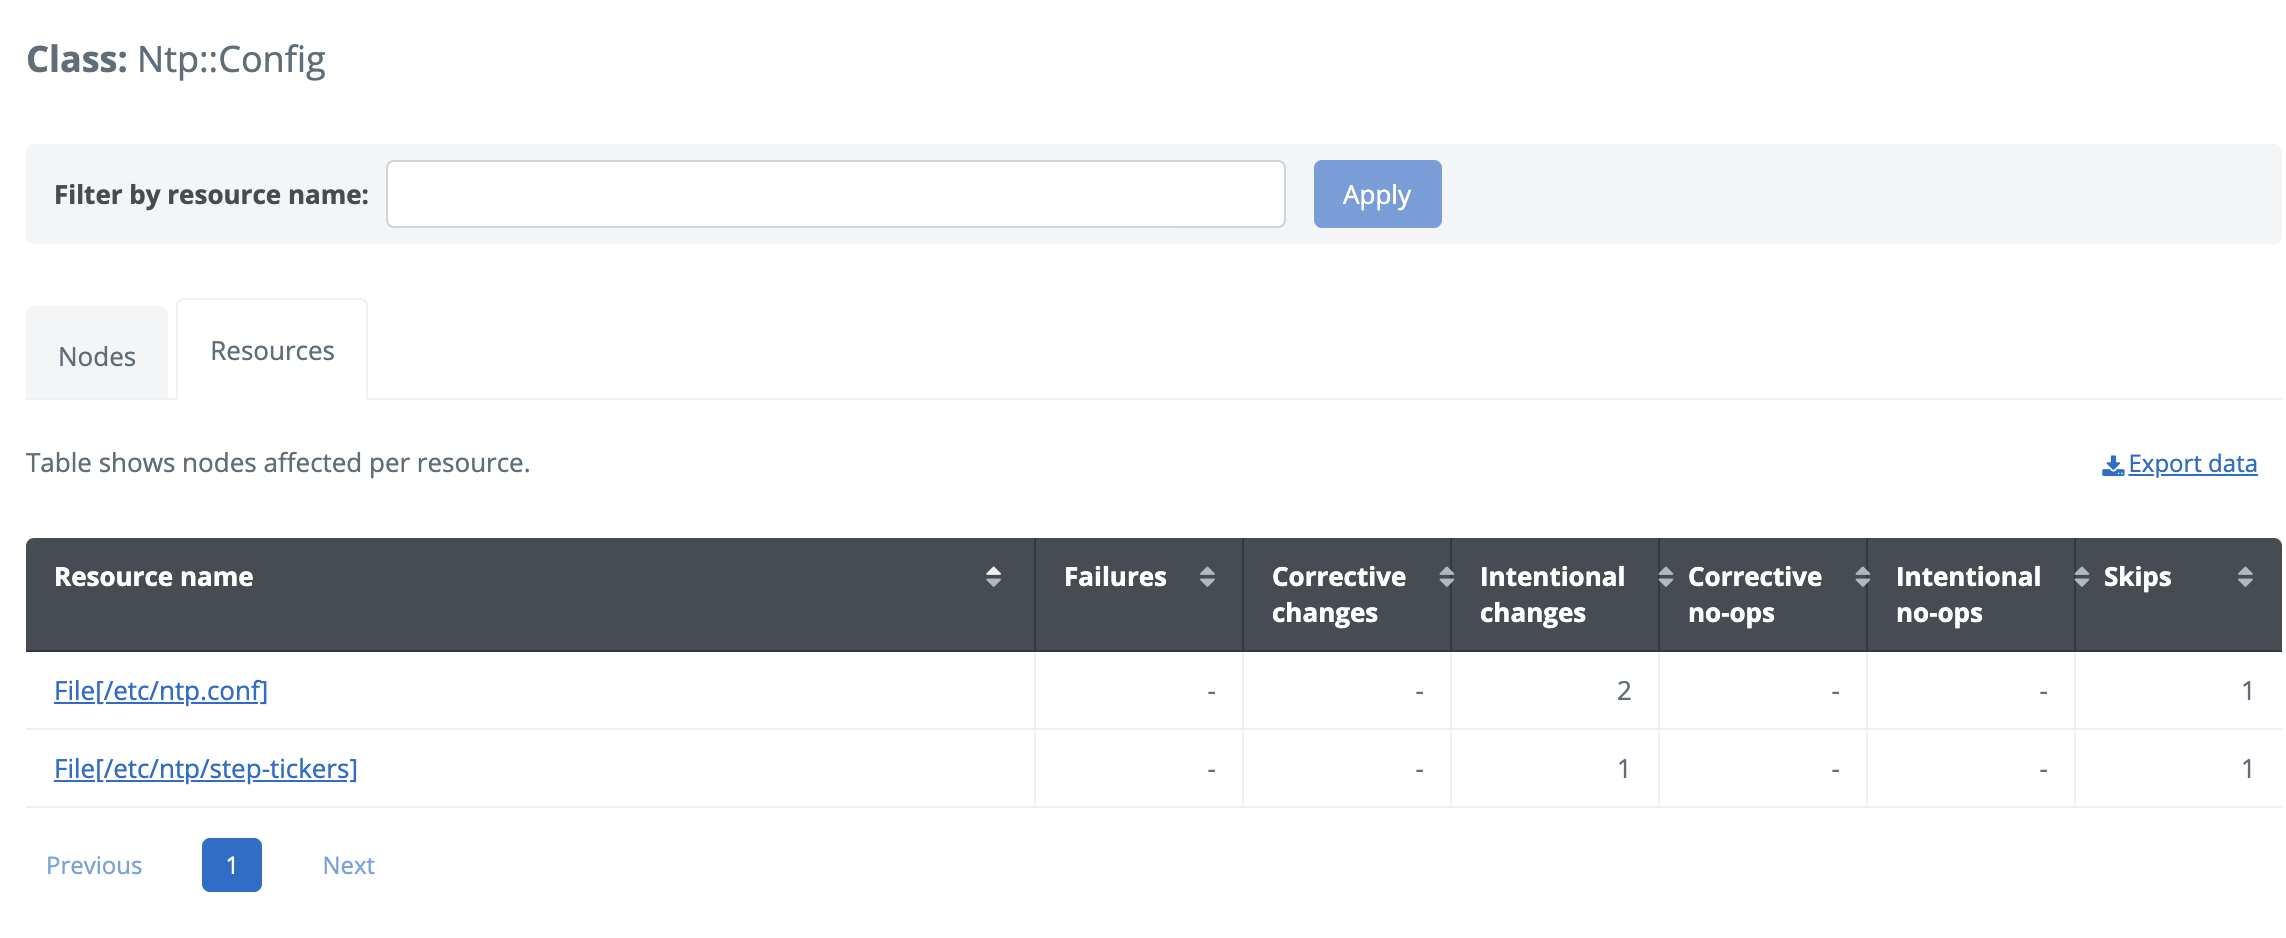
You can view specific resources applied to a node by clicking on a node name, on Linux for example:
When you click on the class: Ntp::Config
You will see: File[/etc/ntp.conf]
Step 5 - Let's set our preferred NTP servers by editing our class parameters
We can set our preferred NTP servers by editing class parameters of our class. As by default, the NTP module from Puppet Forge has been set to use public NTP servers, and your company may have it's own preferred internal pool of NTP servers that you need to set this to.
To set this, we can edit or add class parameters in the Puppet Enterprise console. Rather than editing the module code which is also an option.
Let's change our servers NTP class
In the Puppet Enterprise (PE) console, click Node Groups
Select the name of the node group you created in the previous step.
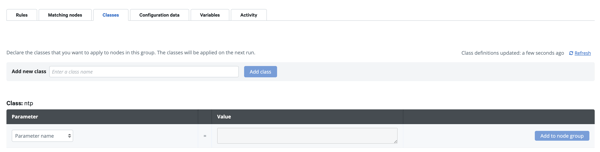
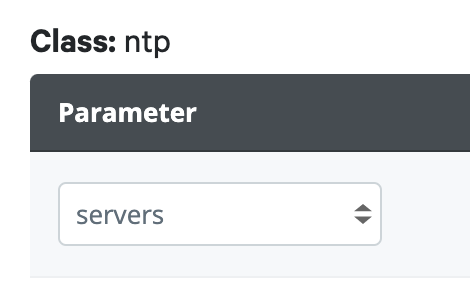
On the Class tab, locate the ntp class in the list of classes.
Under the Parameter column for the class, click on the dropdown menu and choose servers.
 Set the ntp servers value to your preferred server.
For example, we can enter ["time.google.com","time1.google.com"] in the Value box.
Make sure you put the full details in there with the square brackets, as the system will be looking for an array.
["time.google.com", "time1.google.com"]

Click Add parameter.
Click Commit 1 change button at the bottom of the page.
After the run completes, we can verify the time on the system and ensure that it is accurate.
Step 6 - Check to see that our NTP servers have been updated to our preferences
For further verification that the service is configured correctly, open the /etc/ntp.conf file to check the list of NTP servers. Alternatively, we can also run the following command.
$ cat etc/ntp.conf
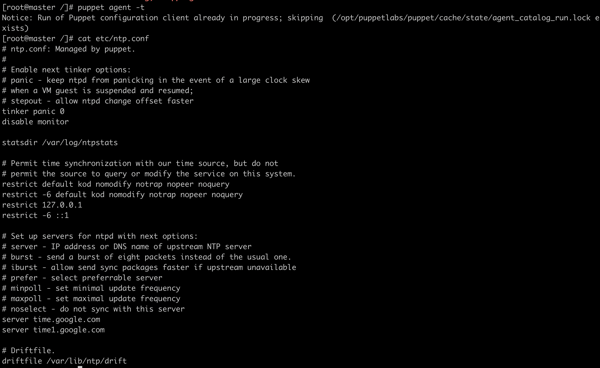
If you scroll down this page you will see the NTP servers we set listed.
If it did not work, you will see this in the following default NTP servers when running the command:
$ cat etc/ntp.conf
Optional. If we want to check that the ntp is alive and running at any time we can run the following command.
$ puppet resource service ntpd
Step 7 - You're set, well done!
You're set now, well done!
You have learned how to download a Puppet Forge module and configure it for your preferred set up. You also would have noticed that we made changes to the Puppet Master server only, yet the changes would update to the nodes in the node group that we created. That is, our Linux server nodes.
We essentially:
- Installed NTP module from the PuppetForge
- Created an NTP node group
- Added the NTP class from the module to your agent nodes
- Viewed changes to infrastructure on our events page
- Edited parameters of our main NTP class
So with the same NTP (network time protocol) servers set, we now can enjoy having our Linux servers synchronised with the same times. All managed from our Puppet Master server machine, so we do not need to manually log into each agent server node to make this change. Perfect!


