Here is a step by step guide on how to set up a VPN on your Asus GT-AX11000 router.
- Step 1 - Log into your Asus router's Admin Console
- Step 2 - Head to VPN section
- Step 3 - Configure the VPN Fusion (VPN Client) settings
- Step 4 - Test that VPN is on
- Step 5 - Test that VPN is working
- Step 6 - Enjoy your new VPN!
- (Optional) - Add more VPN locations to your Asus router
I am currently using an Asus GT-AX11000 router for my home wifi router. So I will walk you through the steps that I used to set up my Asus GT-AX11000 route, as I was struggling to work it out when following the guides online. So I hope this will help you if you are looking to do the same.
One important note is that the Asus "VPN Client" is actually been renamed to Asus "VPN Fusion" in some of the newer GT series of the Asus routers.
That is, you will find that the following steps that I will share will work with only the following router models:
- Asus GT-AX11000 router
- Asus GT-AC5300 router
- Asus GT-AC2900 router
- Asus TUF-AX3000 router
Prerequisites
- Access to your Asus router and can log in as an administrator into the Admin Console area.
- VPN service that you plan on using. I am personally using Surfshark VPN as that happens to be the VPN I have purchased at the time of writing. So you can replace that VPN with the one you are using as you follow this guide.
How to set up a VPN on your ASUS GT-AX11000 Router
Here is a step by step guide on how to set up a VPN on your Asus GT-AX11000 router.
- Step 1 - Log into your Asus router's Admin Console
- Step 2 - Head to VPN section
- Step 3 - Configure the VPN Fusion (VPN Client) settings
- Step 4 - Test that VPN is on
- Step 5 - Test that VPN is working
- Step 6 - Enjoy your new VPN!
- (Optional) - Add more VPN locations to your Asus router
Step 1 - Log into your Asus router's Admin Console
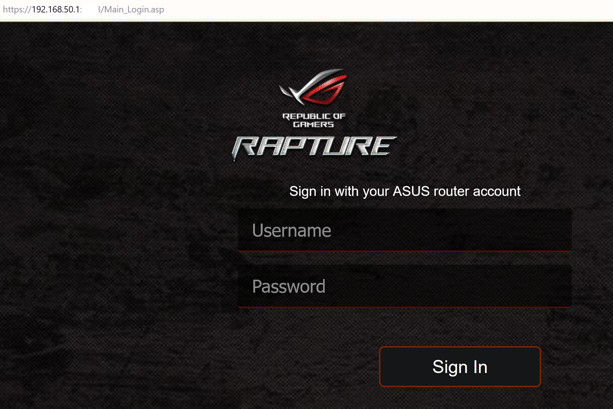
Open your Admin Console (administrator configuration panel) for your Asus router. You can do that by entering your Default Gateway address into your browser's URL address bar. In most cases, by default, it is 192.168.1.1 or 192.168.50.1 or similar.
https://192.168.50.1:8000/Main_Login.asp
If you need help finding the IP address for your router, you can follow these sub steps:
For Windows 10 users:
- Open the “Start” menu, type in and select “Command Prompt.”
- A console window will appear; type “ipconfig” in it and press “Enter.”
- You should see your router’s IP address on the “Default Gateway” line.

For macOS users:
- Open “System Preferences” from the Apple menu.
- Then, click on “Network.”
- Here, select “Wi-Fi” -> “Advanced…” -> “TCP/IP.”
- You will find your router’s IP address displayed next to “Router.”
Step 2 - Head to VPN section
Click on "VPN" to go to the VPN section.
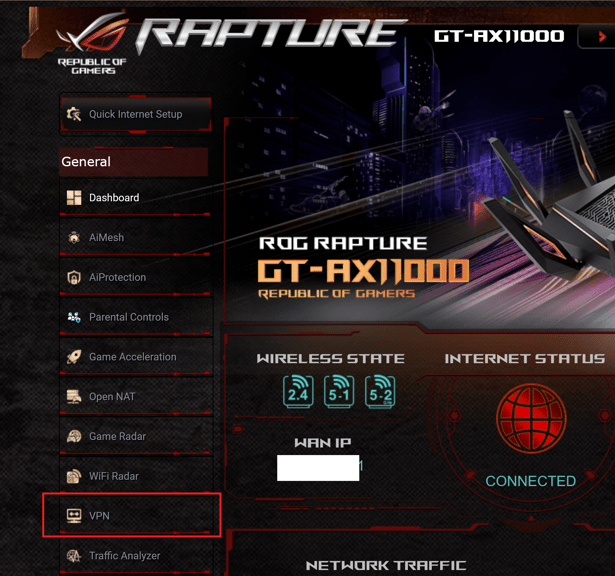
You should see this page once you are in the "VPN" section.
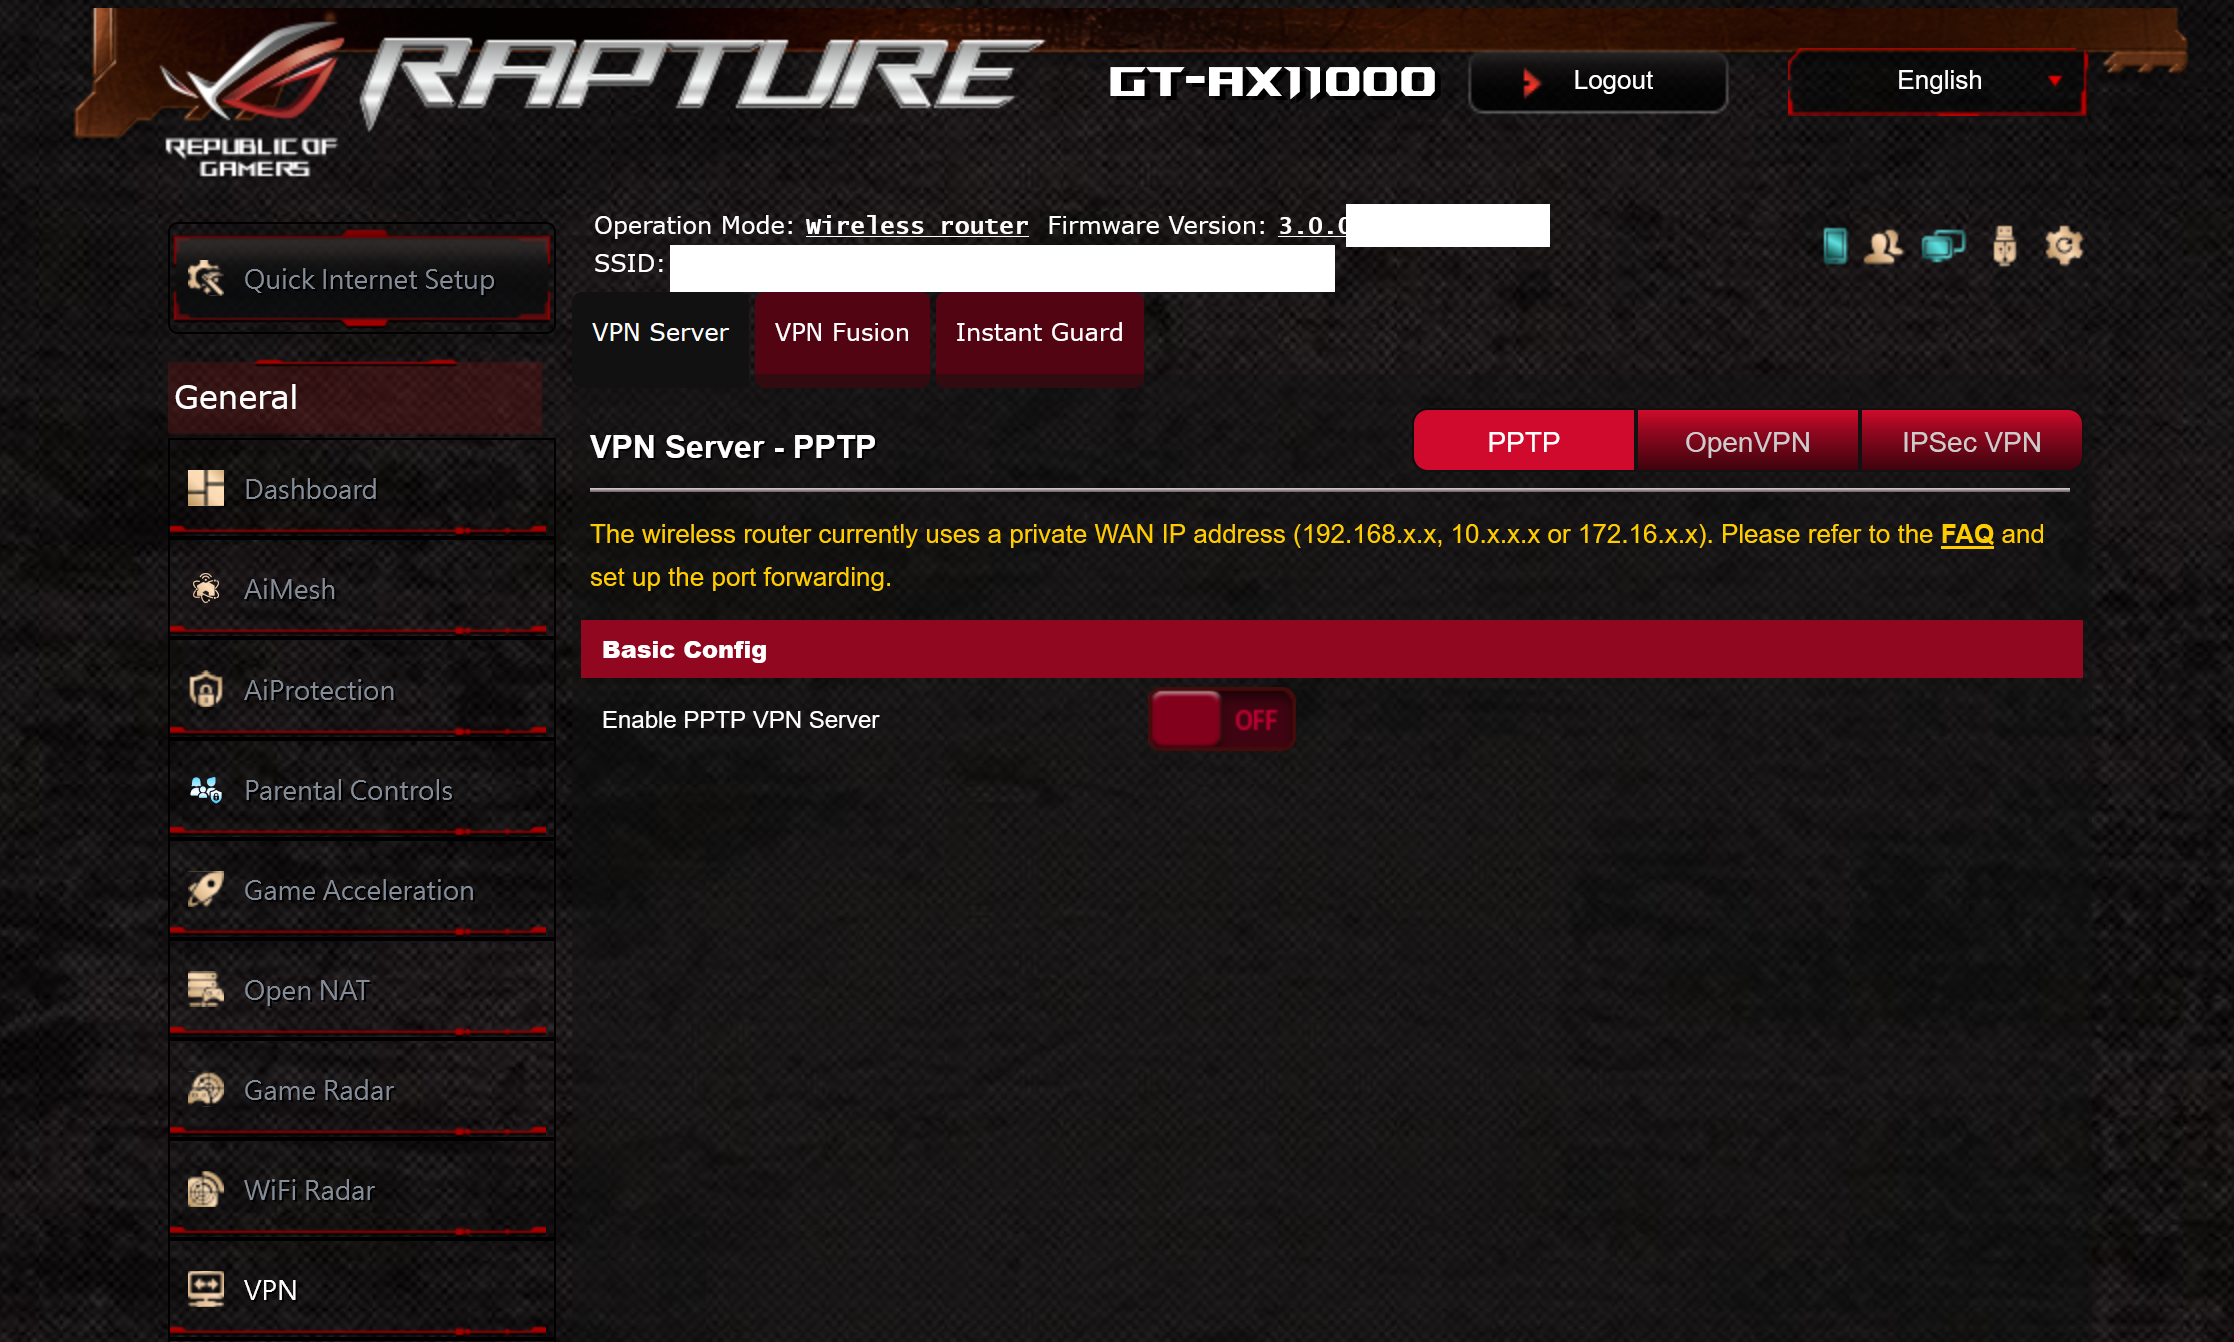
Click on the "VPN Fusion" tab (or "VPN client" in other Asus router models).

Step 3 - Configure the VPN Fusion (VPN Client) settings
You will be presented with some VPN - VPN Fusion configuration details. So this is where we will add in our VPN details here. 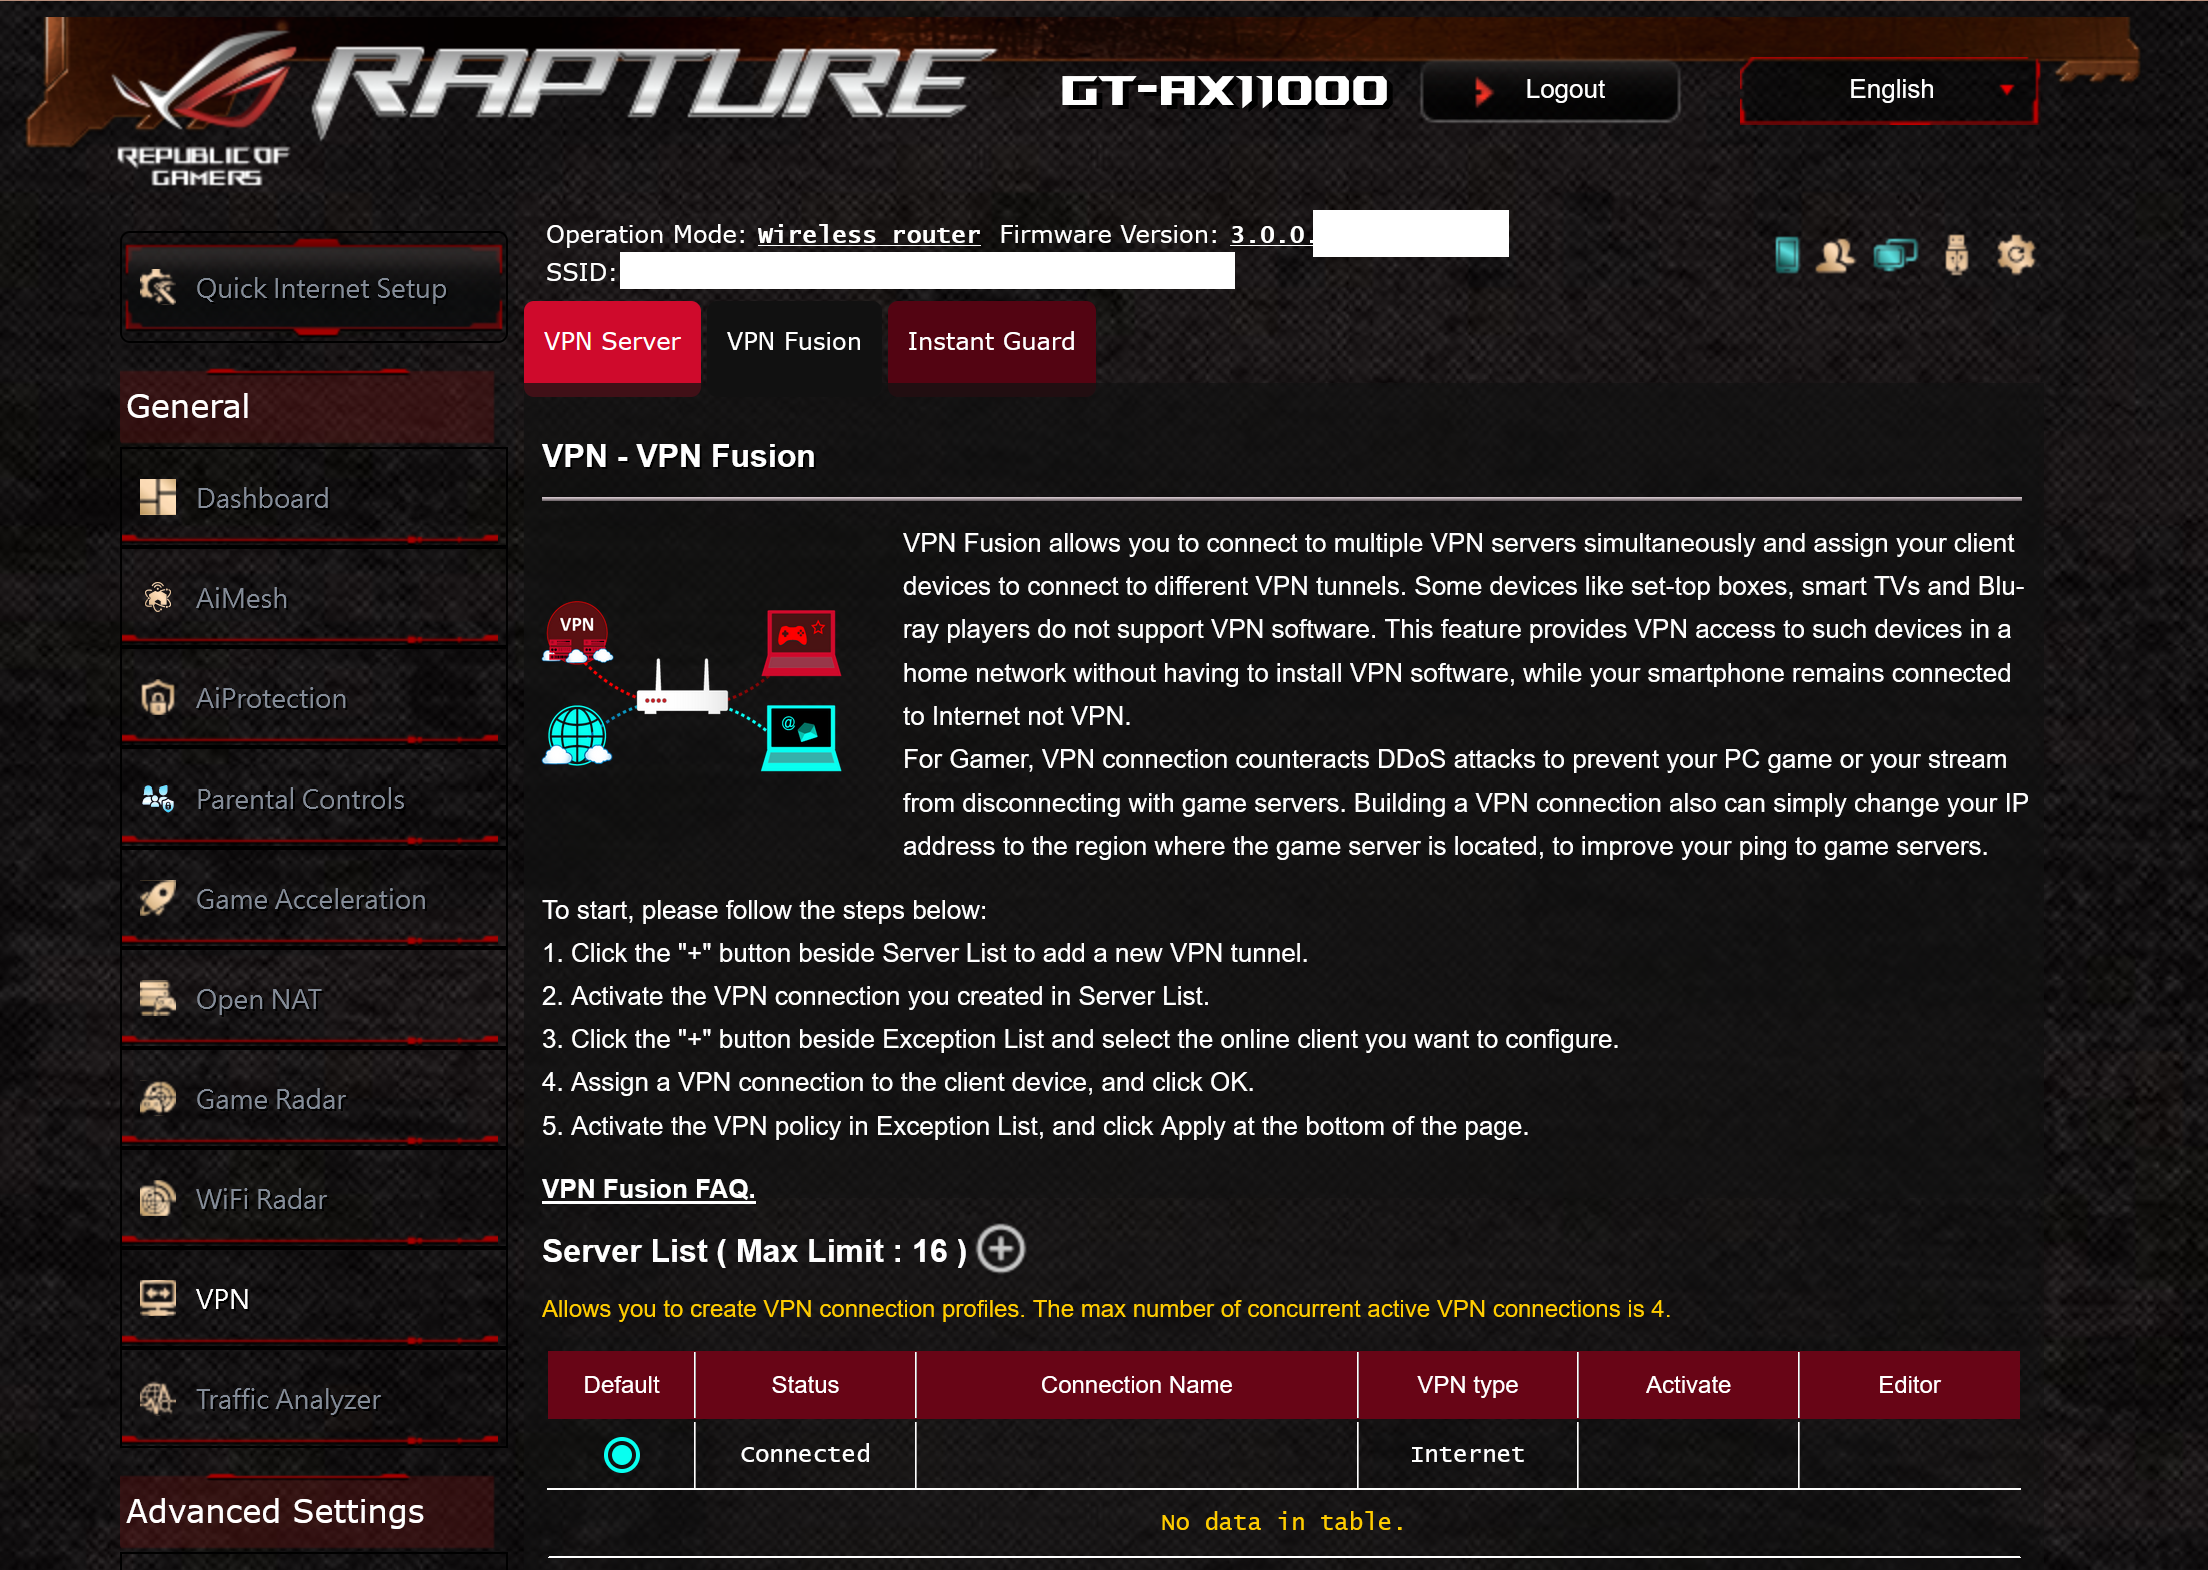
Click the "+" button beside Server List to add a new VPN tunnel.

It will present you with a pop up with PPTP/ L2TP/ OpenVPN settings. We will use the "OpenVPN" tab.
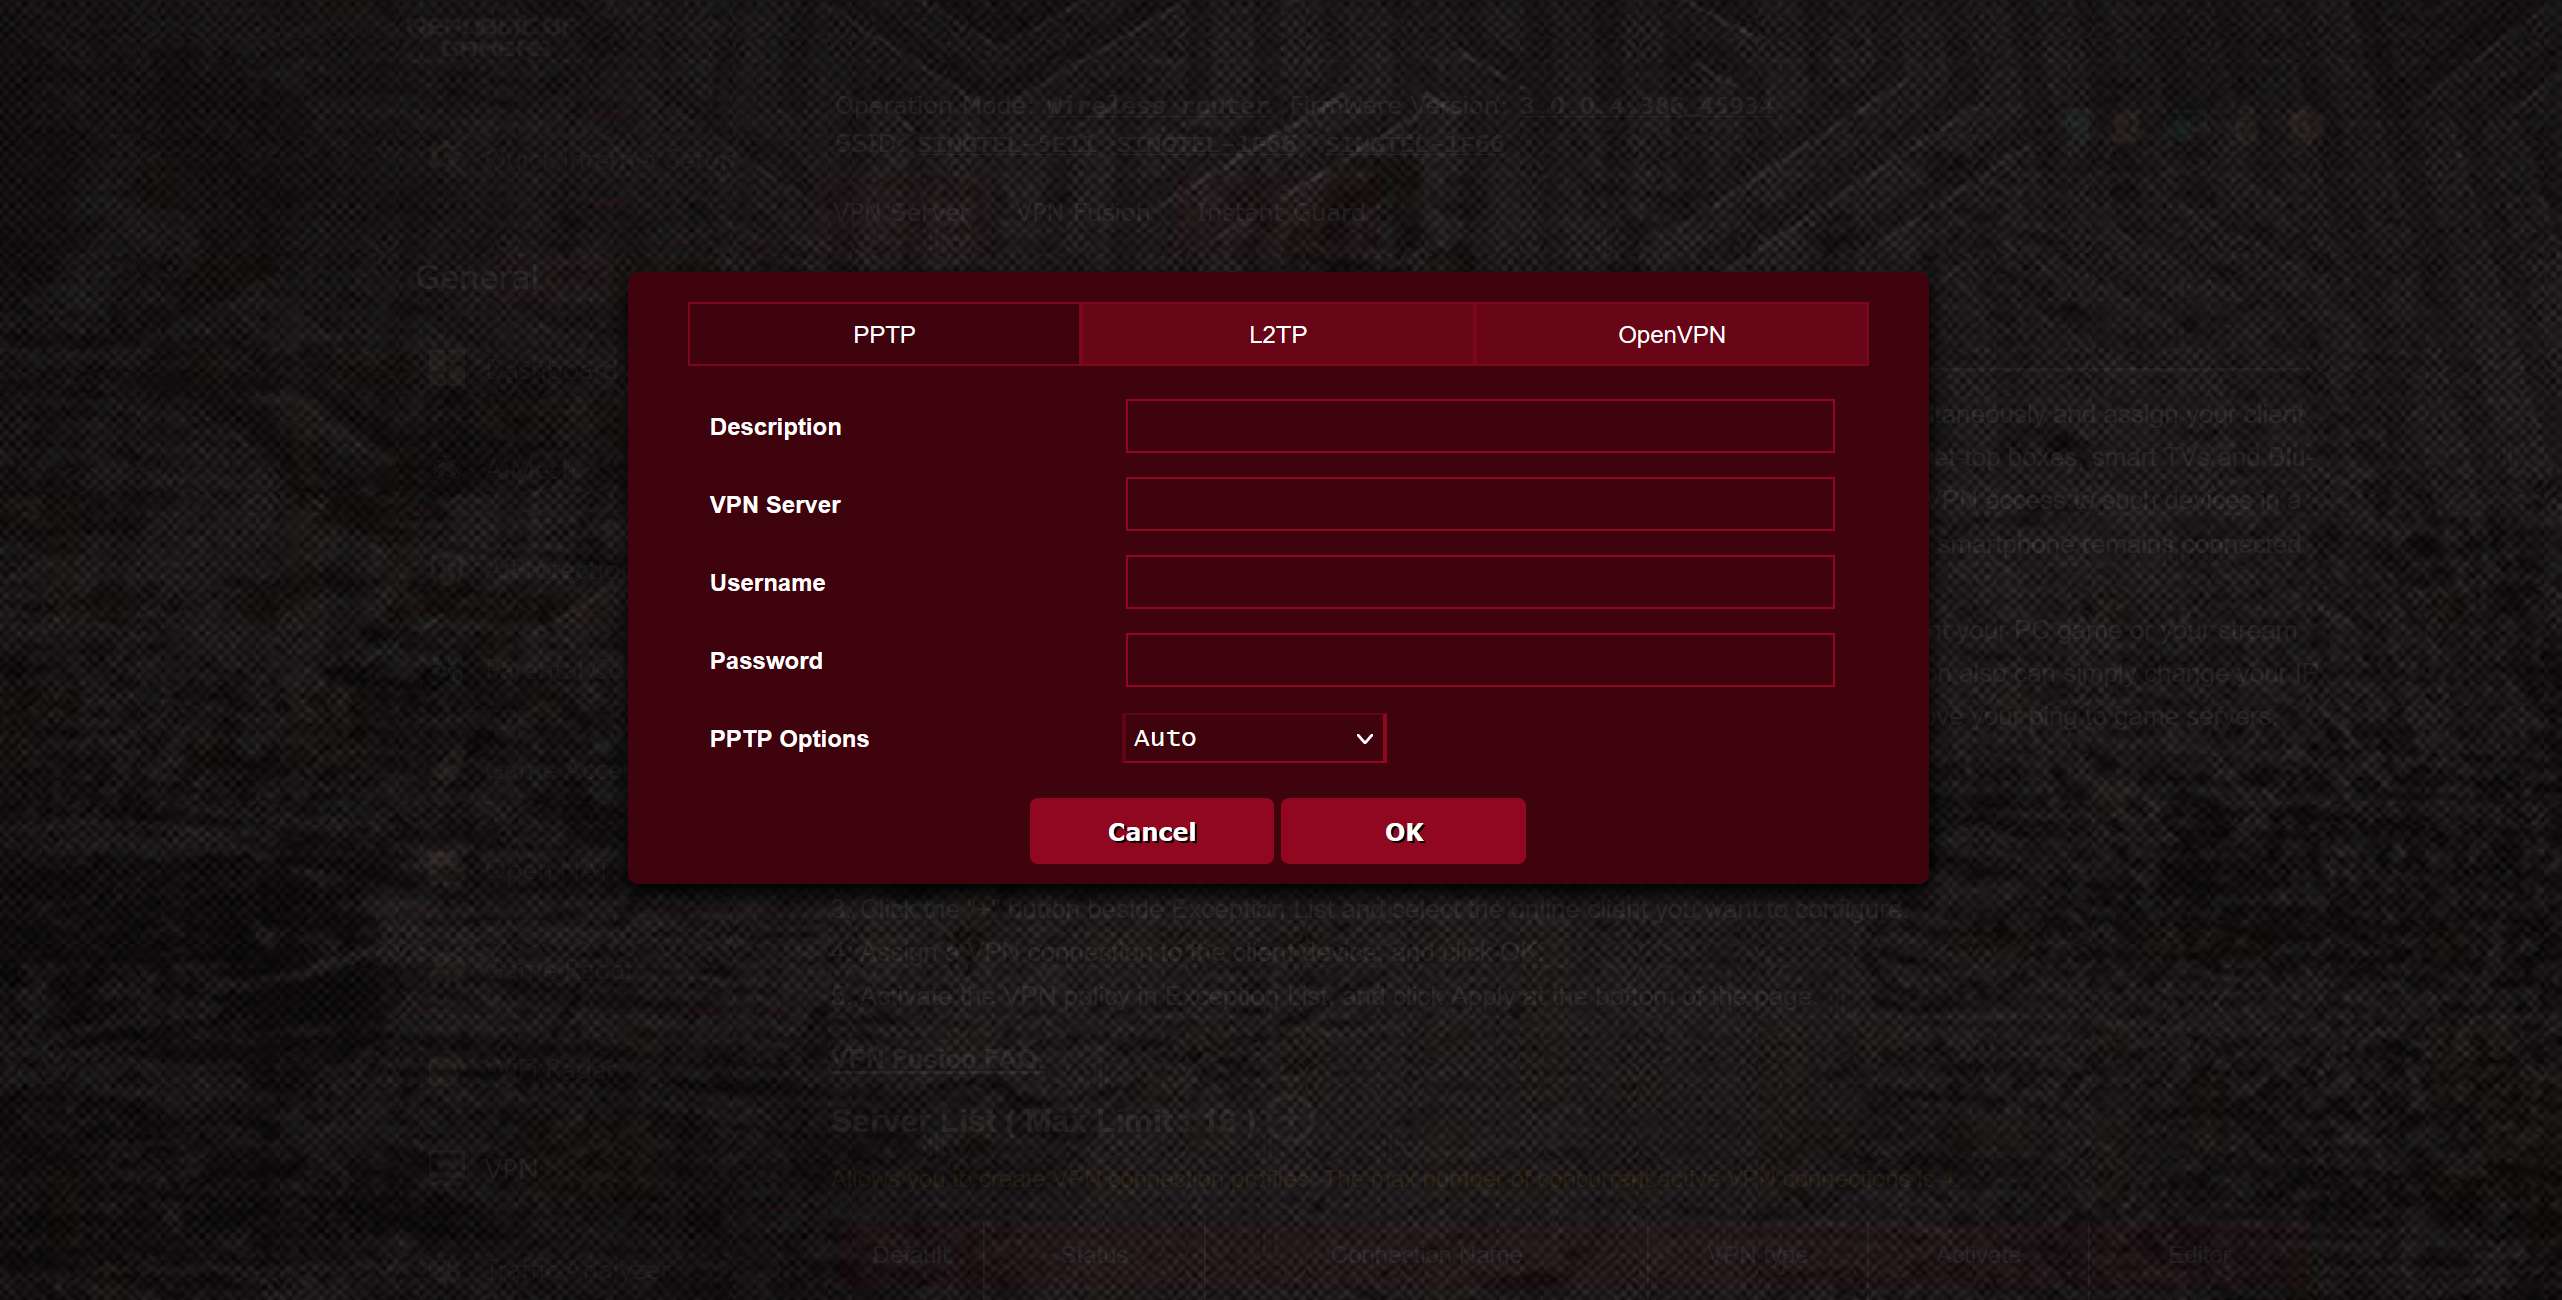
Click on the "OpenVPN" tab.

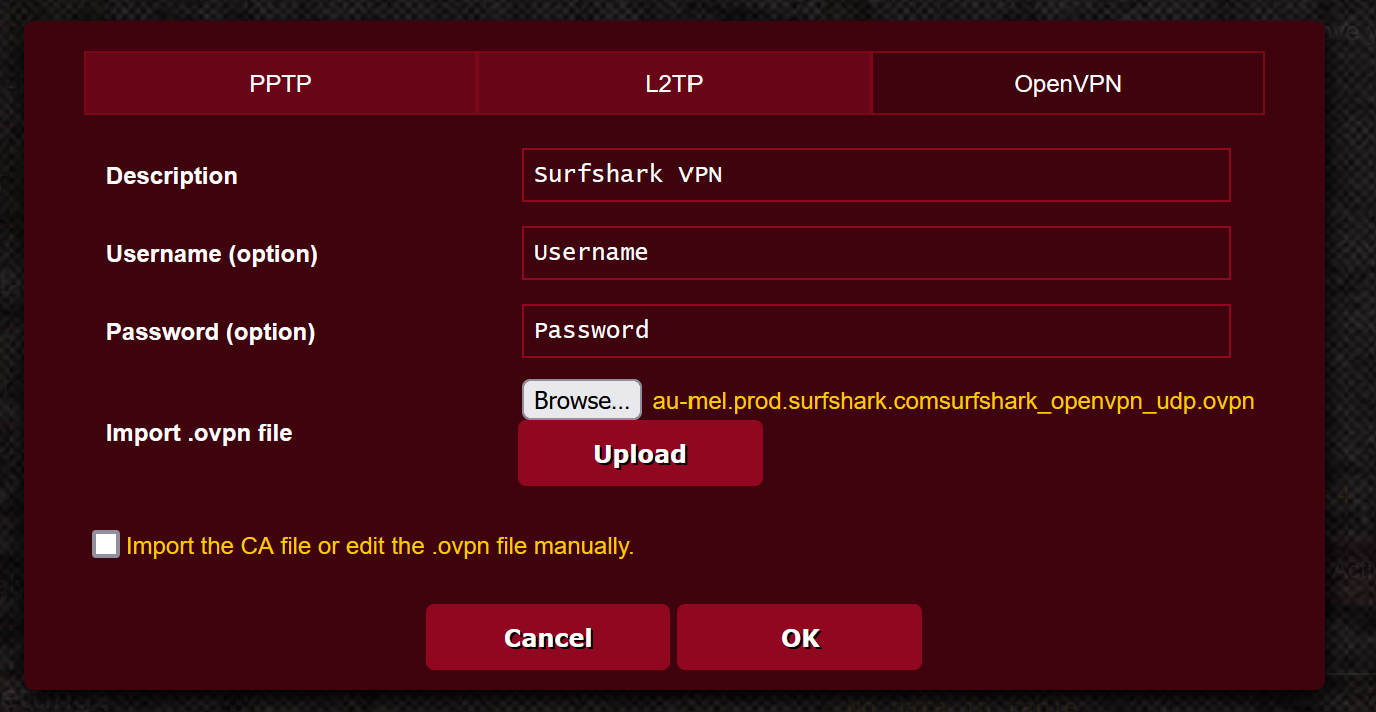
It will ask you to fill in the following details.
We will need to fill in the following:
- Description: you can name this VPN connection whatever you like
- Username: VPN username service credentials
- Password: VPN username service password
- Import .ovpn file which is the configuration file of the VPN server that you will want to connect to by default.
For your VPN provider, you will need to get these details from your VPN provider's website accordingly.
For my example, I purchased Surfshark VPN so I will show you how I will get my username/ password and other details to get this to work for there. I am not affiliated with them in any way. It will be something similar if you are using NordVPN, PureVPN, etc.
For Surfshark VPN (as an example):
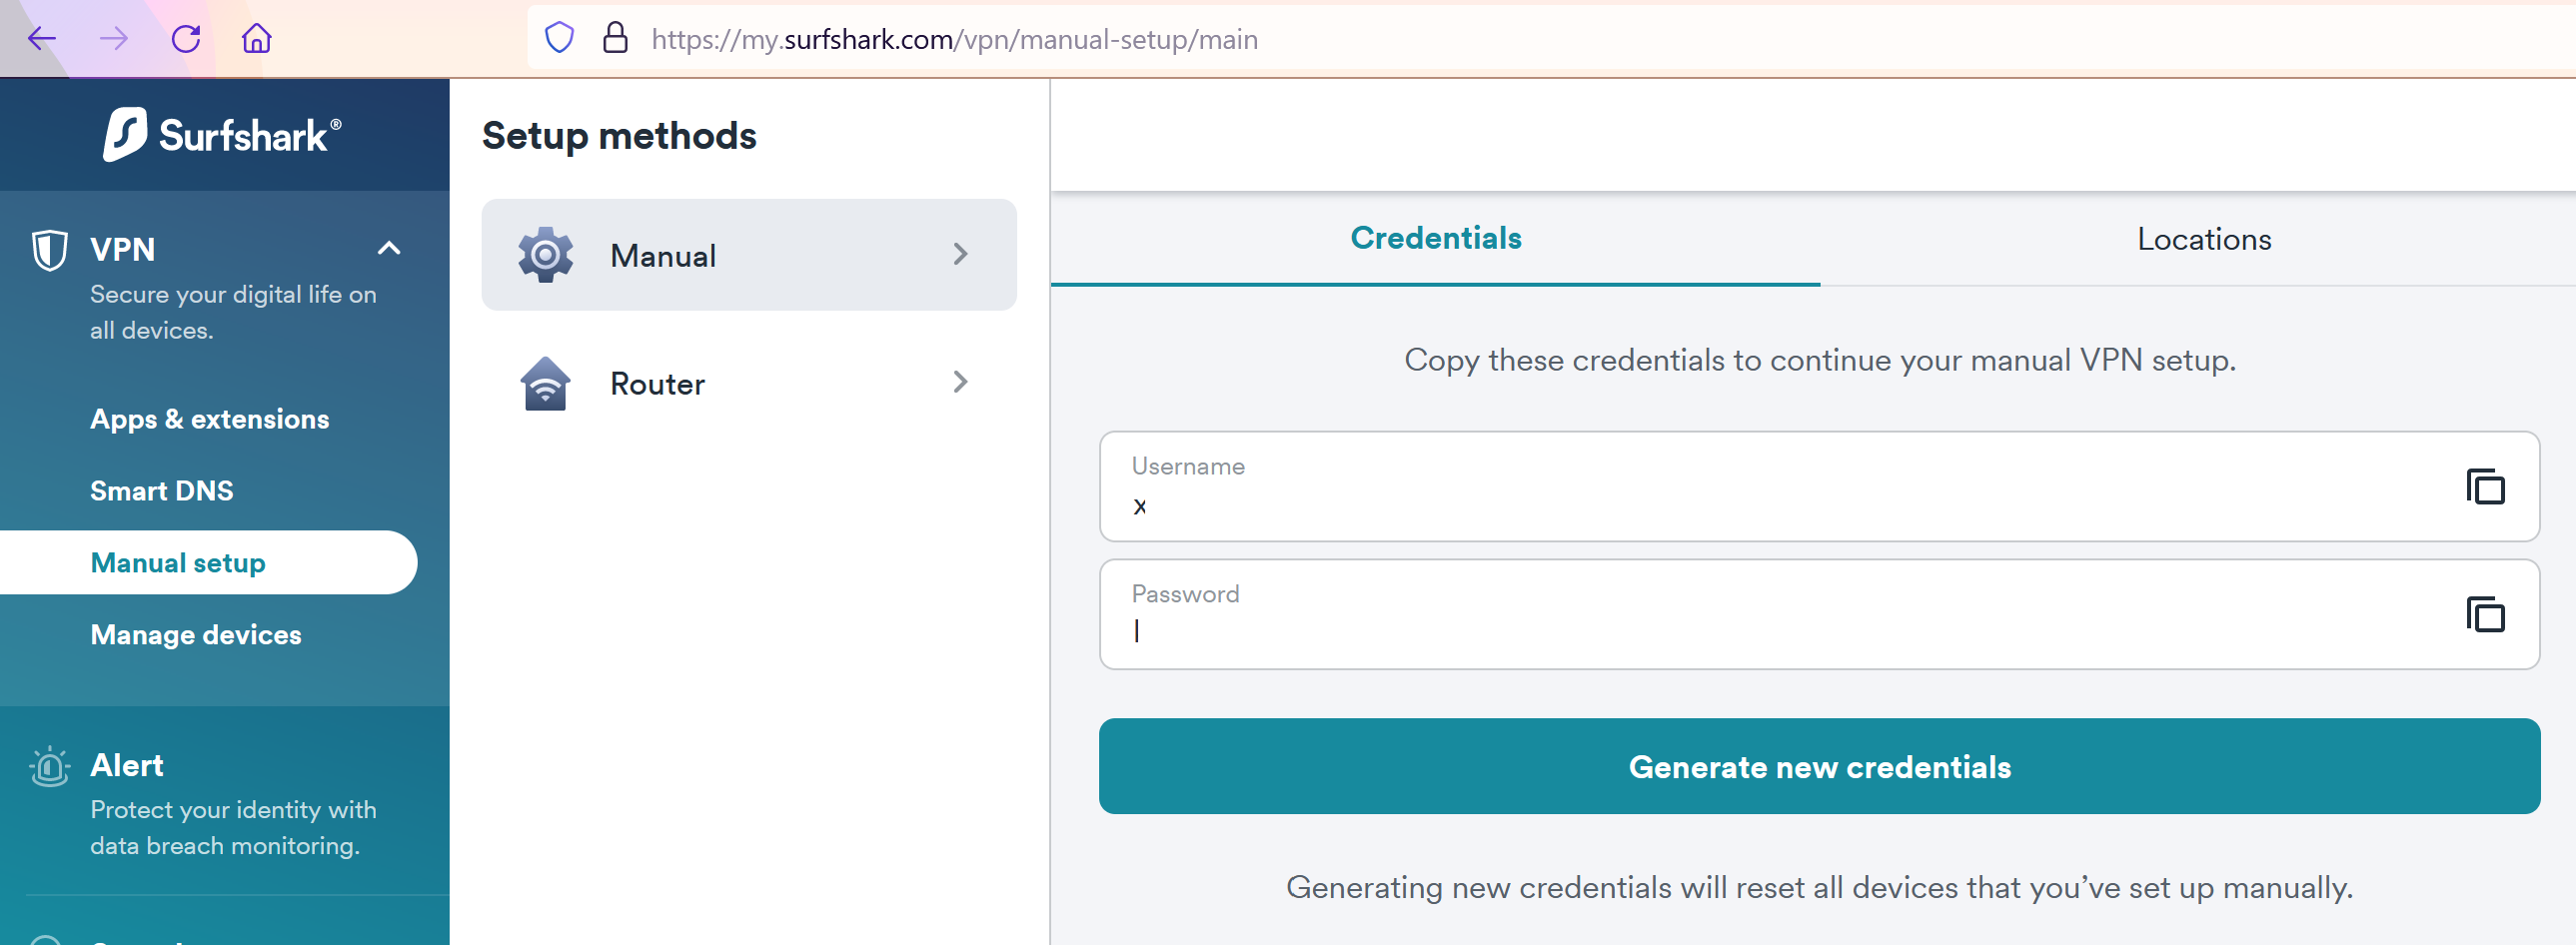
To get your username and password
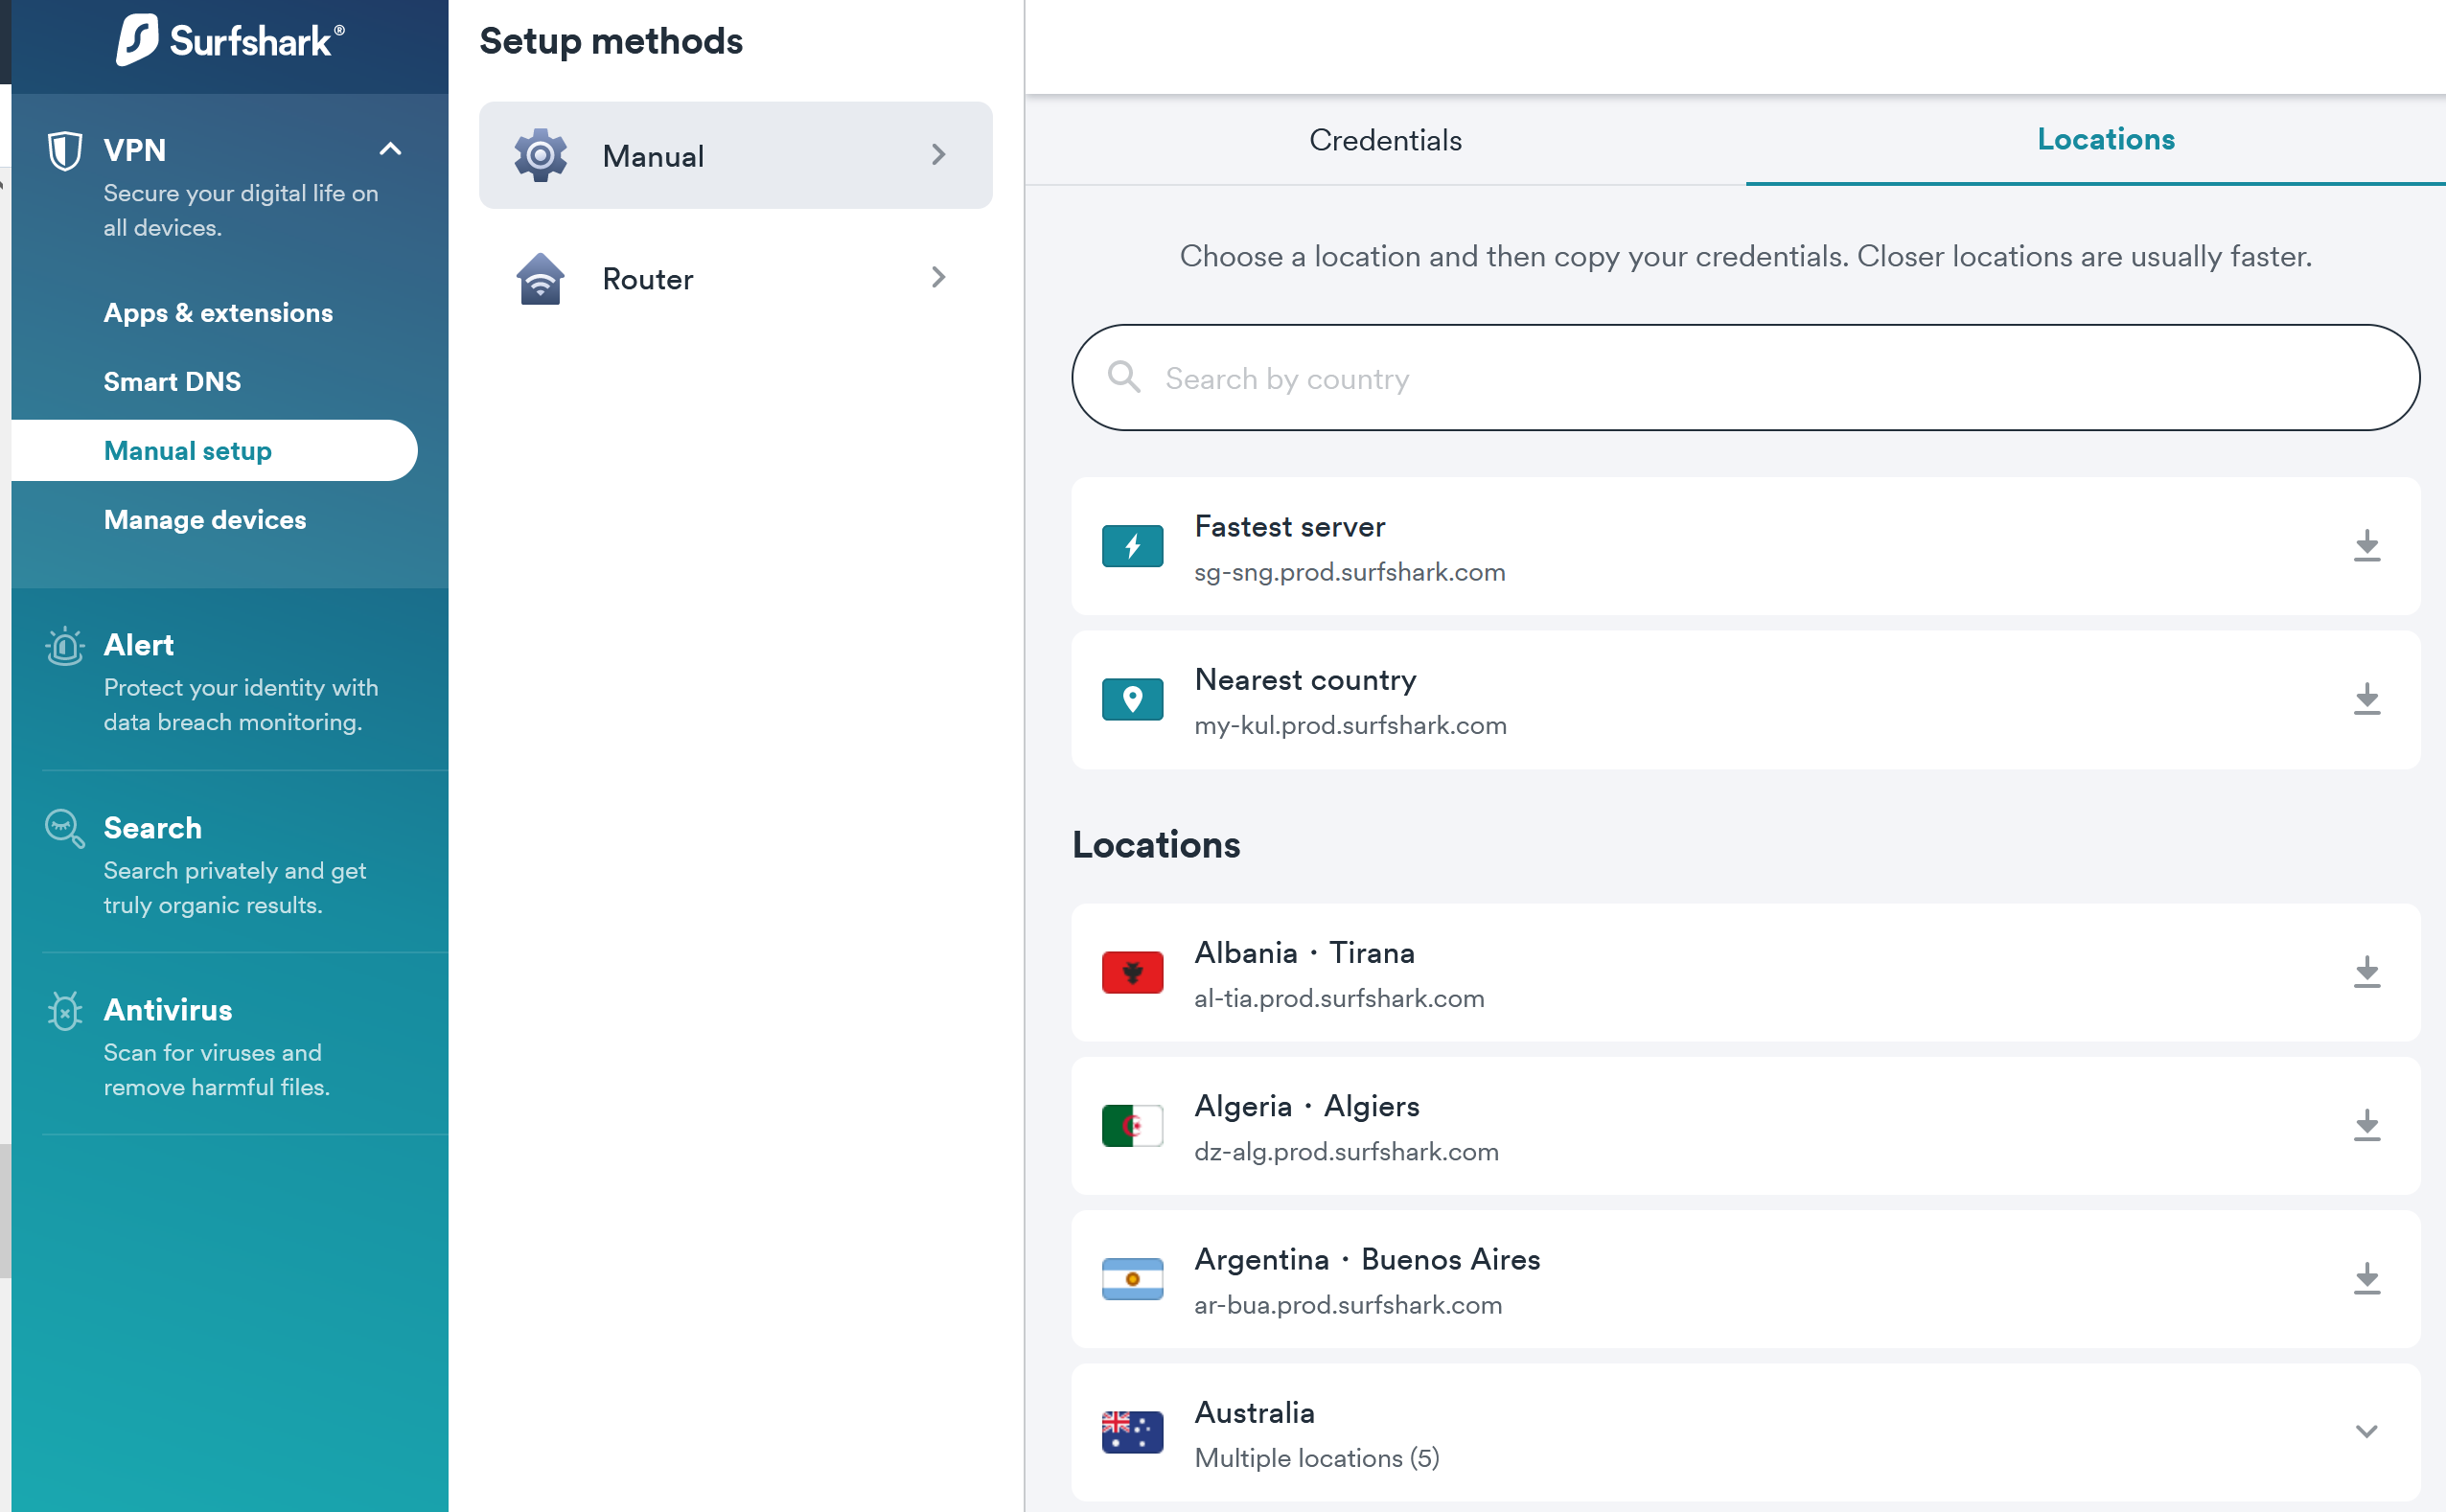
- Log into Surfshark VPN Admin Console https://my.surfshark.com/vpn/manual-setup/main
- Click on VPN> Manual Setup> Manual> Credentials
- You will see your Username and Password here.
To get your configuration file of the VPN server (.ovpn file)
- Log into Surfshark VPN Admin Console https://my.surfshark.com/vpn/manual-setup/main
- Click on VPN> Manual Setup> Manual> Locations
Choose a location to select. I will use Australia as my example location however you can choose any location you wish.
Once you click on the download icon next to your location. You will be presented with the option to "Download files".
Click "Download UDP".
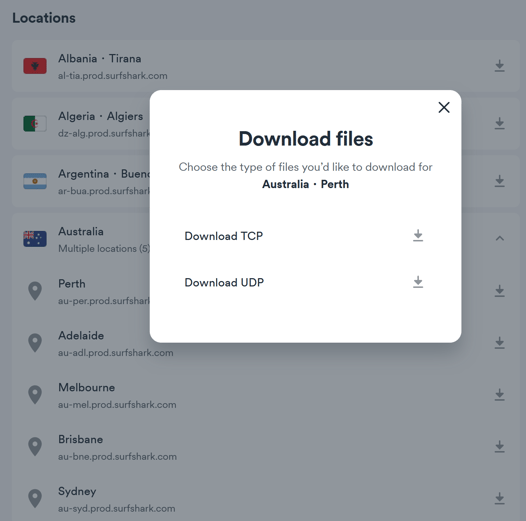
As later we will import this .ovpn file which is the configuration file of the VPN server that you will want to connect to by default.
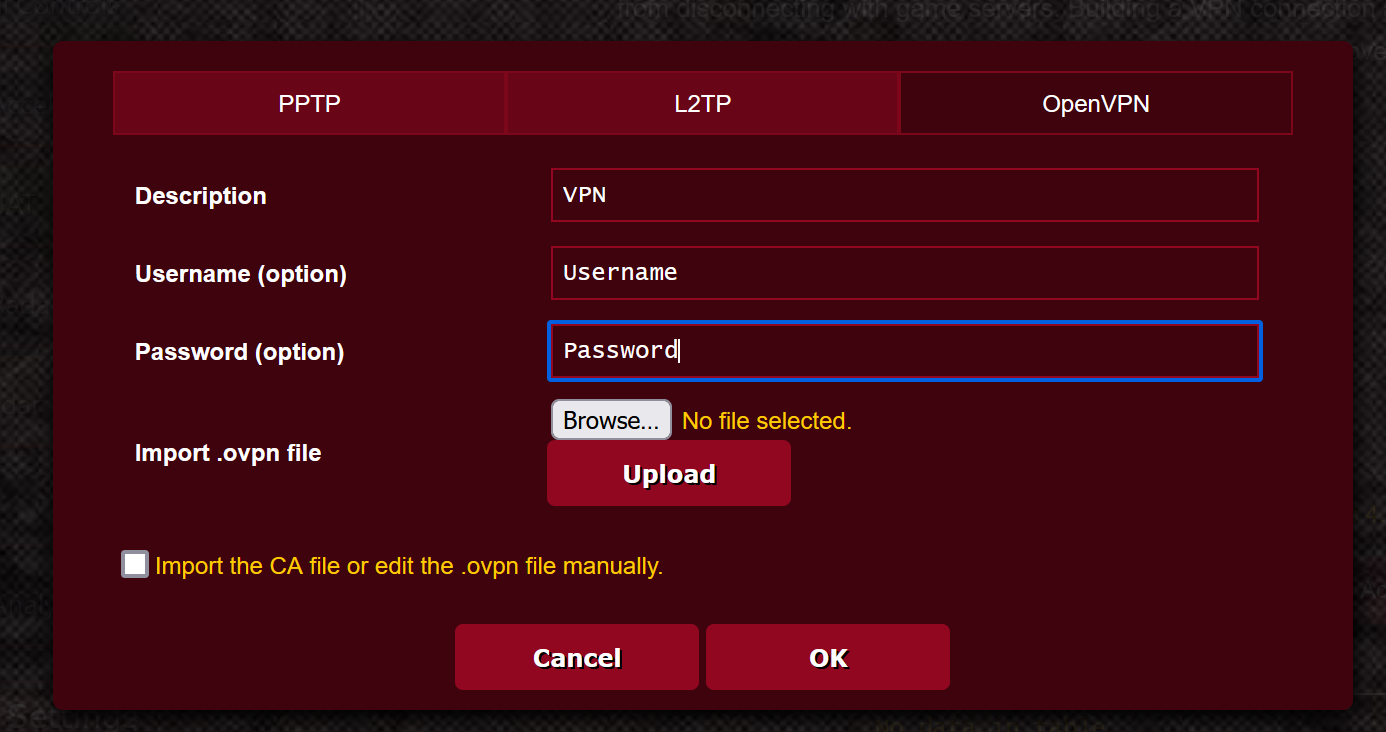
Let's add these details to your OpenVPN settings.
- Description: I called mine my VPN provider's name, Surfshark VPN, but you can call it whatever you prefer.
- Username: VPN username service credentials
- Password: VPN username service password
- Import the configuration file (.ovpn file)
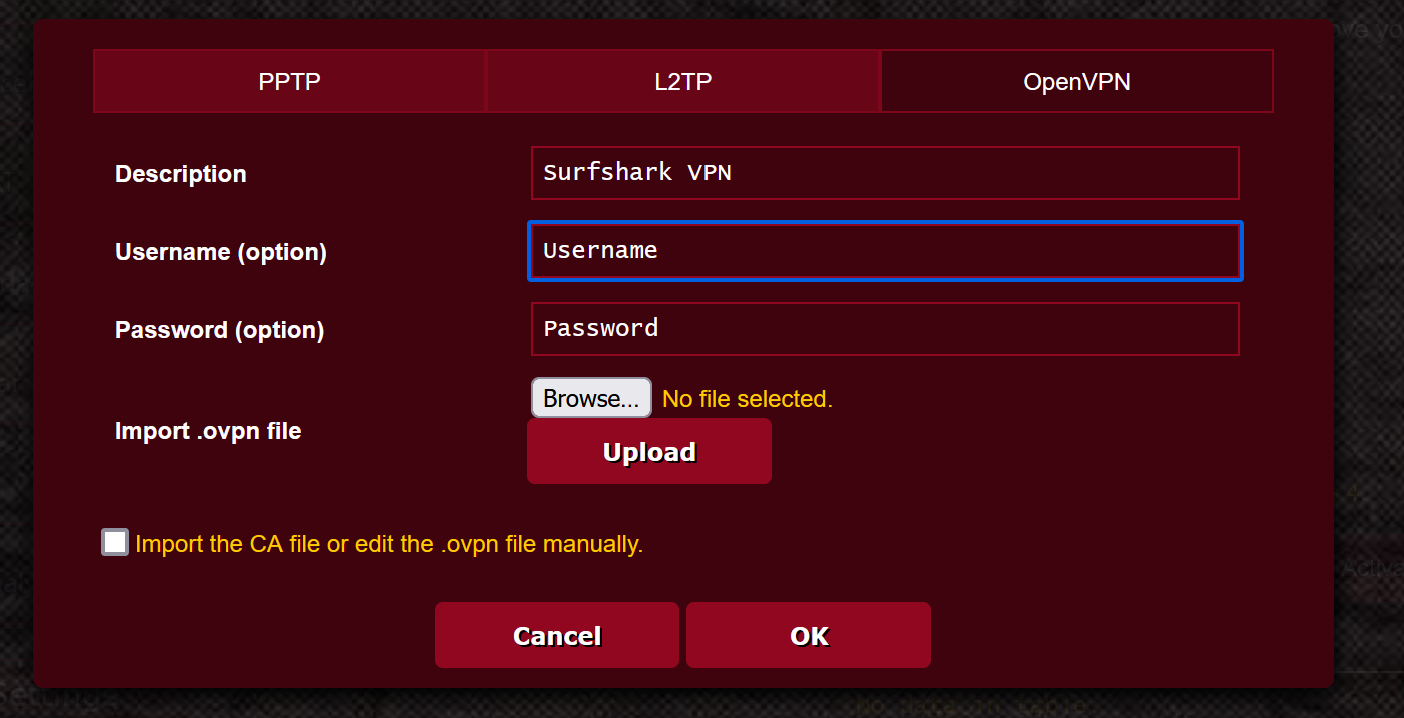
To import the configuration file (.ovpn file), click on "Browse".
We will now upload the .ovpn for the location we selected earlier.
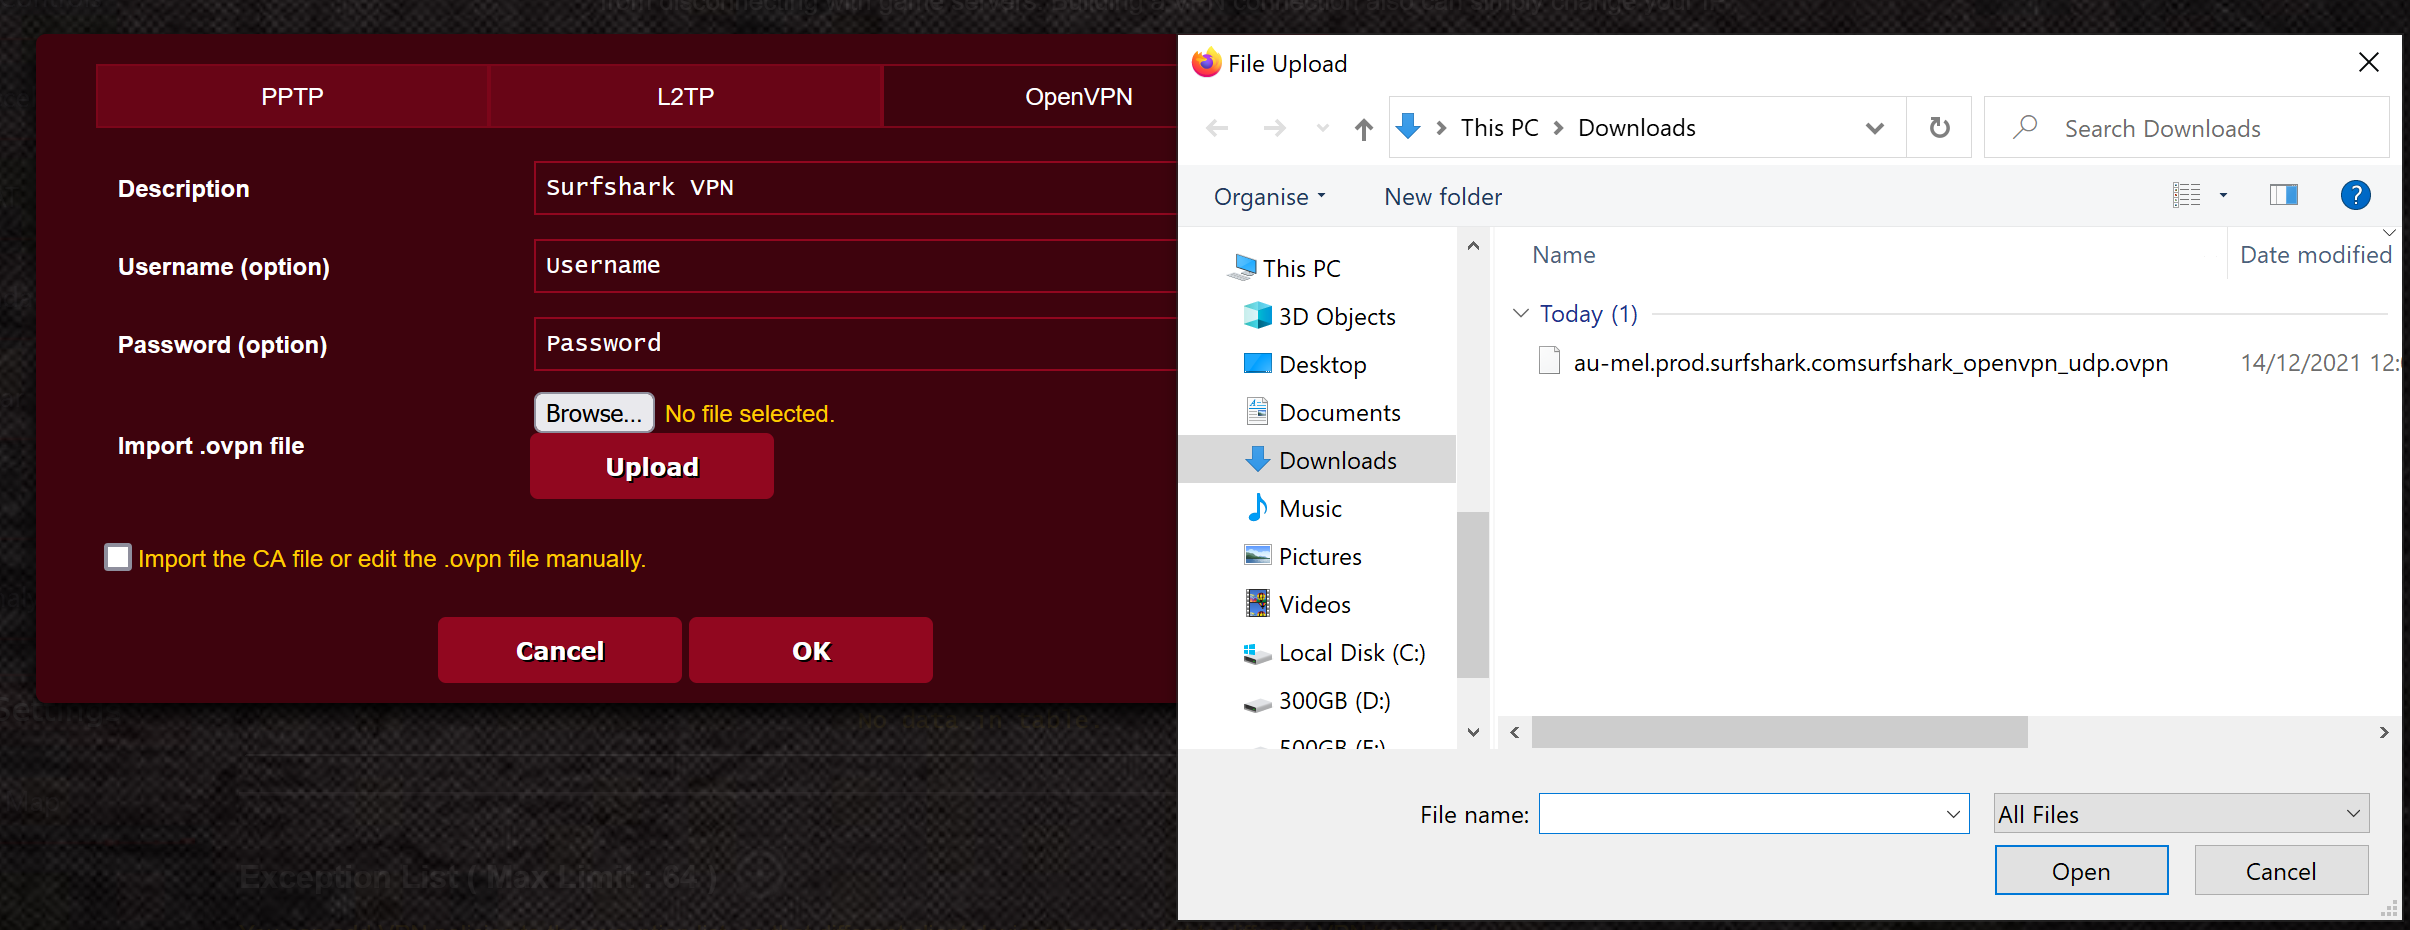
You should see a message stating that your .ovpn file has been uploaded successfully.
Leave "Import the CA file or edit the .ovpn file manually" unchecked.
Click "OK" when you are ready
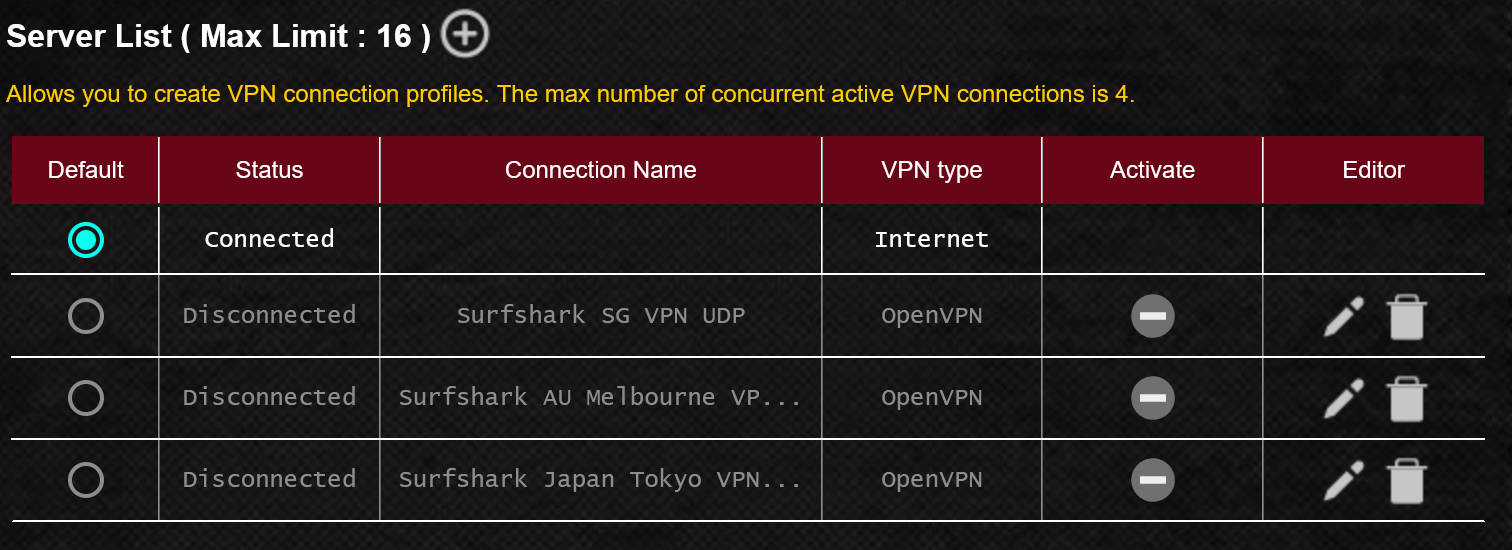
You will see your new VPN connection added to the list now as a new connection set up.
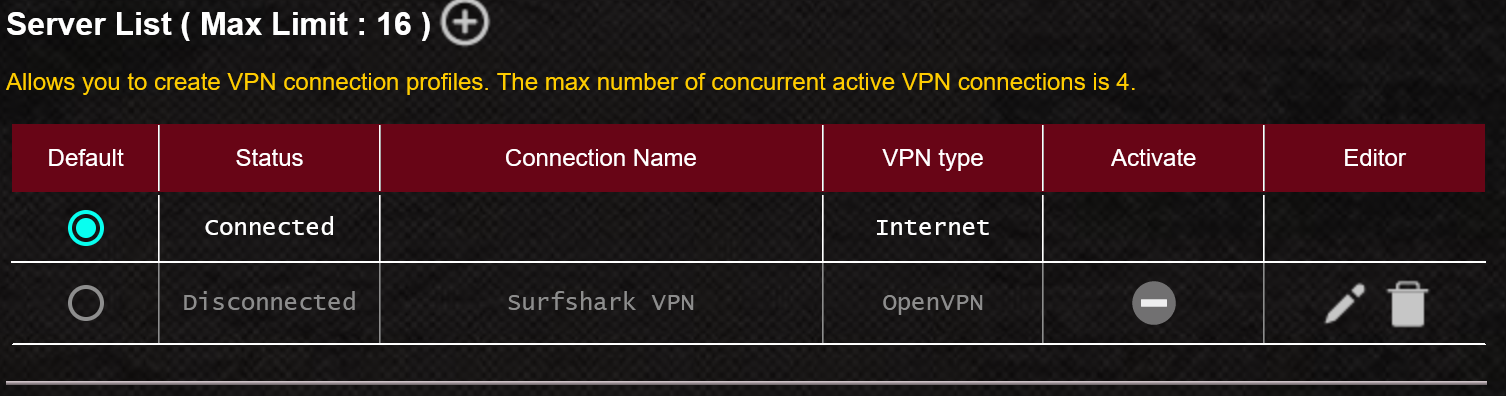
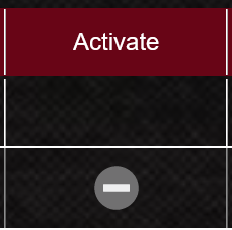
Click on the "Activate" icon button to connect your router to a Surfshark server.
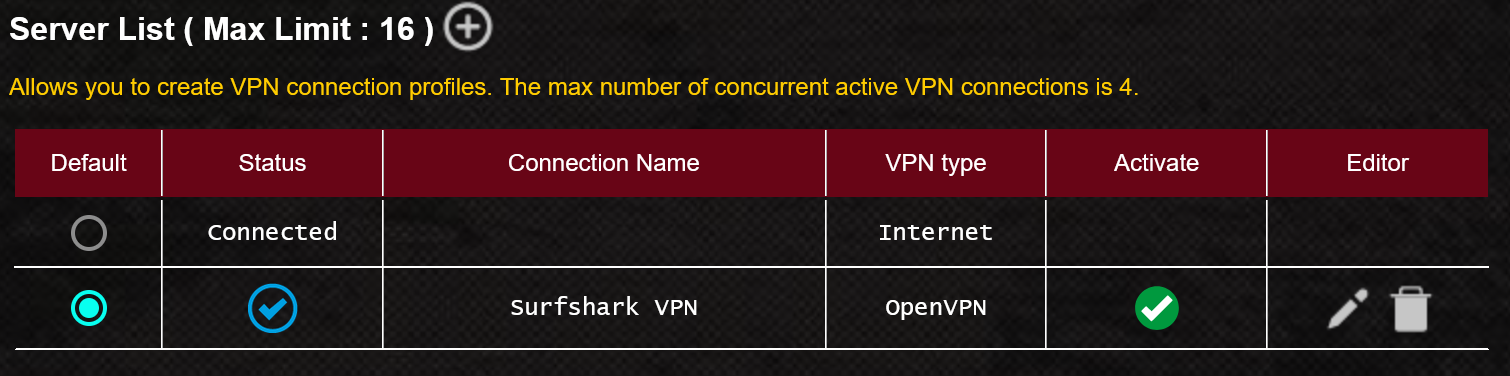
Step 4 - Test that VPN is on
You will see a green tick and status "Connected" when it is fully working.
After a successful connection, you should see the blue checkmark should appear in the Connection Status column.
Step 5 - Test that VPN is working
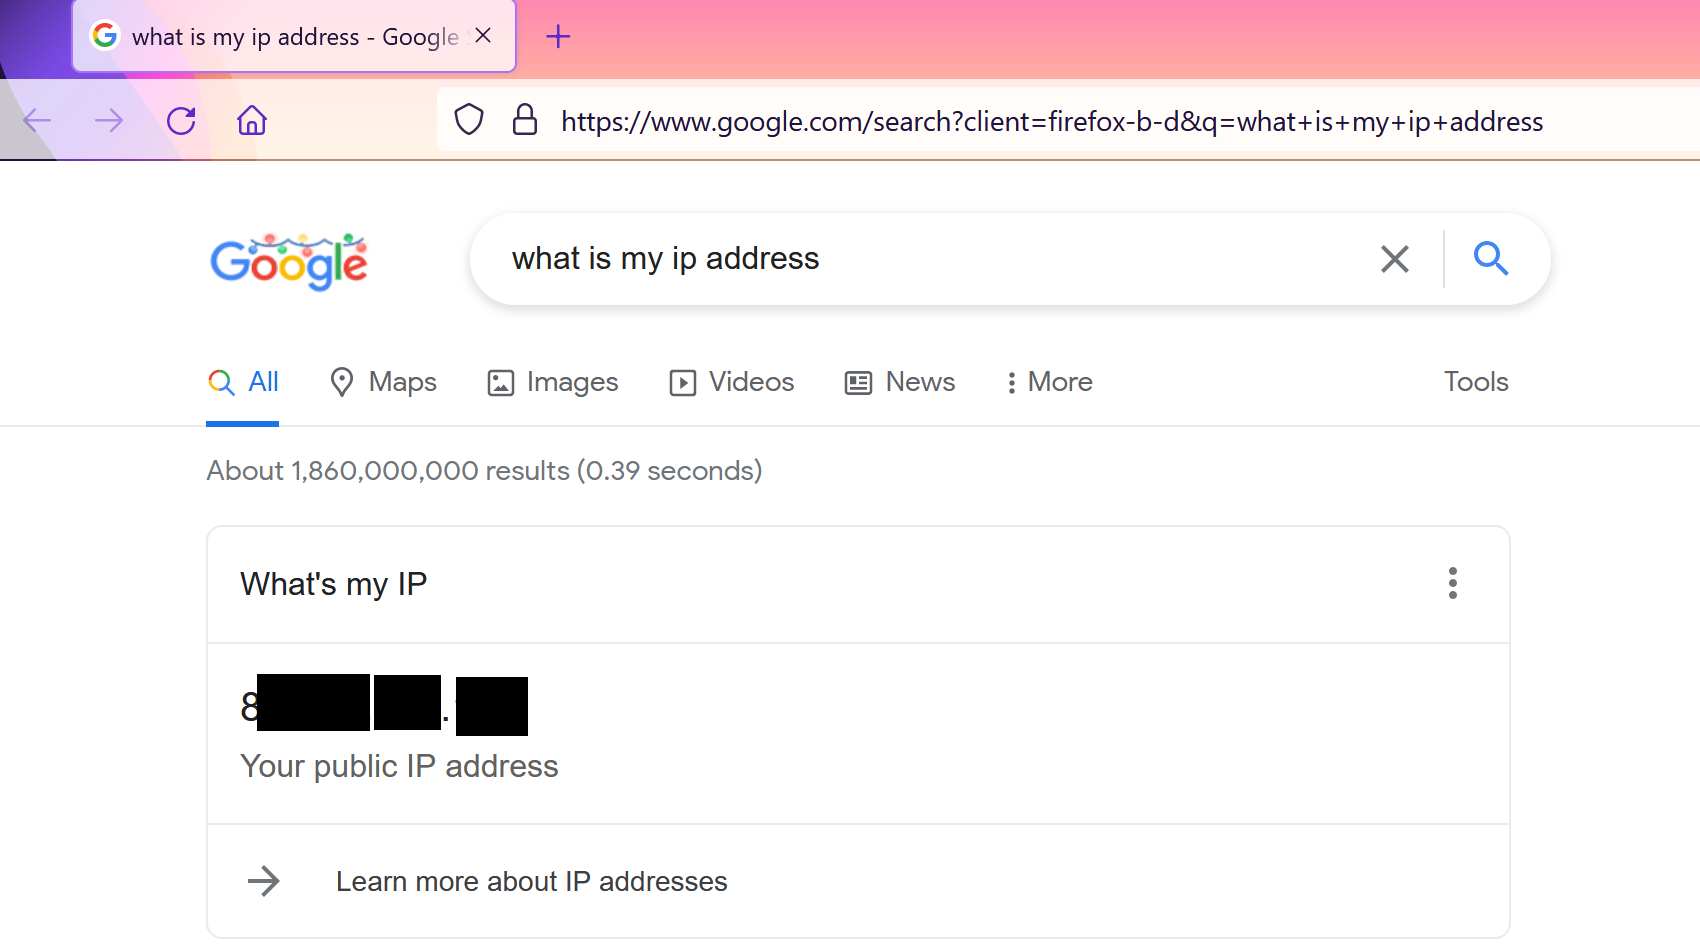
To test if your VPN is active and working, we can do a simple Google search:
Simply search “what is my IP” in Google.
Then confirm that it shows a different IP address and location than your normal location.
If not, you will need to re-check if you carried out the instructions correctly and/or contact your VPN provider's customer support.
Step 6 - Enjoy your new VPN!
Congratulations - you have successfully installed and configured a VPN on your Asus router!
So long as you are connected, your location is private and your sensitive data will remain as secure as VPNs allows.
Happy surfing!
(Optional) - Add more VPN locations to your Asus router
We can more VPN settings into our Asus router to allow us to faster connect to your preferred locations easily.
We do this on the same page as earlier, the "VPN - VPN Fusion" page.
Found in General > VPN> VPN Fusion> VPN - VPN - VPN Fusion.
Click the "+" button beside Server List to add a new VPN tunnel.
Click on the "OpenVPN" tab and fill in the details like we did earlier on.
You can add in your username, password as we did earlier. That is:
- Description: you can name this VPN connection whatever you like
- Username: VPN username service credentials
- Password: VPN username service password
- Import .ovpn file which is the configuration file of the VPN server that you will want to connect to by default.
The key thing that is different is that we will import a different location's .ovpn file for your preferred location.
Here's a quick reference to the steps again (using Surshark VPN as an example but it should be similar with other VPN provider as well).
To get your configuration file of the VPN server (.ovpn file)
- Log into Surfshark VPN Admin Console https://my.surfshark.com/vpn/manual-setup/main
- Click on VPN> Manual Setup> Manual> Locations
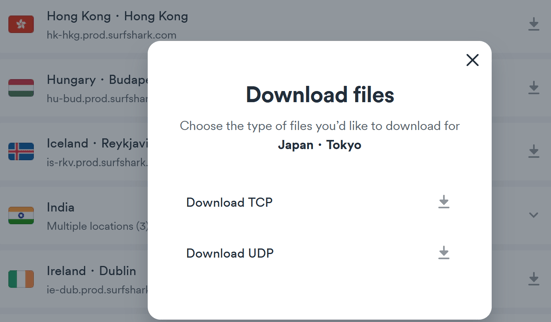
Choose a location to select. I will use Japan as my new preferred location however you can choose any location you wish.
Once you click on the download icon next to your preferred location. You will be presented with the option to "Download files".
Click "Download UDP".
Then upload and import the UDP file into the "OpenVPN" settings on your Asus router as we did earlier.
Click "OK" to save when you are done.
You can repeat this for more preferred locations.
Here is my example: