


Like me, your company may be using Cigna as part of their health insurance plan in Singapore. So I am writing this brief guide to guide you through the process of how to submit a claim through their Cigna app.
The corporate version of Cigna that I am writing about is called cignaenvoy.com.
In the screenshots below, I am using the CignaEnvoy Android mobile app.
You can also submit claims on their website via cignaenvoy.com, I just find it easier to upload photos of receipts using their mobile app.
Step 0 - Getting access to CignaEnvoy
This brief guide does not cover getting access to your Cigna account in the first place, as that will be something that you will either need to call Cigna directly with your personal details to get enabled and/or work with your human resources in order to gain access to your account.
Step 1 - Download and install CignaEnvoy onto your phone
Download and install CignaEnvoy onto your phone from their CignaEnvoy.com website.
Step 2 - Log into CignaEnvoy app
Step 3 - Click on Claims
Step 4 - Click on Submit a New Claim
Step 5 - Choose the family member to submit the claim for
Step 6 - Fill in details for your claim
Step 7 - Submit receipts/ images
Step 8 - Make sure your payment details are added
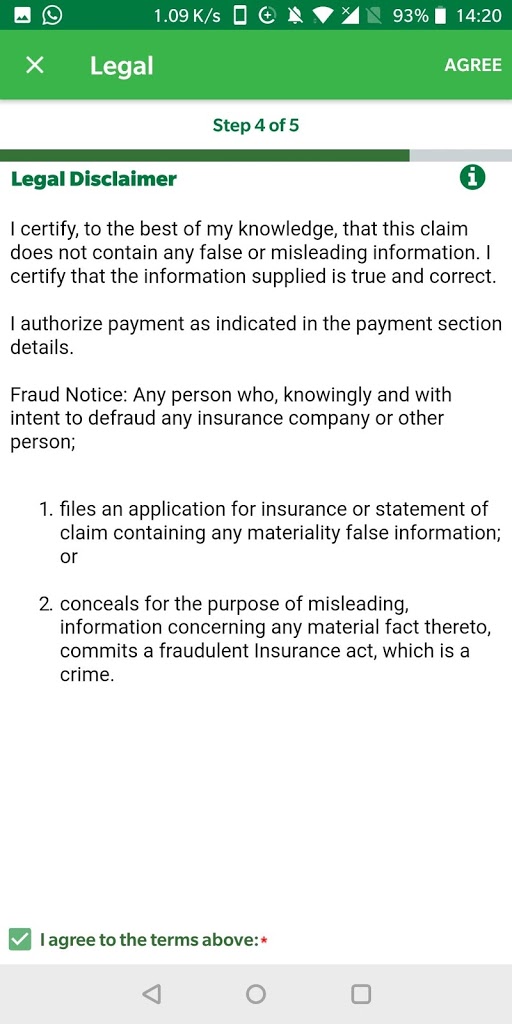
Step 9 - Sign off on the Legal declaration
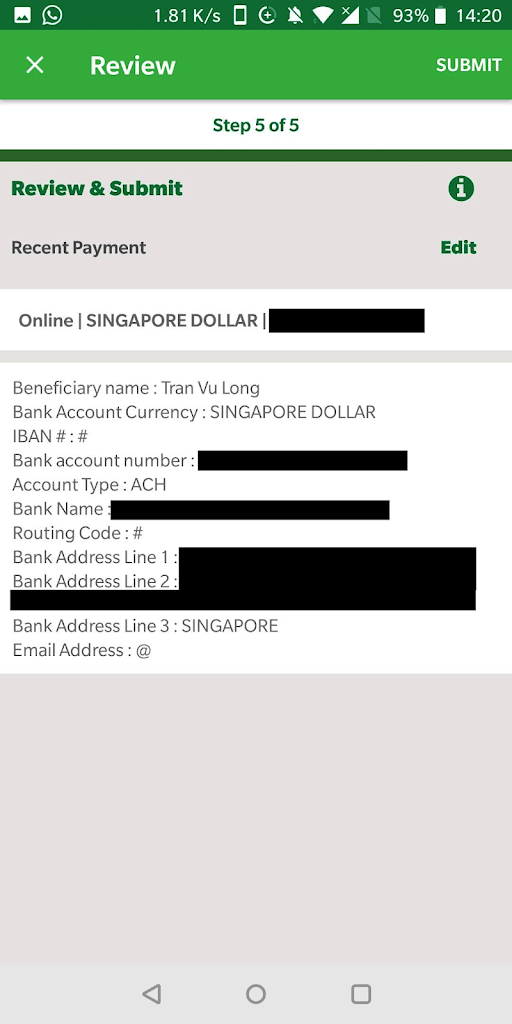
Step 10 - Review and Submit your claim
In detail, with screenshots, that is:
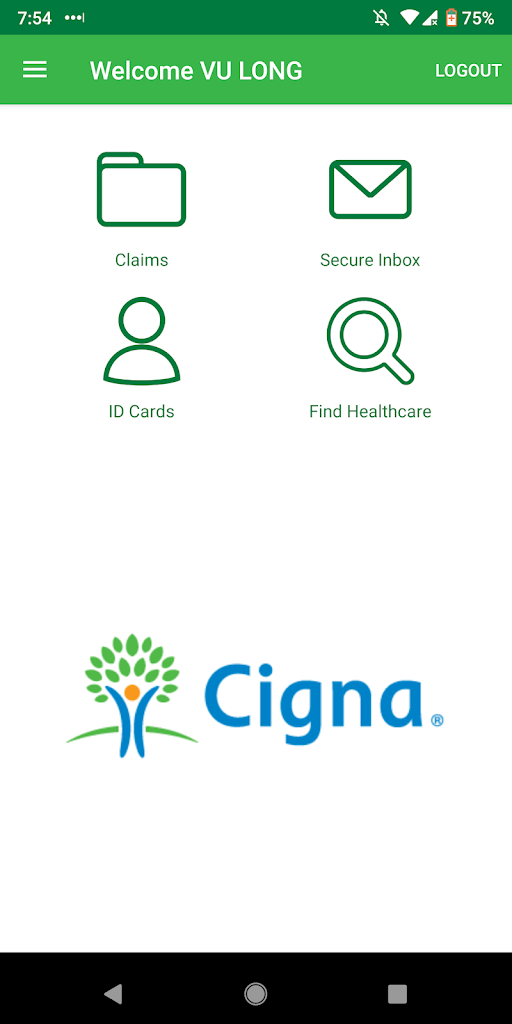
Step 2 - Log into CignaEnvoy app
Once you have logged in, you will see this screen.
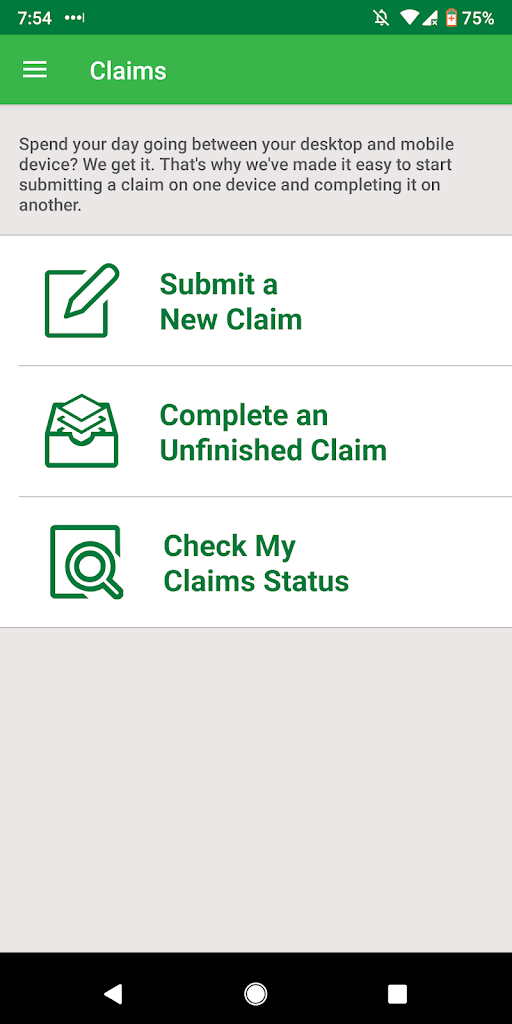
Step 3 - Click on Claims
Select "Submit a New Claim" to kick off the process of submitting a claim.
Step 4 - Click on Submit a New Claim
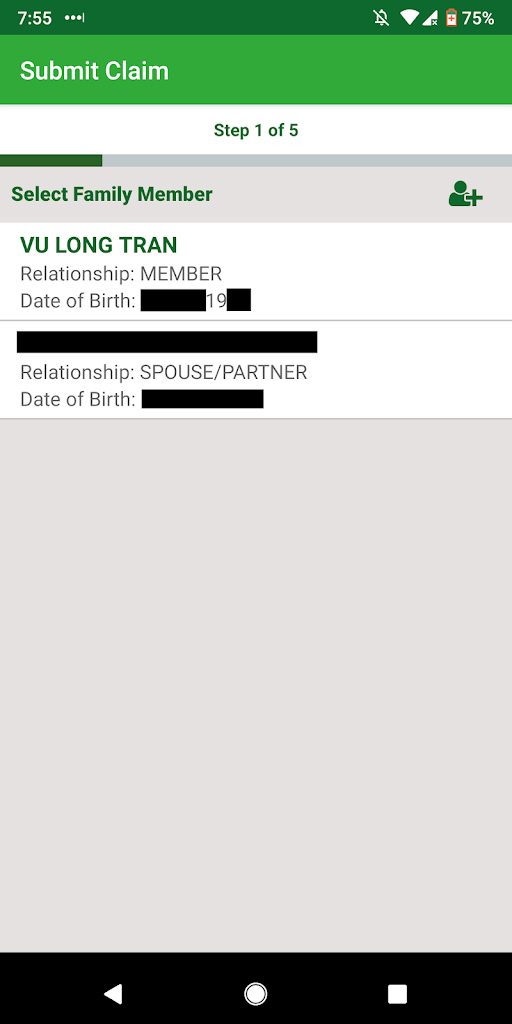
Step 5 - Choose the family member to submit the claim for
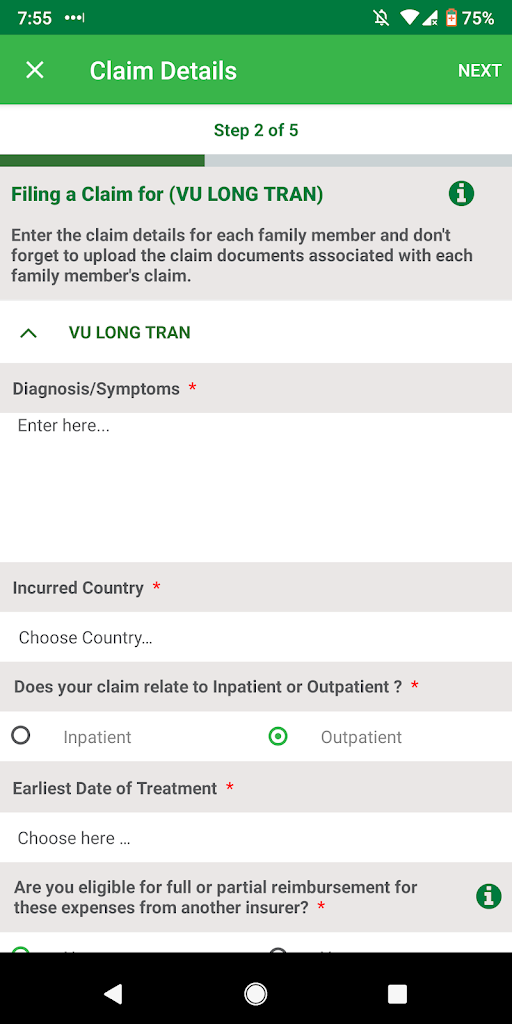
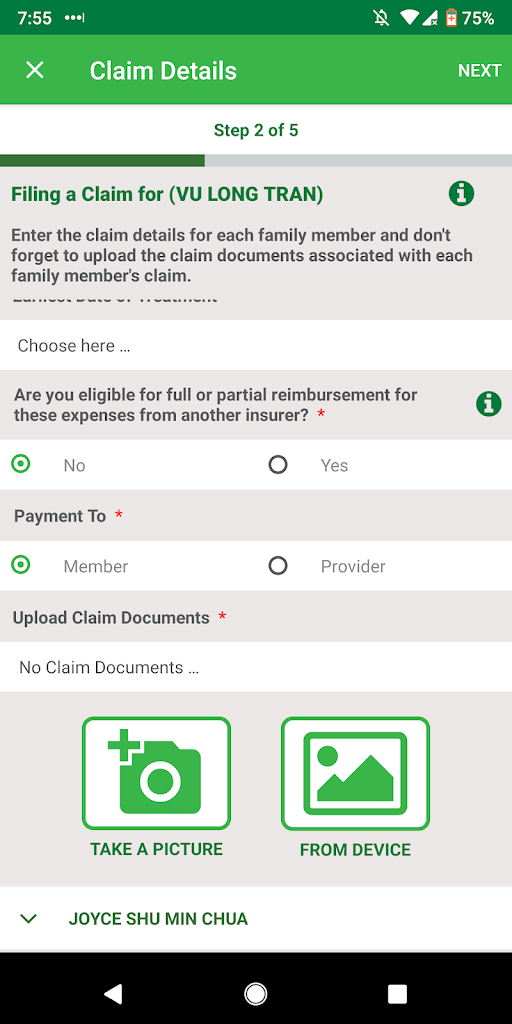
Step 6 - Fill in details for your claim
Fill in details for your claim such as Diagonsis, symptoms, insured country, inpatient (admitted into hospital) vs outpatient (GP visit, non admission into a hospital), and date of treatment.
Step 7 - Submit receipts/ images
Choose the "Take a picture" (to take a picture of your receipt) or upload a photo/ image from your device via the "from device" option.
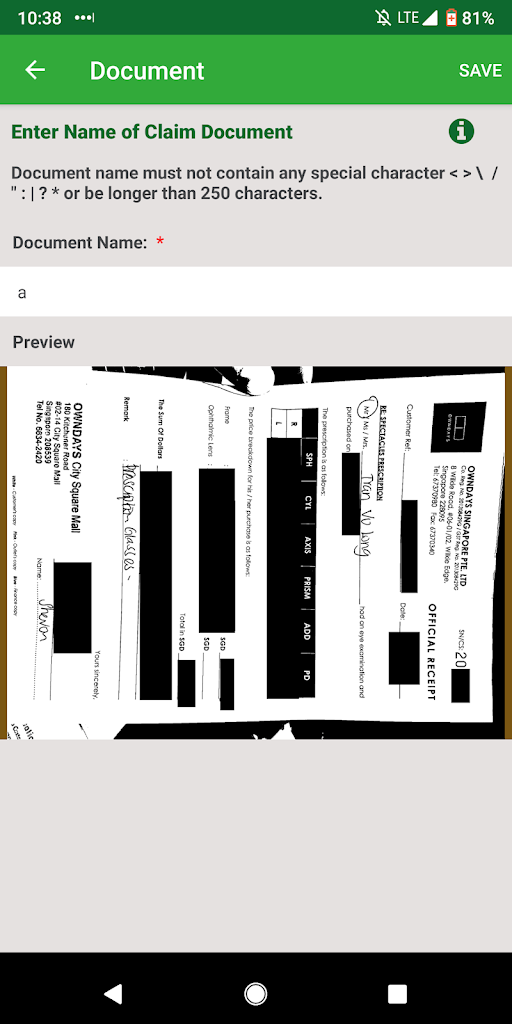
Then fill in details about the image.
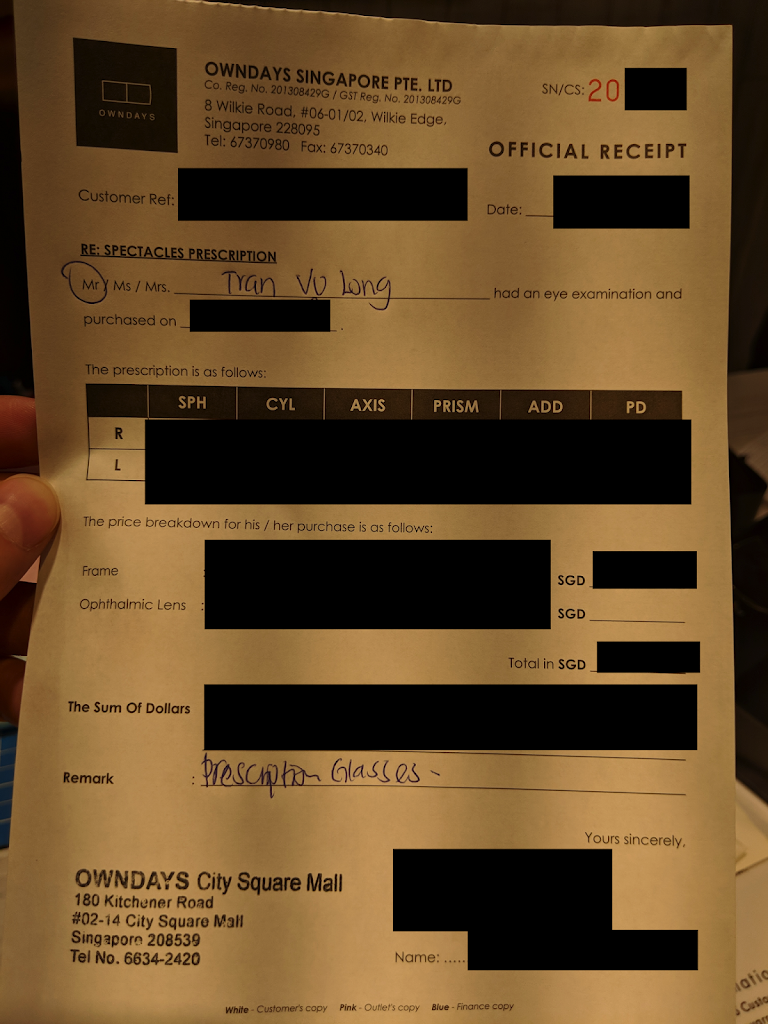
This is my example receipt example for your reference.
Note - the system will auto render the image for easier processing on their side. So it'll turn black and white, etc. You need not worry about it, as you just need to make sure the image appeared clearly.
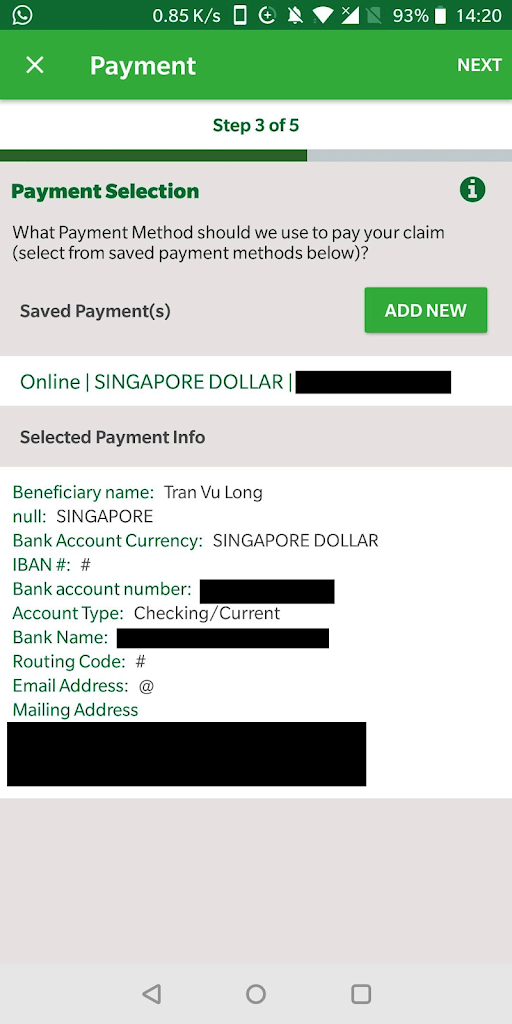
Step 8 - Make sure your payment details are added
Step 9 - Sign off on the Legal declaration
Step 10 - Review and Submit your claim
Step 11 - Claim submitted!
You will receive a confirmation number once your claim is completed.
You may want to log back in and select the Claims> Check My Claims Status to check that it is in the listings there. As that's what I like to do to make sure the claim has been submitted.
It generally takes 7- 14 days to get a virtual response. Then you simply need to wait for it to be processed. You will at times receive an email from the CignaEnvoy team if they have any follow up questions on your claim.
As always, always make sure you get sign off from a doctor and the items you are claiming be a "medical necessity". Though of course, depends on the customised plan your company has.
For Asia Pacific customers like myself, a hard copy letter confirmation arrives from the UK to Singapore. As it is being sent from the UK, this normally arrives at your registered mailing address after 2-3 months.
I hope that has helped you get a sense of the process and helps you with claiming. Stay healthy!

