This is a step by step guide on how to use the Secure Web Authentication (SWA) forms based authentication Template Apps with Okta.
Why use Template Apps?
- When you see no support by the application for federated Single Sign On (SSO) protocols such as SAML 2.0, Open ID Connect (OIDC), WS-Federation.
- If you have tested the Secure Web Authentication (SWA) app and you have discovered that one of the following may be apparent. For example, that:
- Multiple pages - Website uses multiple pages for their sign on process, where it checks for your Username on one page, and then takes you to another page and checks for your Password there. In such cases, the Template Two Page Pluging App is required.
- Uses Frames - The application's website designer decided to use website frames for the website design. In such cases, the Template Frame Plugin App is required.
- Cross-site request foregery protection - Website has cross-site request forgery XSRF protection. To check, inspect the page to see if the server generated an XSRF token, you may see fields such as EVENTVALIDATION or FORMVALIDATION which are generated on asp pages. In such cases, the Template Plugin App is required.
- Prerequisites
- Add Template App to your Okta instance
- Set up SSO settings on Okta
- Test and confirm that it is working
- (Optional) How I derived the CSS selectors of the login form
Prerequisites
Before you can start setting up a Secure Web Authentication the website application you would like to log into with Okta and your web application, we will need to have:
- Need login form on the website - Ideally with a field text boxes where a user would normally input their "Username" and "Password".
- Choose the template to suit the web design - You have determined that some form of Secure Web Authentication (SWA) and one of the Template Apps is suitable for the website design of the applications you want to log into. This may be:
- Template App
- Template Basic Auth App
- Template Frame Plugin App
- Template Plugin App
- Template Plugin App 3 Fields
- Template Two Page Pluging App
How to use a SWA Template App with Okta
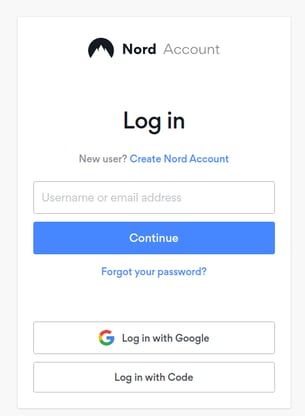
Let's take NordVPN.com, where I want to be able to log in my users into NordVPN using Okta.
NordVPN does not currently support SAML 2.0 or Open ID Connect (OIDC), and I still want to log my users into NordVPN. So I will leverage Okta's forms based authentication approach, called, "Secure Web Authentication" (SWA) and use that to log users into their NordVPN accounts.
That is, you would be looking to log your users into NordVPN Account, https://nordaccount.com.
1. Add Template Two-Page app to your Okta instance
Log in to your Okta account as an administrator (with administrator access).
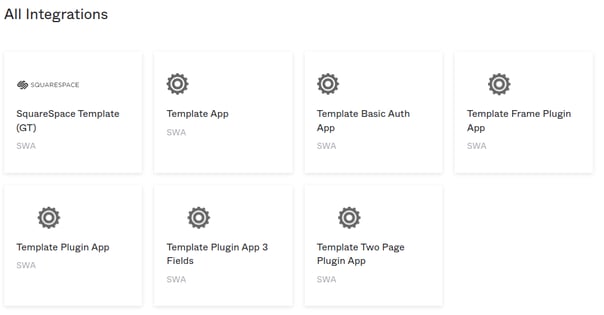
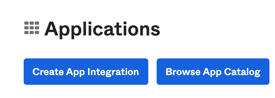
Under Applications> Applications, click Browse App Catalog.
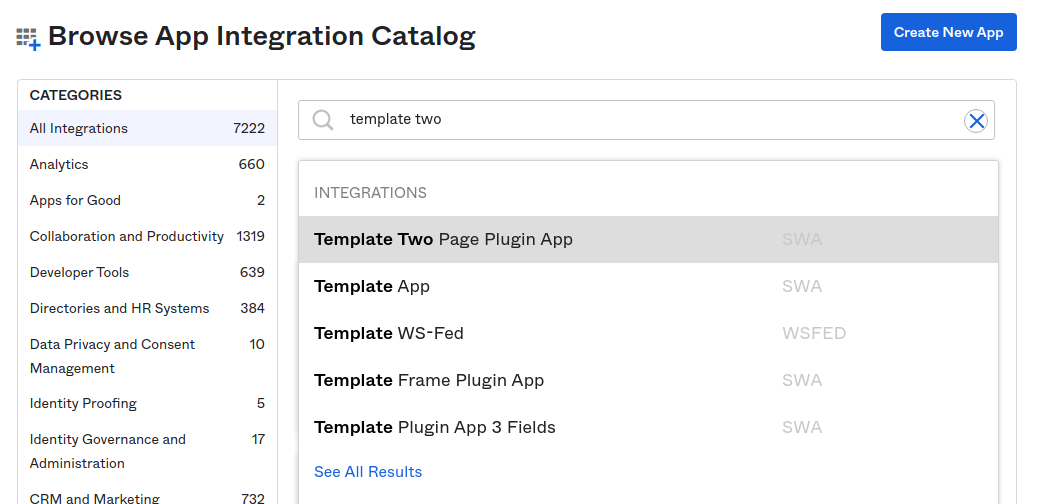
Search for Template Two Page Plugin App.
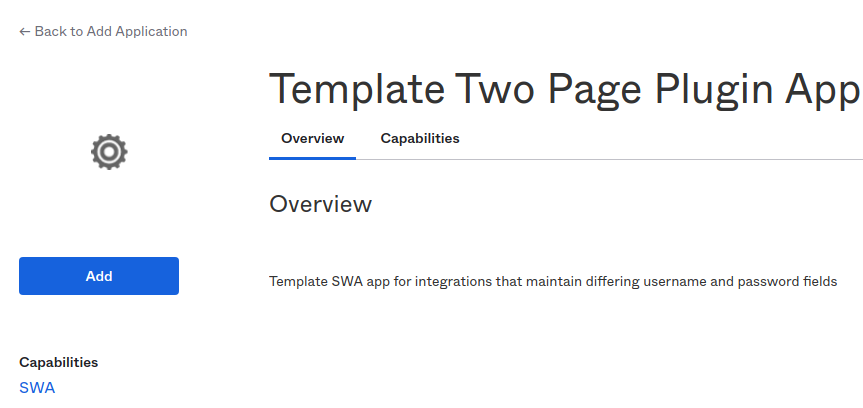
Click Add.
On the "Add Template Two Page Plugin App" page, fill in the options as "placeholder" for now, and click Next.
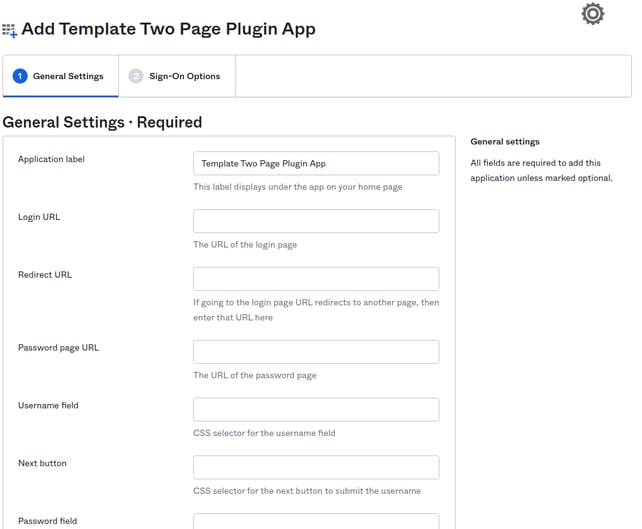
Fill in the options as "placeholder" for now, and click Next.
- Application name - Name your app (any name is fine).
- Login URL - Type "placeholder".
- Redirect URL - Optional, leave blank
- Password page URL- Type "placeholder".
- Username field - Type "placeholder".
- Next button - Type "placeholder".
- Password field - Type "placeholder".
- Submit button - Type "placeholder".
You will see the following, in the General tab. We will come back to this later.
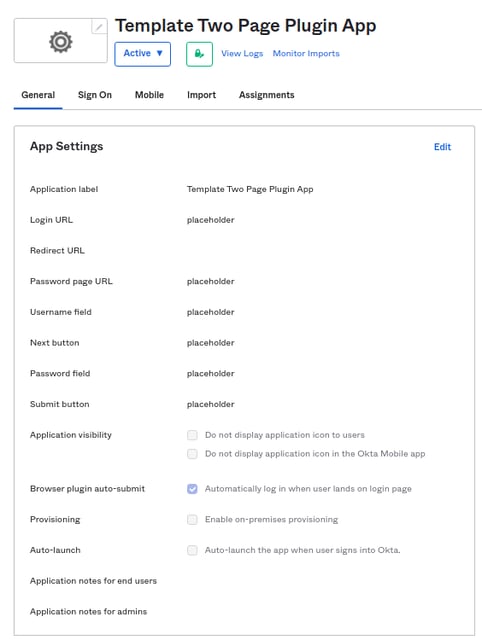
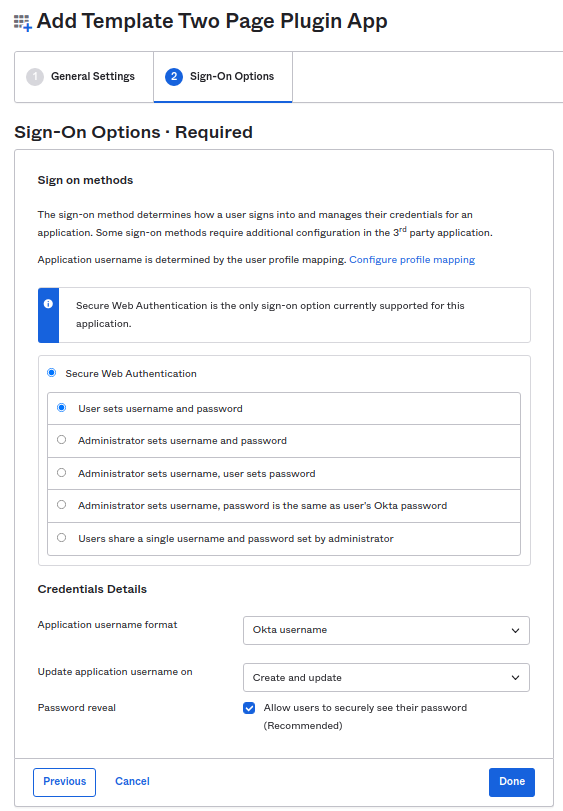
On this "Sign-On Options" tab, click Done.
For reference, this is what each field means:
- Login URL: enter the URL of the log-in form (the actual URL where you can view the form).
- Redirect URL: if going to the login page URL redirects to another page, then enter that URL here.
- Password page URL: enter the Password page URL (This is the URL which contains the frame)
- Username field: enter the CSS selector for the username field.
- Next Button: enter the CSS selector for the next button that would redirect you to the next page.
- Password field: enter the CSS selector for the password field.
- Submit Button: enter the CSS selector for the Submit button.
Optional, if you want to upload a logo for the application. You can right click and download this Nord image and use this.

2. Check the CSS selectors of your login form
For the fields we left as placeholder, we would need to now go to our website that we want to log into and match the parameters to the CSS selectors from the website's login form.
This is required, as the Okta Browser Plugin will look for the CSS selectors of the relevant fields we want the Okta Browser Plugin and populate it.
Once defined correctly, the Okta Browser Plugin with populate these fields and click the login button.
Check the CSS selectors from login form
We can check the CSS selectors by using "Inspect Element" (Ctrl + Shift + I on Google Chrome) on the log in pages.
The key here is to collect the details about:
- Username field: #identifier_field
- Next button: #app > div > div > div > div > div > div > form > fieldset > button
- Password field: #password_field
- Submit button: #submit
3. Update your SSO settings to the CSS selectors
In Okta Admin Console.
Under Applications> Applications.
Open your Template Two Page Plugin App that you had created for NordVPN.
Click on the General tab.
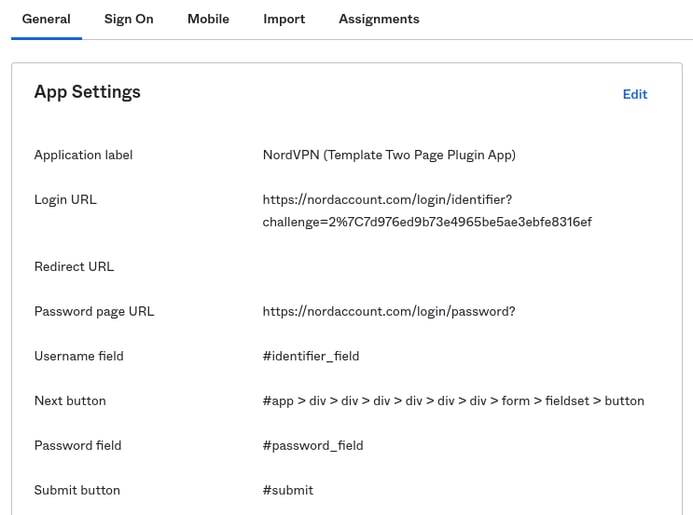
Replace the "placeholders" that we set up earlier with the CSS selector details and click Save.
- Application name - Name your app (any name is fine).
- Login URL - You may need to copy this one from NordVPN.com. https://nordaccount.com/login/identifier?challenge=2%7C7d976ed9b73e4965be5ae3ebfe8316ef
- Redirect URL - Optional, leave blank
- Password page URL - https://nordaccount.com/login/password?
- Username field - #identifier_field
- Next button - #app > div > div > div > div > div > div > form > fieldset > button
- Password field - #password_field
- Submit button - #submit
4. Test that SSO is working on NordVPN app
When you are ready, let's test that it works.
In Okta Admin Console, let's assign a user to the application. (Applications> Applications> NordVPN app)
Go to "Assignments" tab. (Applications> Applications> NordVPN app> "Assignments)
Select "Assign" and "Assign to People".
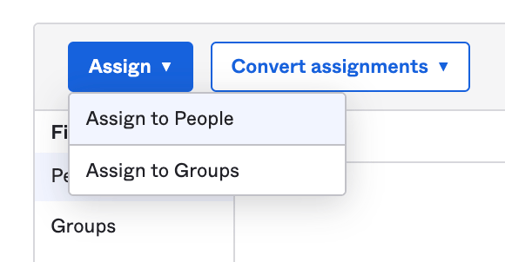
Select our test user, click "Assign" and then "Done".
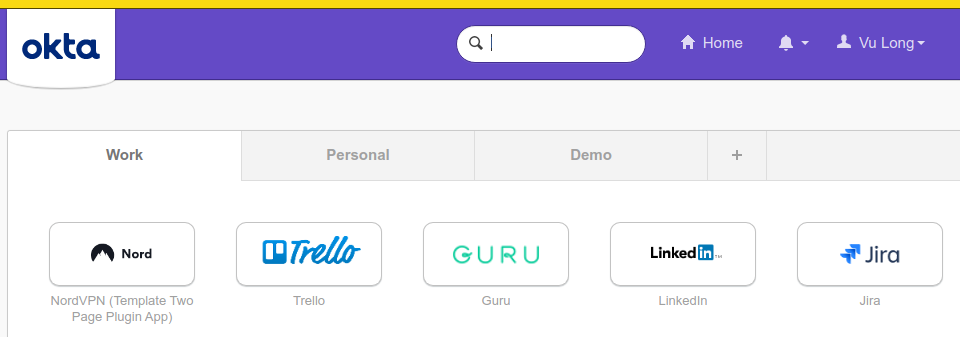
Now let's log into our Okta instance as a test user. You may need to refresh your browser if you had the browser window already open.
Then click on "Nord VPN" application icon (chiclet).
Success, you will be logged in successfully to your NordVPN account!
(Optional) How I derived the CSS selectors of the login form
You may have noticed that I used different CSS types and styles to get this one to work. We generally try use the CSS "id" attributes from the log in page. However, it depends on how the web designer coded of the application's log in website page.
For websites that do not use "id" for its username, password, or submit buttons, we may need to use other CSS types such as "name" attributes, "type" attributes, etc.
Here are some example types you can try. Though, as usual, it is highly dependent on the web designer.
- Username field:
- #username
- input[type="text"]
- Next Button:
- #submit
- input[class="btn"]
- input[type="submit"]
- Password field:
- #password
- input[type="password"]
- input[id="password"]
- input[name="password"]
- Submit button:
- #submit
- input[class="btn"]
- input[type="submit"]
For even more unique website designs, we can also instruct the Okta Browser Plugin to jump css types and ultimately get to the specific CSS field. It may be needed if say the website has multiple submit buttons (so type="submit" wouldn't work), or multiple text boxes (so type="text" wouldn't work).
This likely will require some analysis and trial and error before you get one that successfully works.
- #password-form > button
- #app > div > div > div > div > div > div > form > fieldset > button
(Optional) Turn off auto-launch for the Template app
As you may be doing trial and error, it is best to turn off auto-launch for the Template app, so you can control when you want to run the tests. As sometimes the Okta Browser Plugin will see the applicable log in page and auto-login.
In Okta Admin Console.
Under Applications> Applications.
Open your Template Two Page Plugin App that you had created for NordVPN.
Click on the General tab.
Change this "Browser plugin auto-submit" setting on the page and make sure it is unchecked during your testing.

Check the CSS selectors from login form
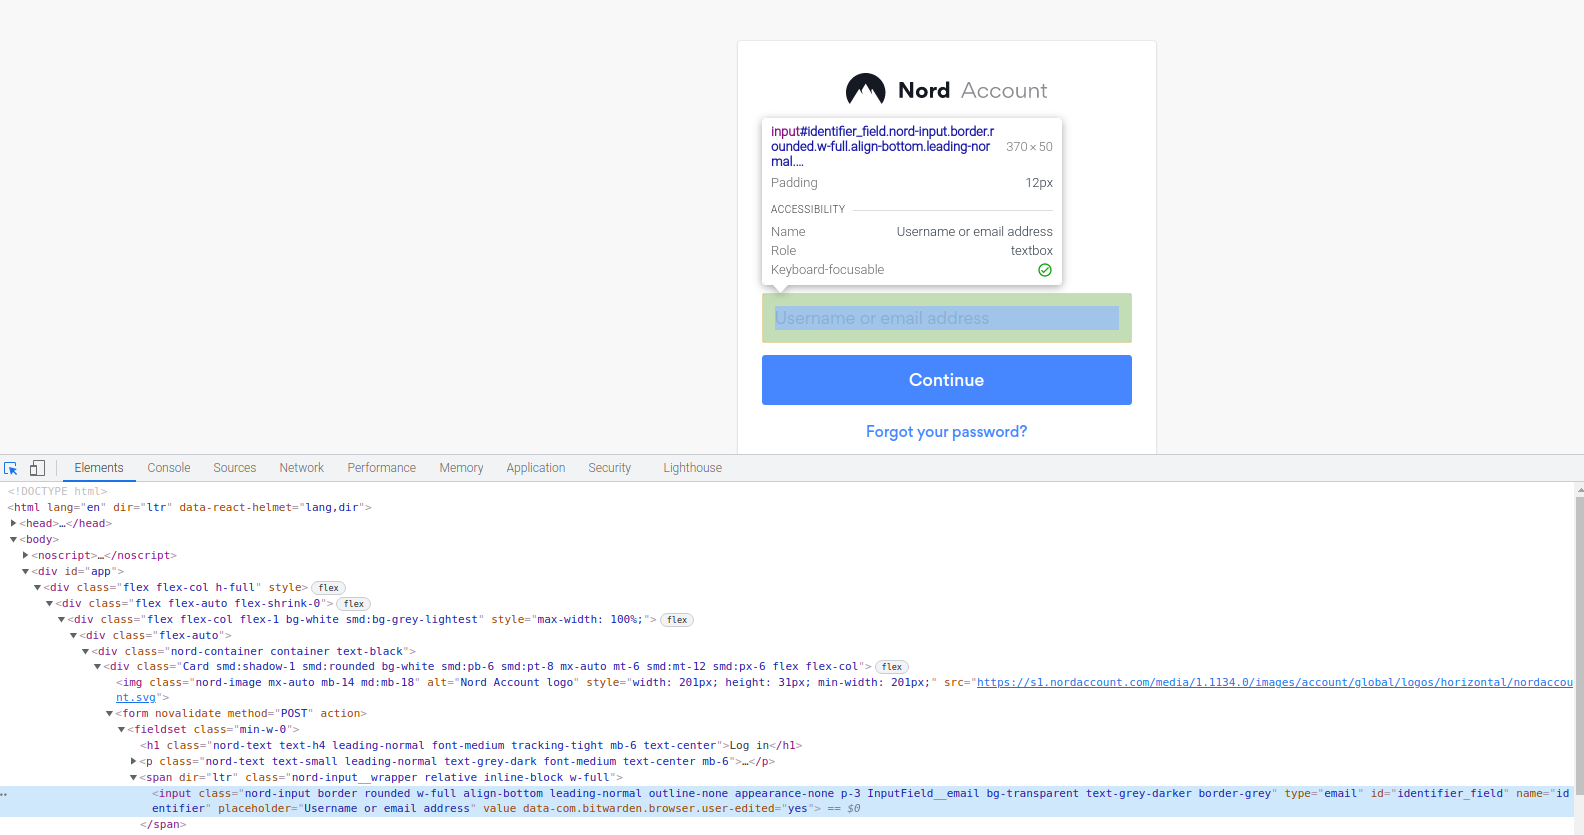
Username example from NordVPN login form
For this username field, I can see:
- type="email"
- id="identifier_field"
- name="identifier_field"
I choose #identifier_field here for simplicity to capture that css field. But input[type="identifier_field"] would often work as well.
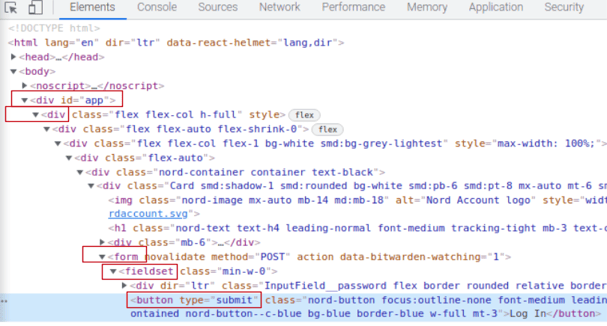
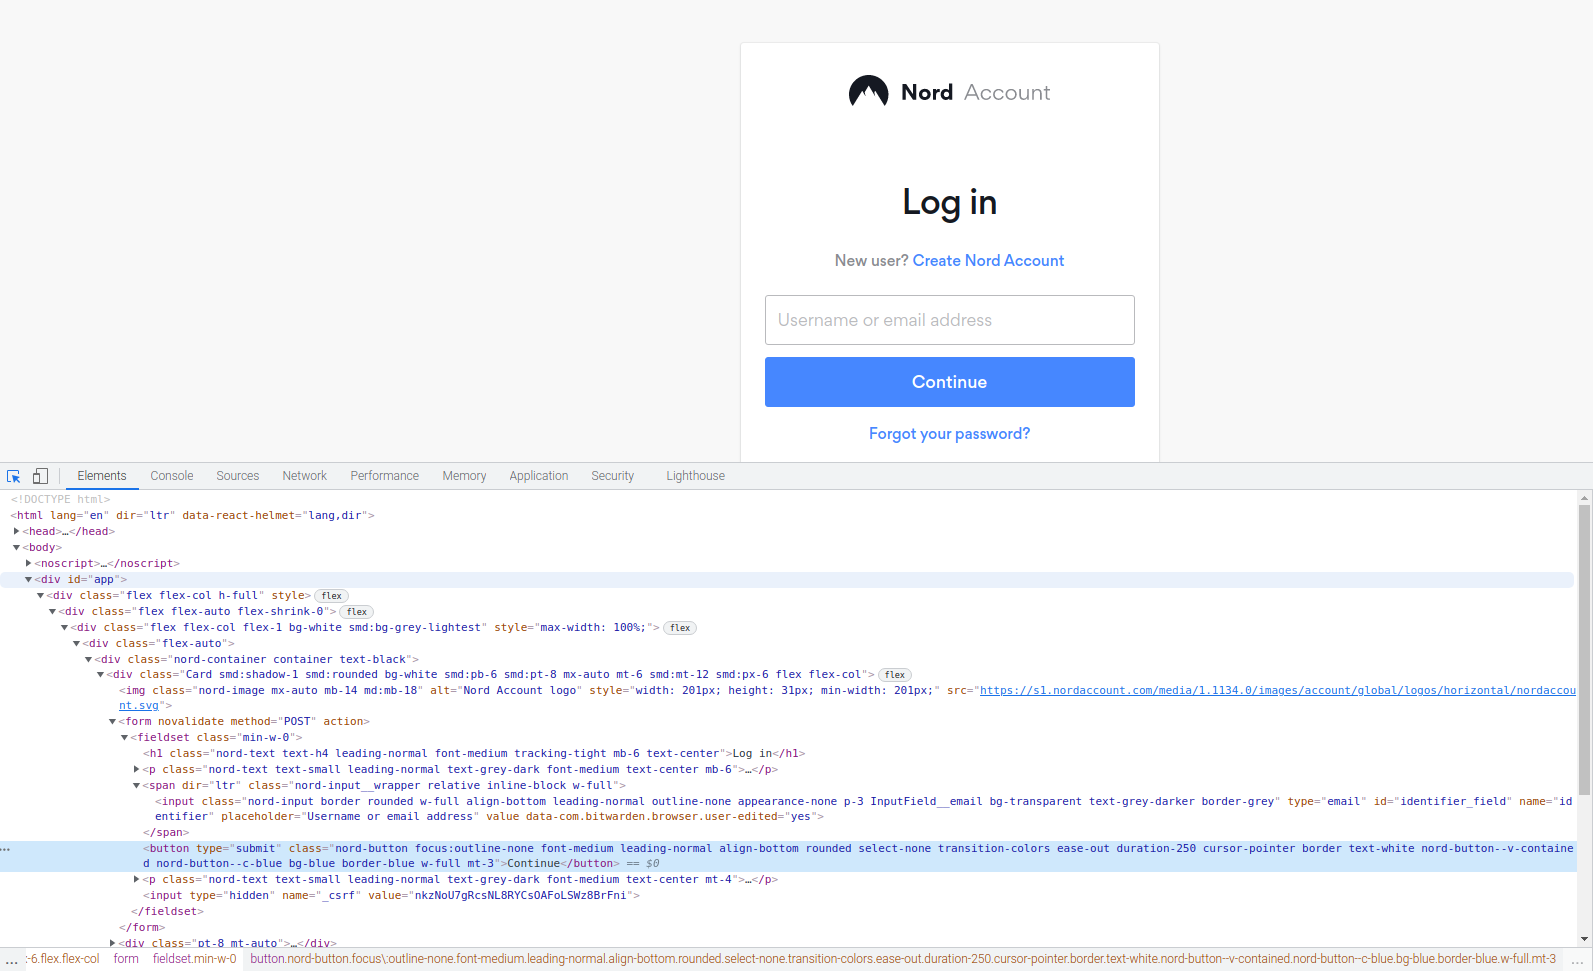
Next button example from NordVPN login form
For this button field, I can see the following in the CSS tags:
- type="submit"
- no id tag
- no name tag
- class="nord-button focus:outline-none font-medium leading-normal align-bottom rounded select-none transition-colors ease-out duration-250 cursor-pointer border text-white nord-button--v-contained nord-button--c-blue bg-blue border-blue w-full mt-3"
However, neither of these work. So I have to apply the css tree mapping technique and work up the CSS tags tree.
Ultimately my outcome was the following:
- #app > div > div > div > div > div > div > form > fieldset > button
How it is derived is:
- I see <div id="app"> at the top, so I can set that is the lead with #app.
- Then I need to count the css tags that follow it, so that is counting the <div> css tags. I counted six <div> css tags.
- Then there is a <form> css tag.
- Then there is a <fieldset> css tag.
- Before finally getting to my <button> css tag.
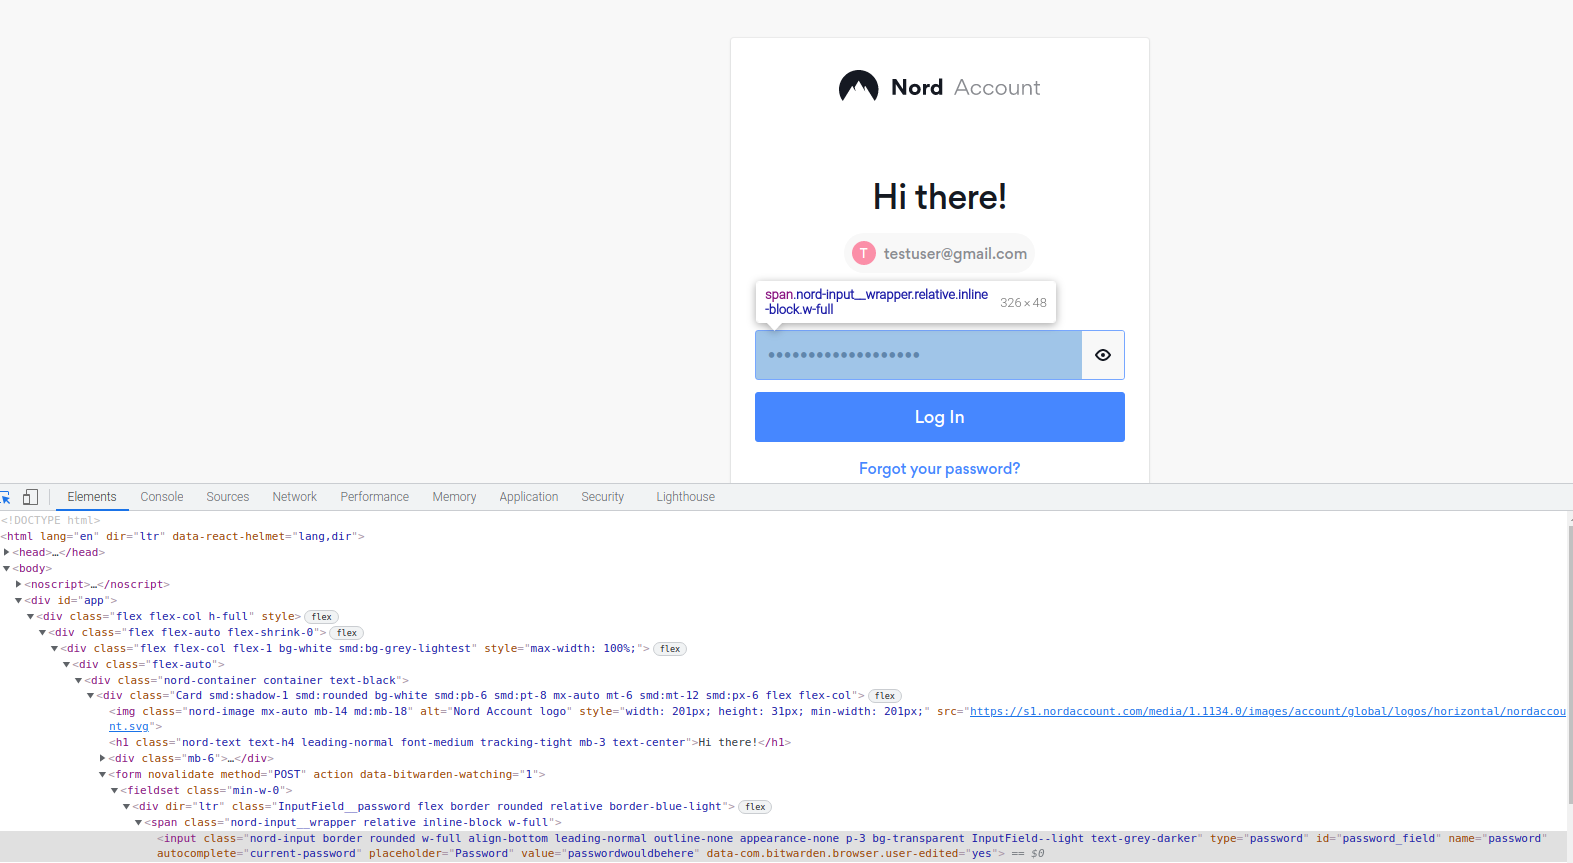
Password field example from NordVPN login form
For this password field, I can see the following in the CSS tags:
- type="password"
- id="password_field"
- name="password"
I choose #password_field here, to capture that css field.
These are also suitable options:
- input[id="password_field"]
- input[name="password"]
- input[type="password"]
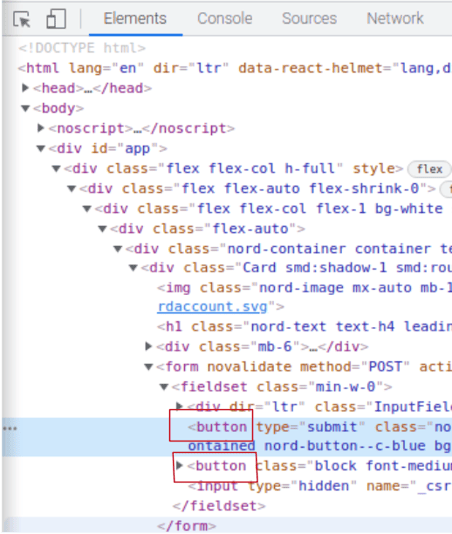
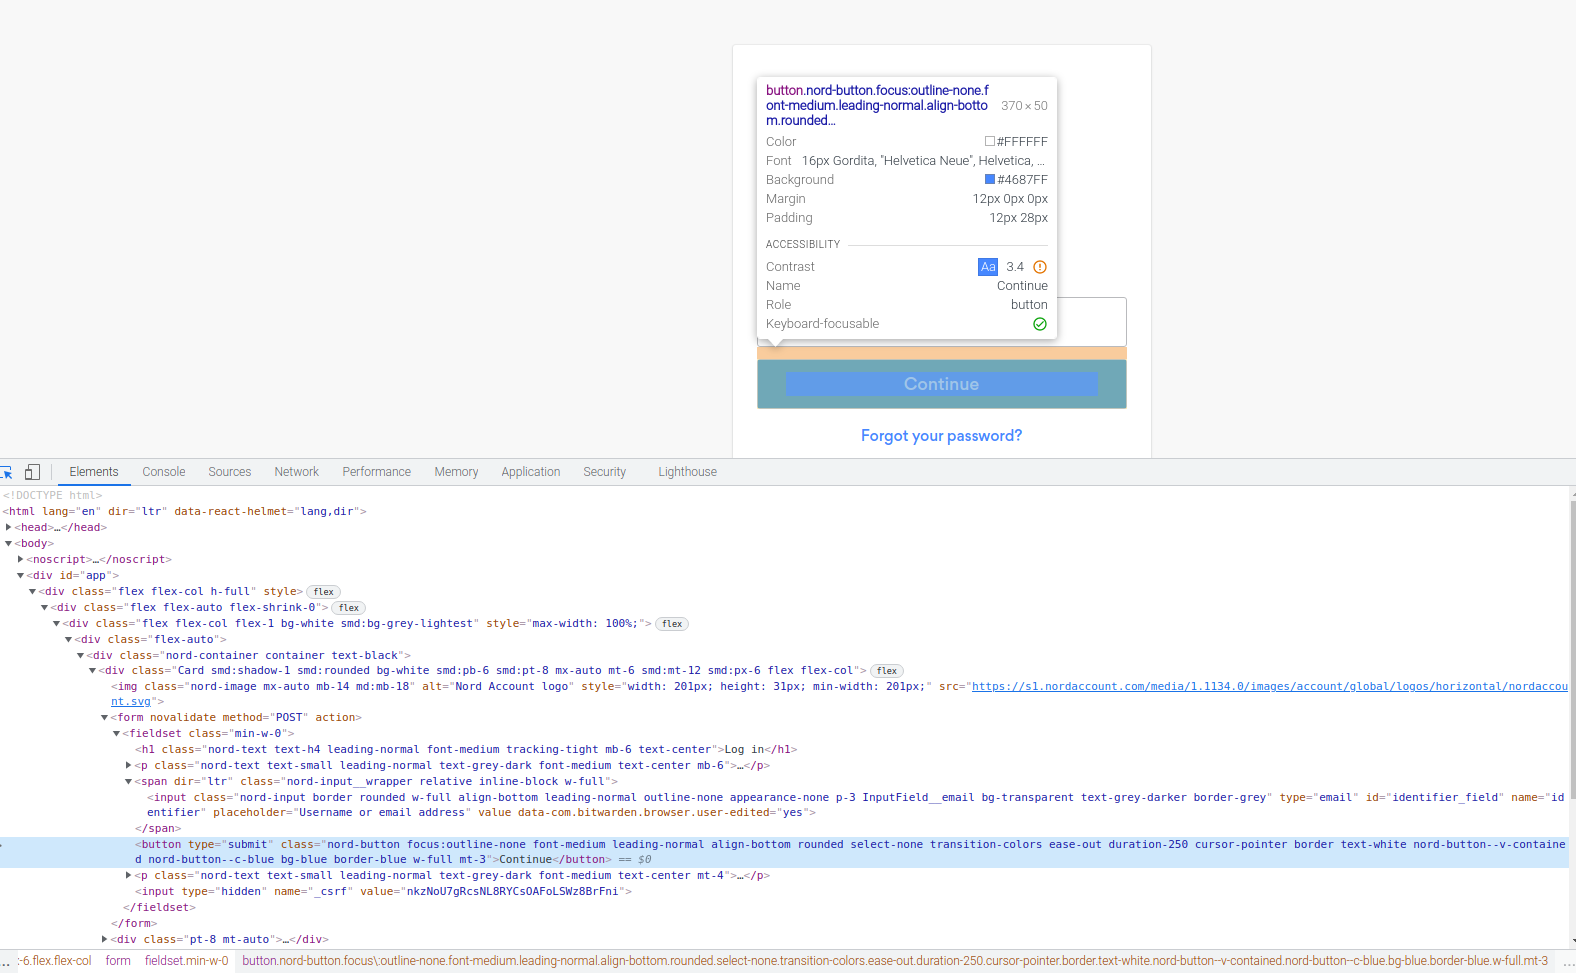
Submit button example from NordVPN login form
For this submit button, I can see the following in the CSS tags:
- type="submit"
- class="nord-button focus:outline-none font-medium leading-normal align-bottom rounded select-none transition-colors ease-out duration-250 cursor-pointer border text-white nord-button--v-contained nord-button--c-blue bg-blue border-blue w-full mt-3"
However, neither of these work (the following does not work).
- #submit
- input[type="submit"]
- css tree, due to there being two <button> css tags. (More details in shared below).
So in this case, the final step of submitting the login button cannot be facilitated with the Okta Browser Plugin. Since the Okta Browser Plugin will not be able to distinguish the differences in the website css code.
So there are two options:
- Ask the developer of the application (in this example, that is NordVPN.com) to recode the css code on their website.
- Users manually click the final step to log into NordVPN.

(Optional) Example of why css tree mapping may not always work
You might find that sometimes thecss tree mapping technique does not work all the time. This would be depending on how a website is designed.
In my example here, it does not work as there are two css tags with the same name. For example, there are two "<button>" css tags for the submit button. So it does not know which one to trigger an action on.
So the following sequence that worked earlier on the first log in page, does not work on the second log in page.
- #app > div > div > div > div > div > div > form > fieldset > button (however there is two <button> css tags present!)
How it is derived is:
- I see <div id="app"> at the top, so I can set that is the lead with #app.
- Then I need to count the css tags that follow it, so that is counting the <div> css tags. I counted six <div> css tags.
- Then there is a <form> css tag.
- Then there is a <fieldset> css tag.
- Before finally getting to my <button> css tag. However, there are two <button> css tags in the same part of the css code.
So this means, due to two <button> css tags in the same part of the css code, this pathway would not work.