This is a step by step guide on how to set up SSO for Mapbox on Okta.

- Add Mapbox app to your Okta instance
- Set up profile mapping settings on Okta
- Set up SSO settings on Mapbox
- Test and confirm that it is working
Prerequisites
Before you can start setting up Single Sign On (SSO) for Mapbox and Okta, we need to check the following:
- Access to Mapbox Admin Console - Confirm that you have administrator access to Mapbox Admin Console.
- Access to Okta Admin Console - Confirm that you have administrator access to Okta's Admin Console. If you do not have an Okta account, you can create a free Okta Trial account or Okta Developer account.
- (Recommended) Use the same email address for your Mapbox administrator account as your Okta administrator account.
How to set up SSO for Mapbox on Okta
1. Add Mapbox app to your Okta instance
Log in to your Okta account as an administrator (with administrator access).
Search for the Mapbox app in the OIN store

Add Mapbox app in

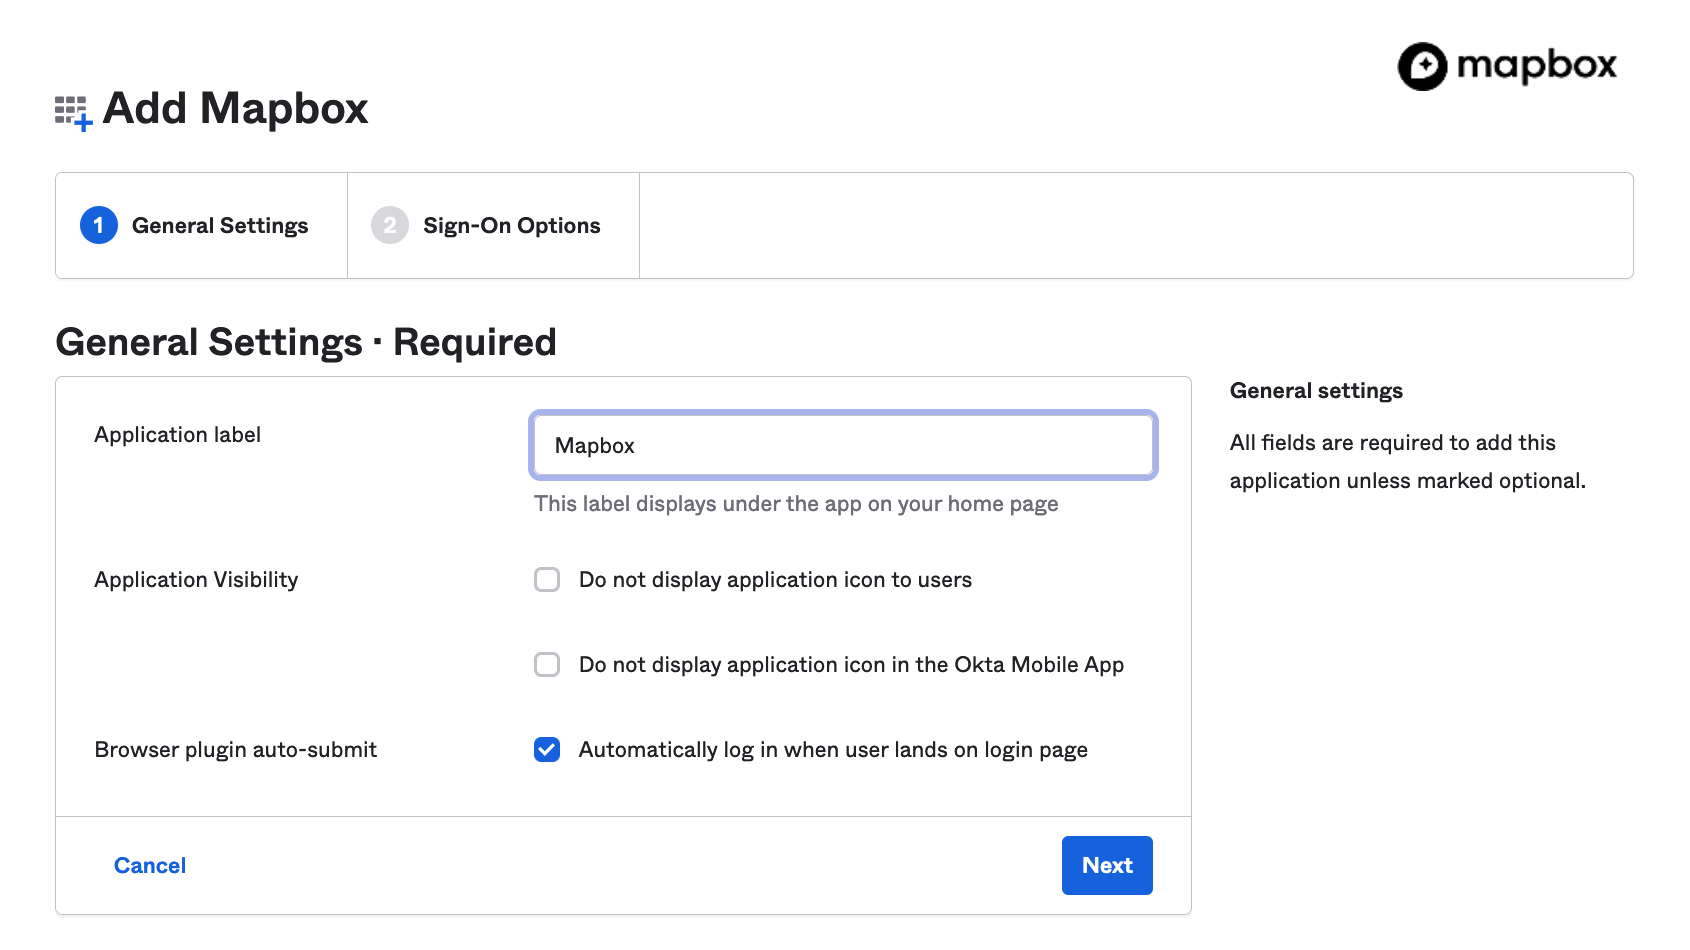
Leave the default settings in the first page and click Next.
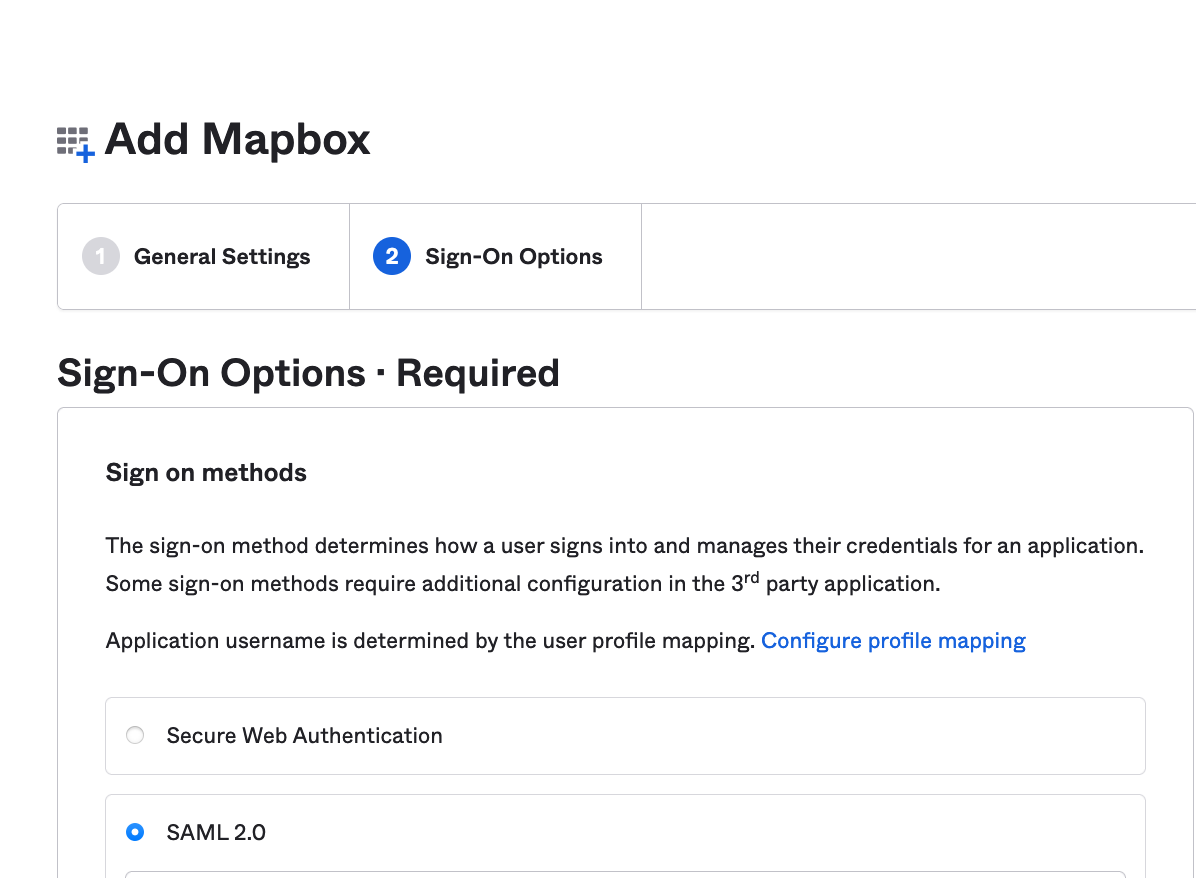
Select SAML 2.0 option
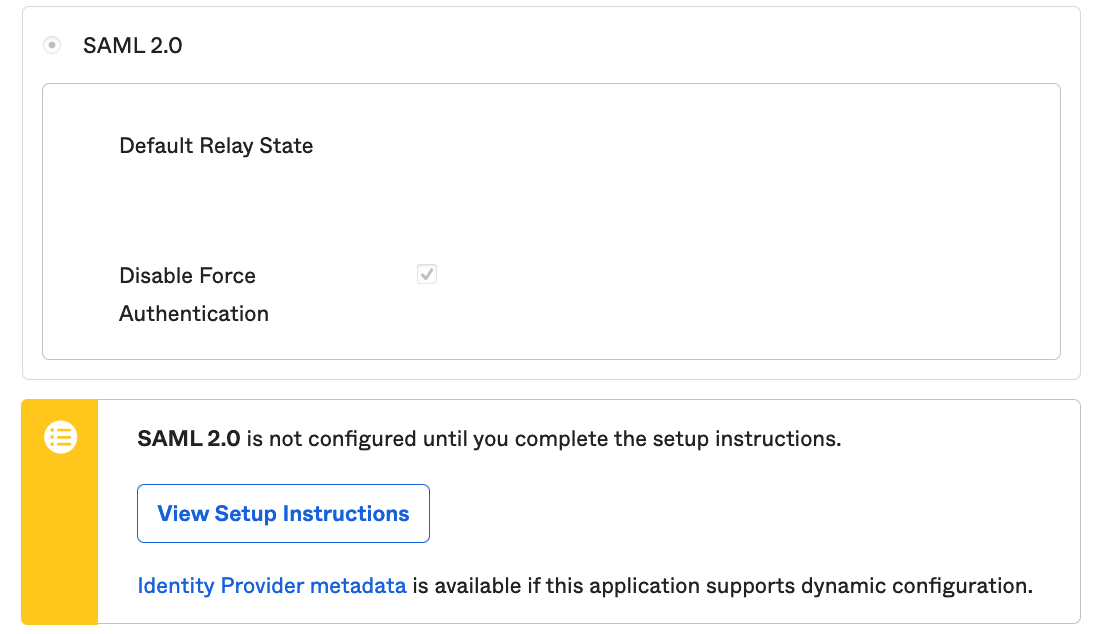
Leave the default settings and click Done.
Then click on the "Sign On" tab.

Click on "View Setup Instructions".
You will then be sent to a customised version with your instance's details prefilled in this webpage - https://saml-doc.okta.com/SAML_Docs/How-to-Configure-SAML-2.0-for-Mapbox.html.
Take note of these details on the page, you will need to copy and paste these into Mapbox later.
- Identity provider sign-on URL
- Issuer ID
- X.509 certificate
It will look something like this:
- Identity provider sign-on URL - https://youroktapage.com/app/mapbox//sso/saml
- Issuer ID - http://www.okta.com/
- X.509 certificate - -----BEGIN CERTIFICATE-----
<yourcertificate>
-----END CERTIFICATE-----
2. Set up profile mapping settings on Okta
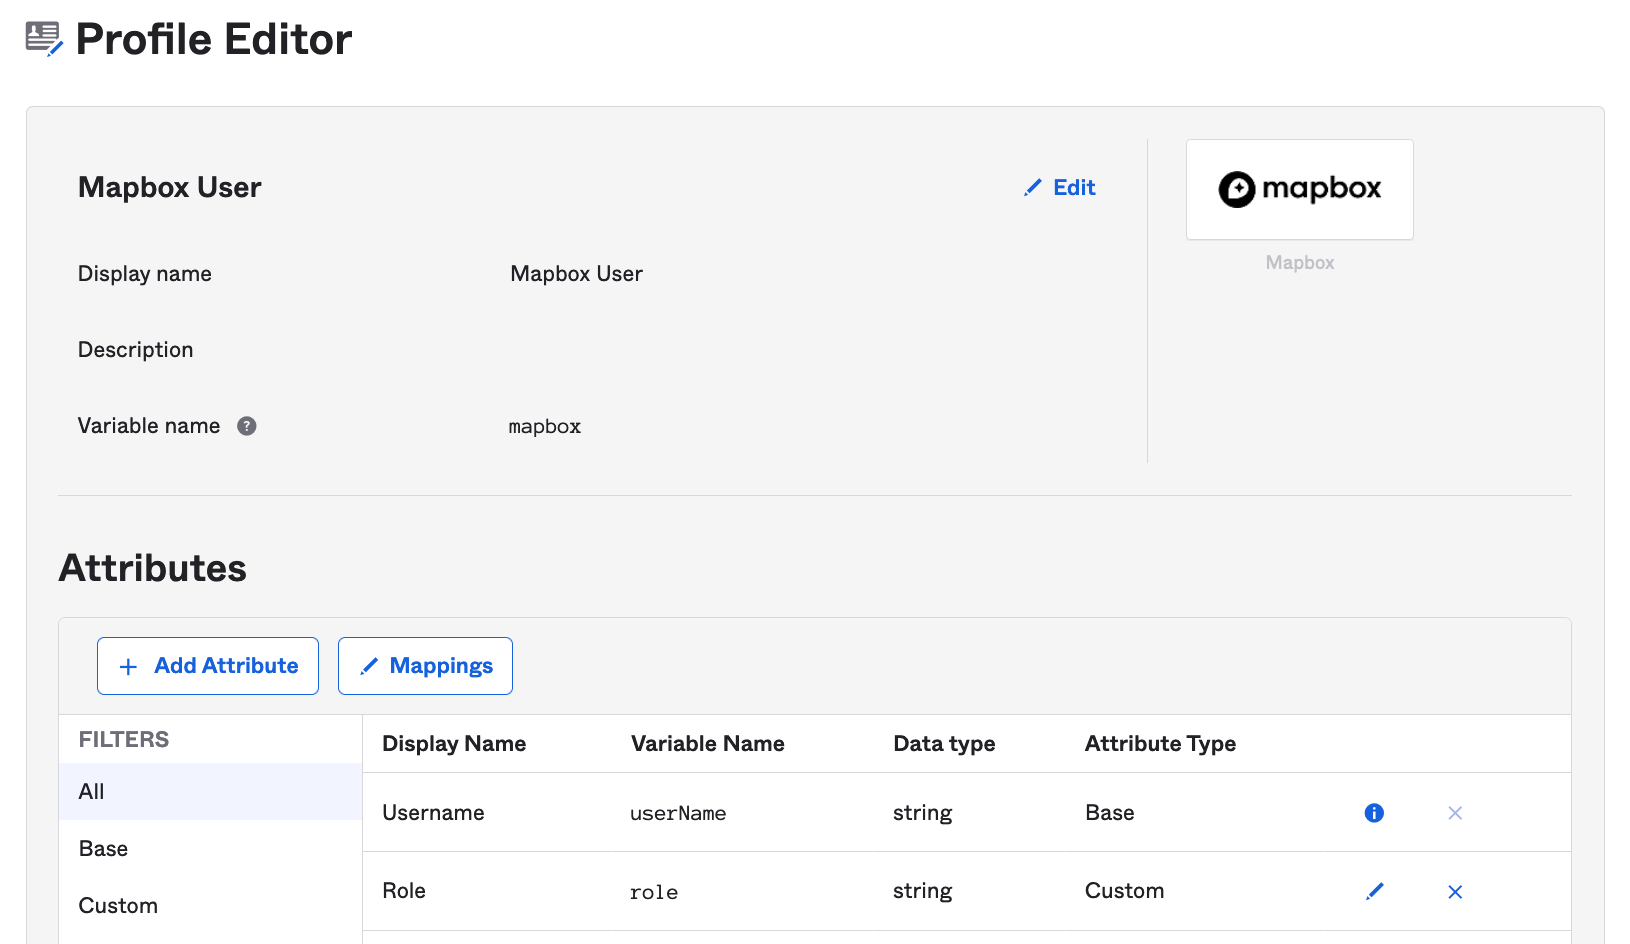
Add "Role" as a new custom field on the Mapbox App Profile
Mapbox checks for a "role" field with their SSO (SAML assertion) requests, so we need to create this as a custom field in Okta. That way, the role detail is transferred to Mapbox in the SAML assertion.
In Okta, navigate to Directory > Profile Editor.
Search for the mapbox app, then click Profile.
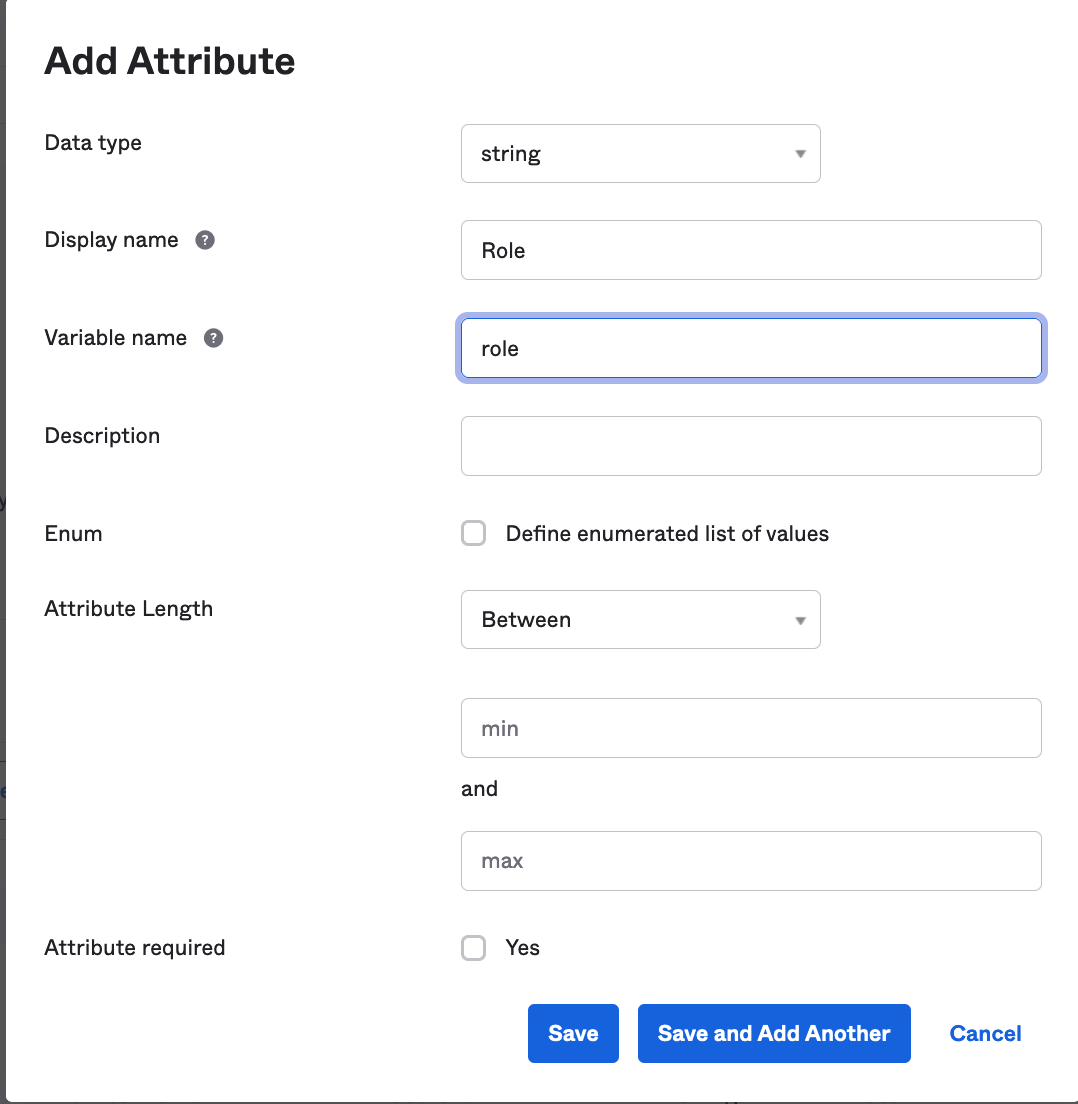
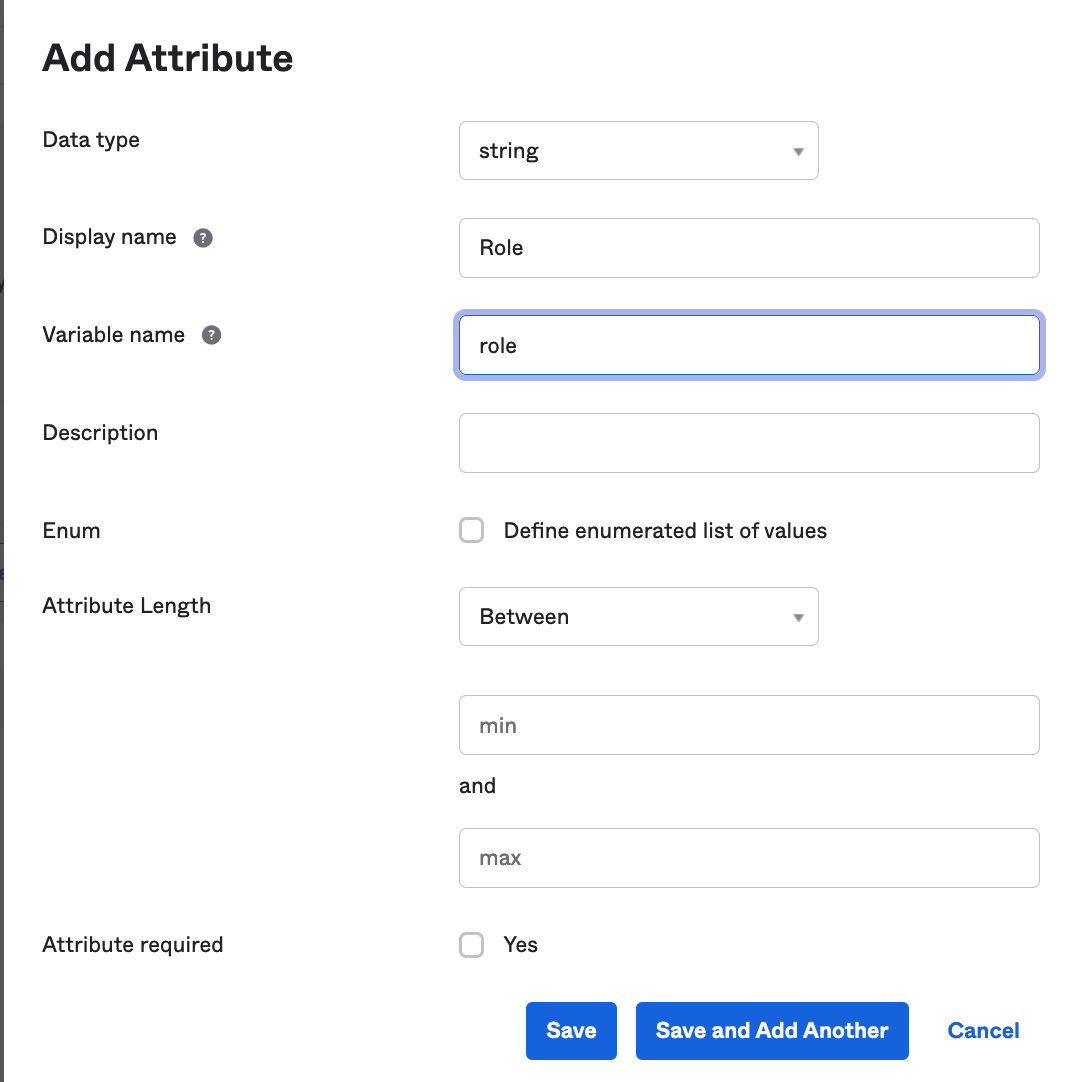
Fill in the details:
- Display name: Role.
- Variable name: role.
Click either Save
You will then get something like this.
Add "Role" as a new custom field on Okta User Profile
In Okta, navigate to Directory > Profile Editor.
Search for the Okta, then click Profile.

Fill in the details:
- Display name: Role.
- Variable name: role.
Click either Save.
You should then see Role added as a new field.

Fill in "Role" field
Now let's map the fields.
In Okta, navigate to Directory > Profile Editor.
Search for the mapbox app, then click "Mapping".
"Mapbox User Profile Mappings" will pop up on the screen.
Click on the "Okta User to Mapbox" tab.
Add in "user.role" to the mapping.
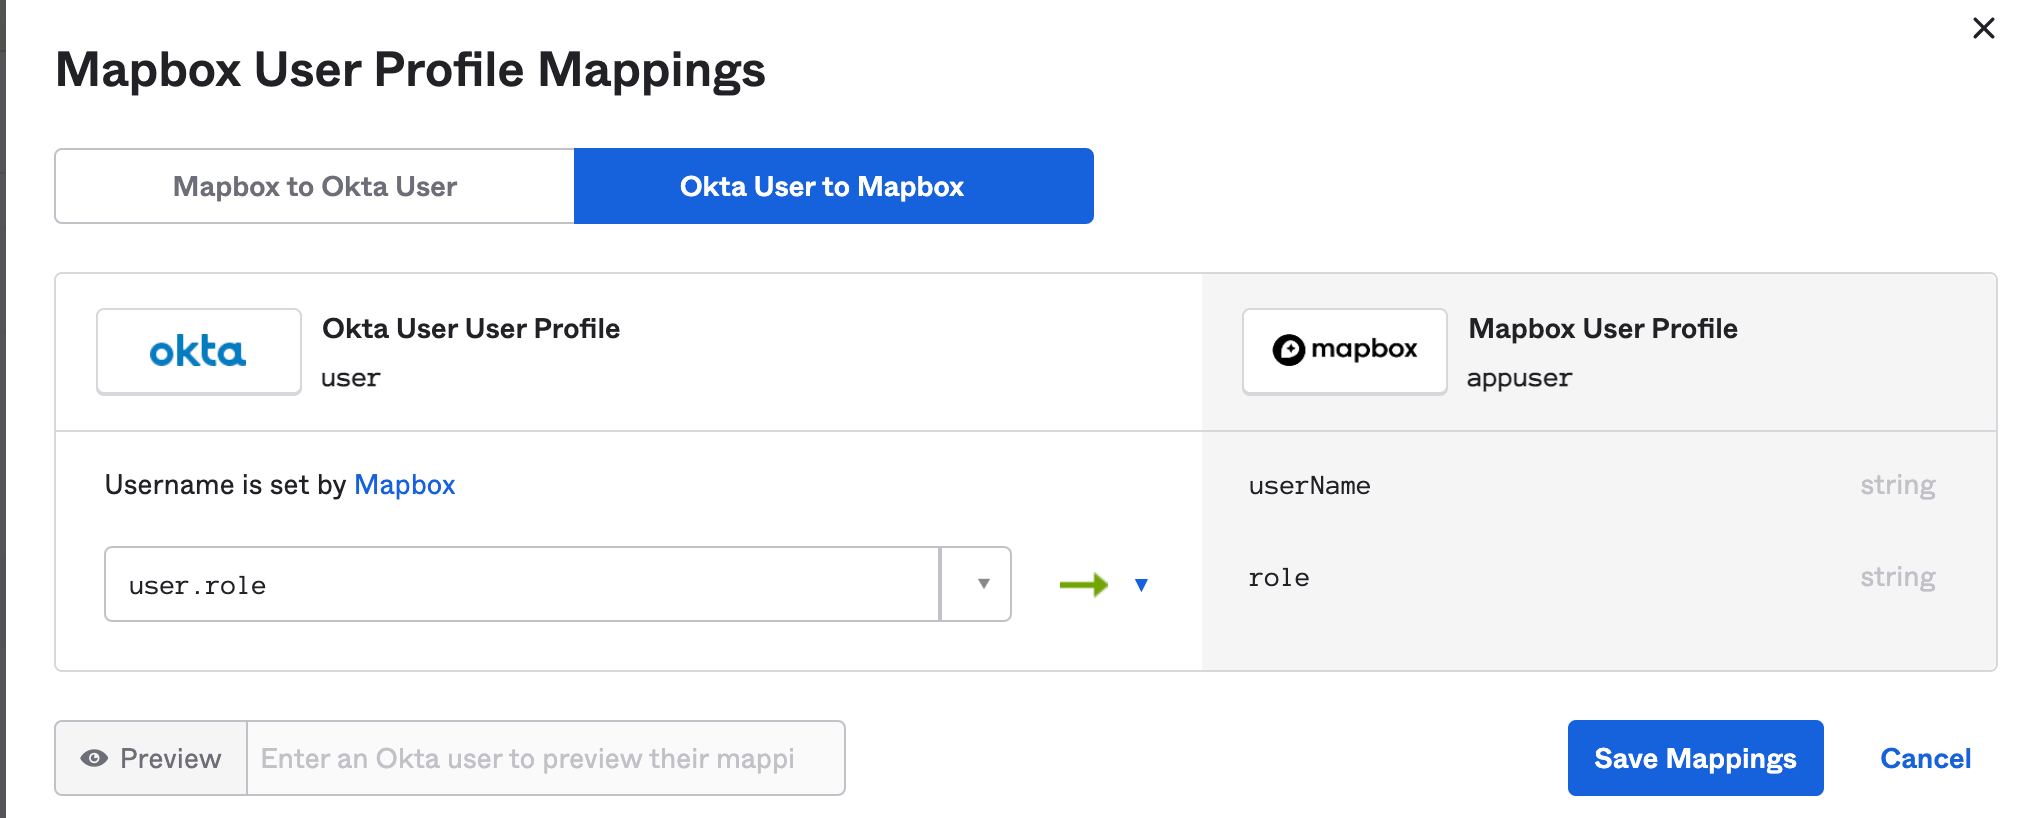
Select "Apply mapping on user create and update".

Now that the profile mapping is set for the "Role" field we can now make sure our users on Okta have something in this field.
In Okta, on a user account that you want use to log into Mapbox, let's fill the "Role" field. You can find your users on Okta by going to Directory> People > and then clicking on your desired user.
Then click on the "Profile" tab.

Then click on "Edit".
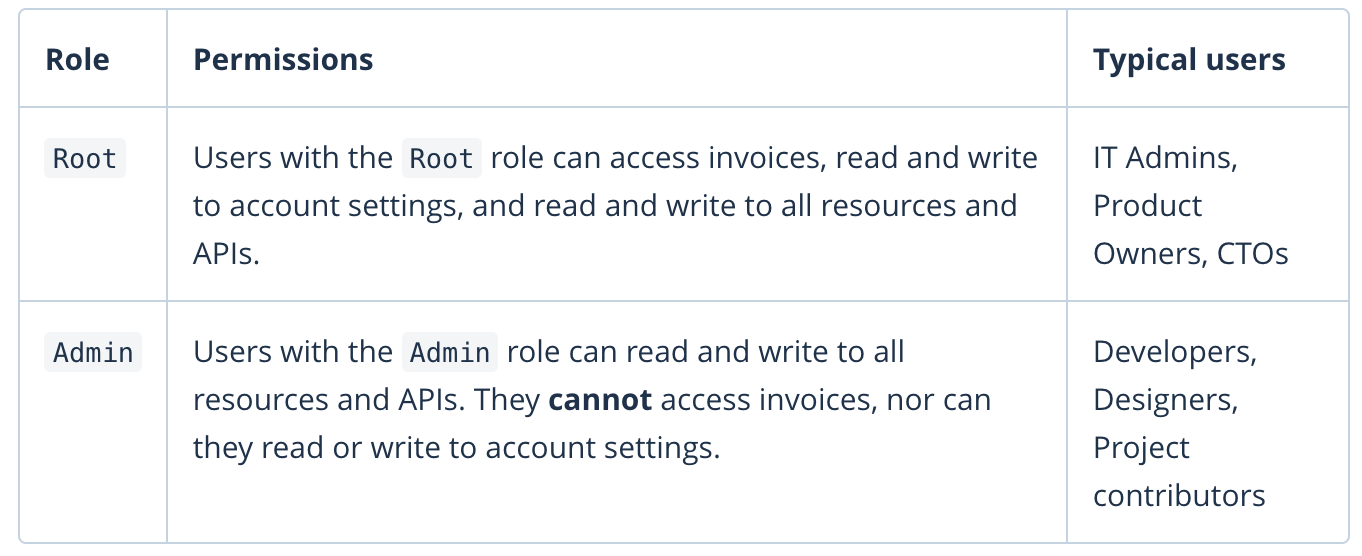
Based on the role types guidance in Mapbox, you can fill them in as "Root" or "Admin".


Why?
- Assign yourself the Root user role in your IdP (Identity Provider, in this case Okta) so you will have access to settings.
- Assign most other users the Admin user role so they will not have access to settings.

3. Set up SSO settings on Mapbox
Log into your Mapbox account
Log in to your Mapbox account as an administrator (with administrator access).
Open Single Sign-On Settings
In Mapbox, open Single Sign-On (SSO) settings.
You will find this Settings> Security> Edit Single Sign On
https://account.mapbox.com/settings/security
Edit Single Sign-On Settings
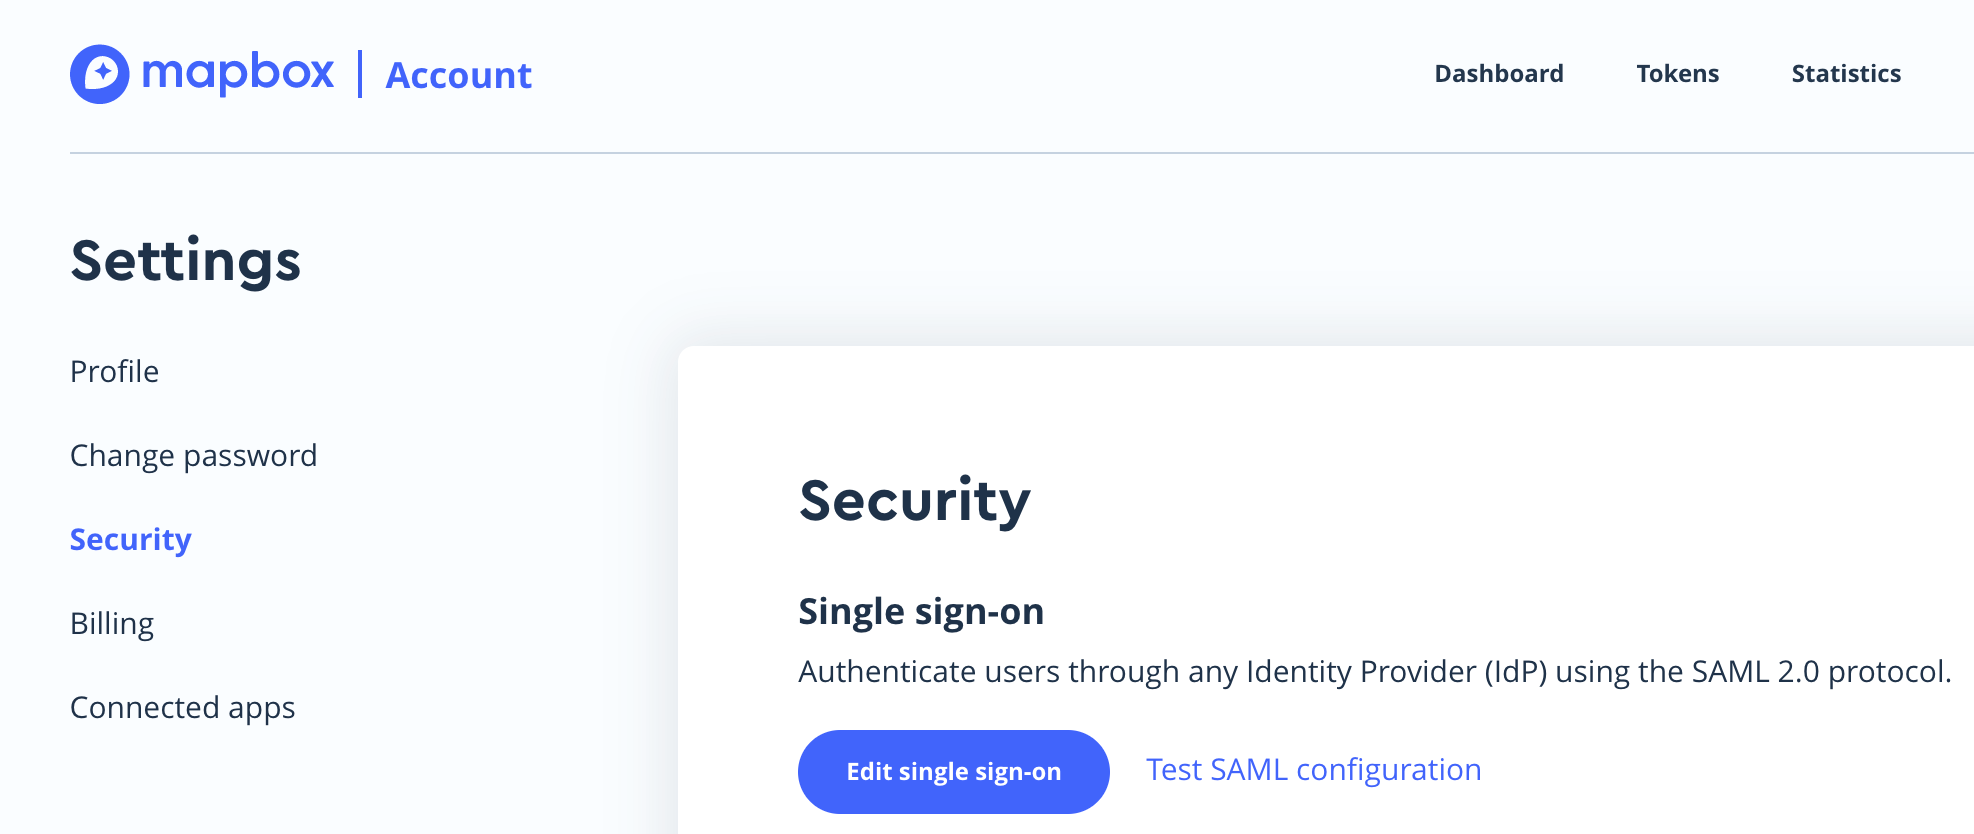
Click on "Edit Single Sign-On" settings.
Then copy SSO settings from Okta and paste it into Mapbox's sections. 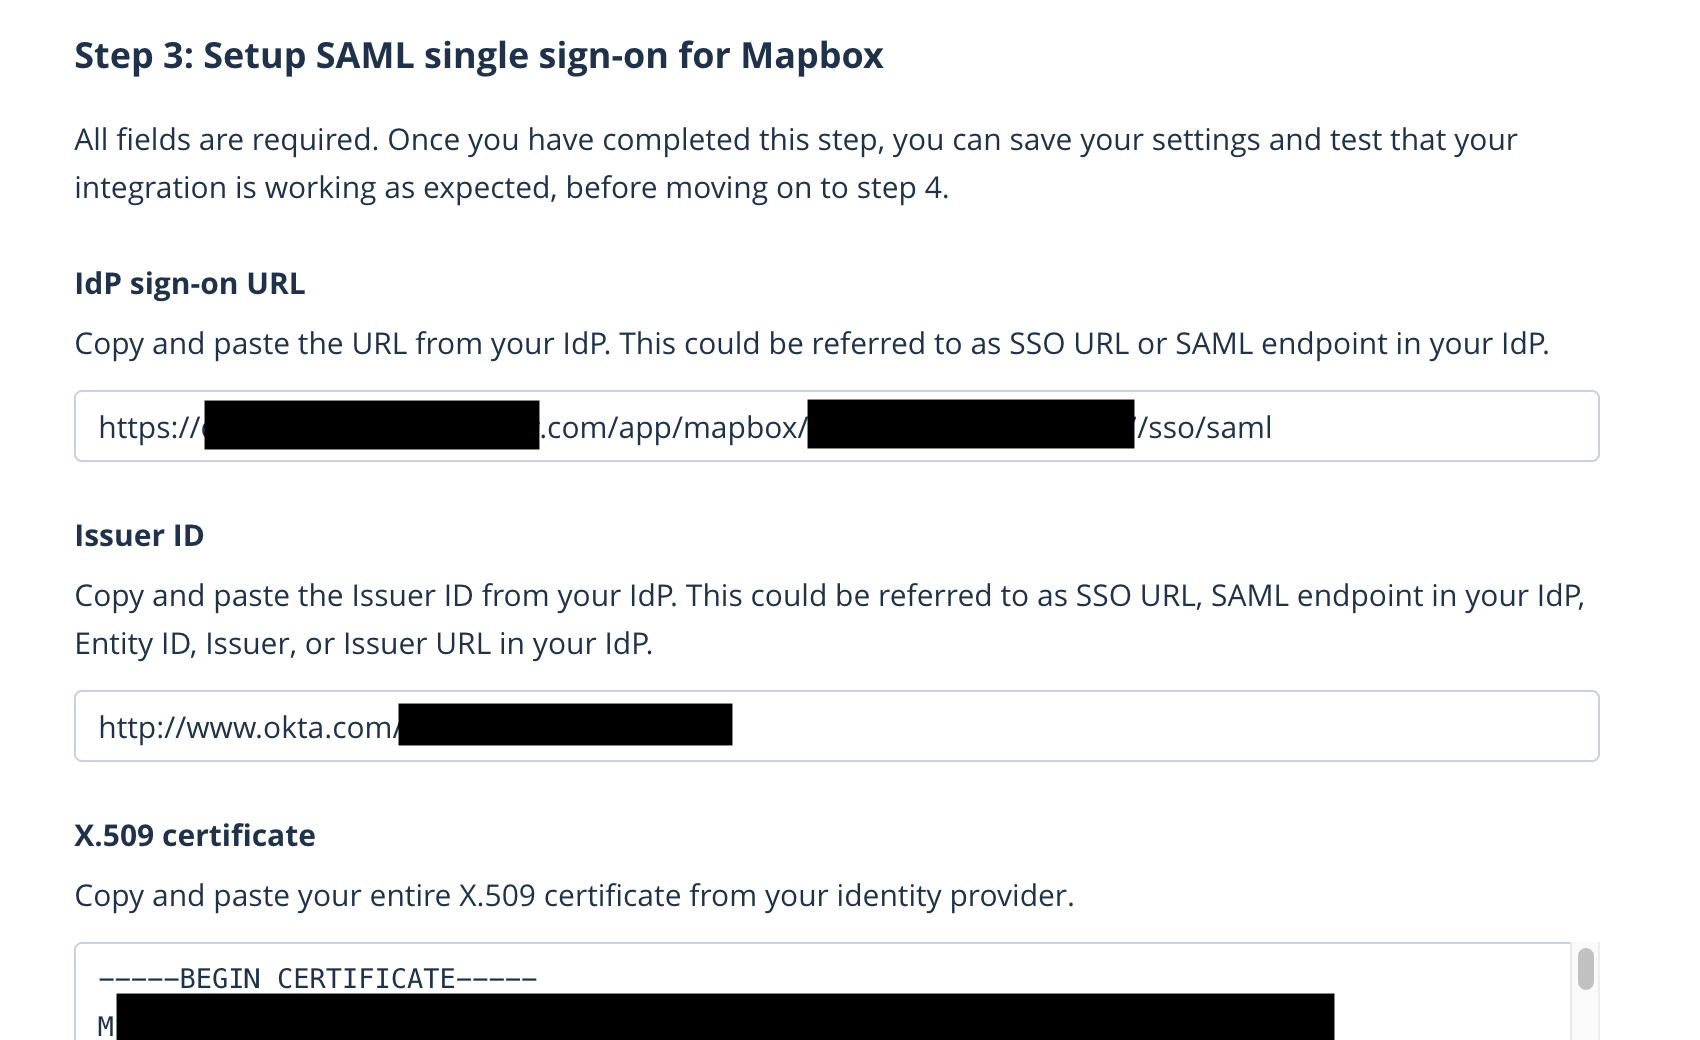
Be sure to include — BEGIN CERTIFICATE — and — END CERTIFICATE — when pasting your X.509 certificate into the Mapbox form.
Then click "Enable single sign-on" when you're ready to submit the form.
4. Test that SSO is working on Mapbox
When you are ready, test that it works.
Click on "Test SAML configuration".

If it works, you will be logged in successfully to your Mapbox account.
(Optional) Test that SSO for Mapbox is working on Okta
We can now also test this in your Okta end user dashboard. To do this, in Okta, let's assign a user to the application.
Go to our "Mapbox" application via Applications> Applications.
Go to "Assignments".

Select "Assign" and "Assign to People".
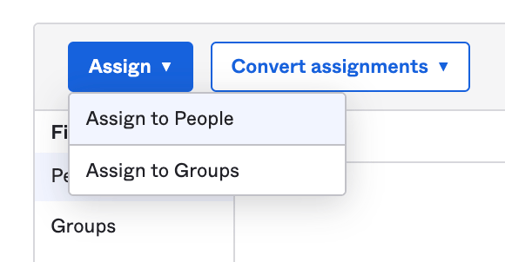
Select our test user, click "Assign" and then "Done".

Now let's log into our Okta instance as a test user. You may need to refresh your browser if you had the browser window already open.
Then click on "Mapbox" application icon (chiclet).

Troubleshooting:
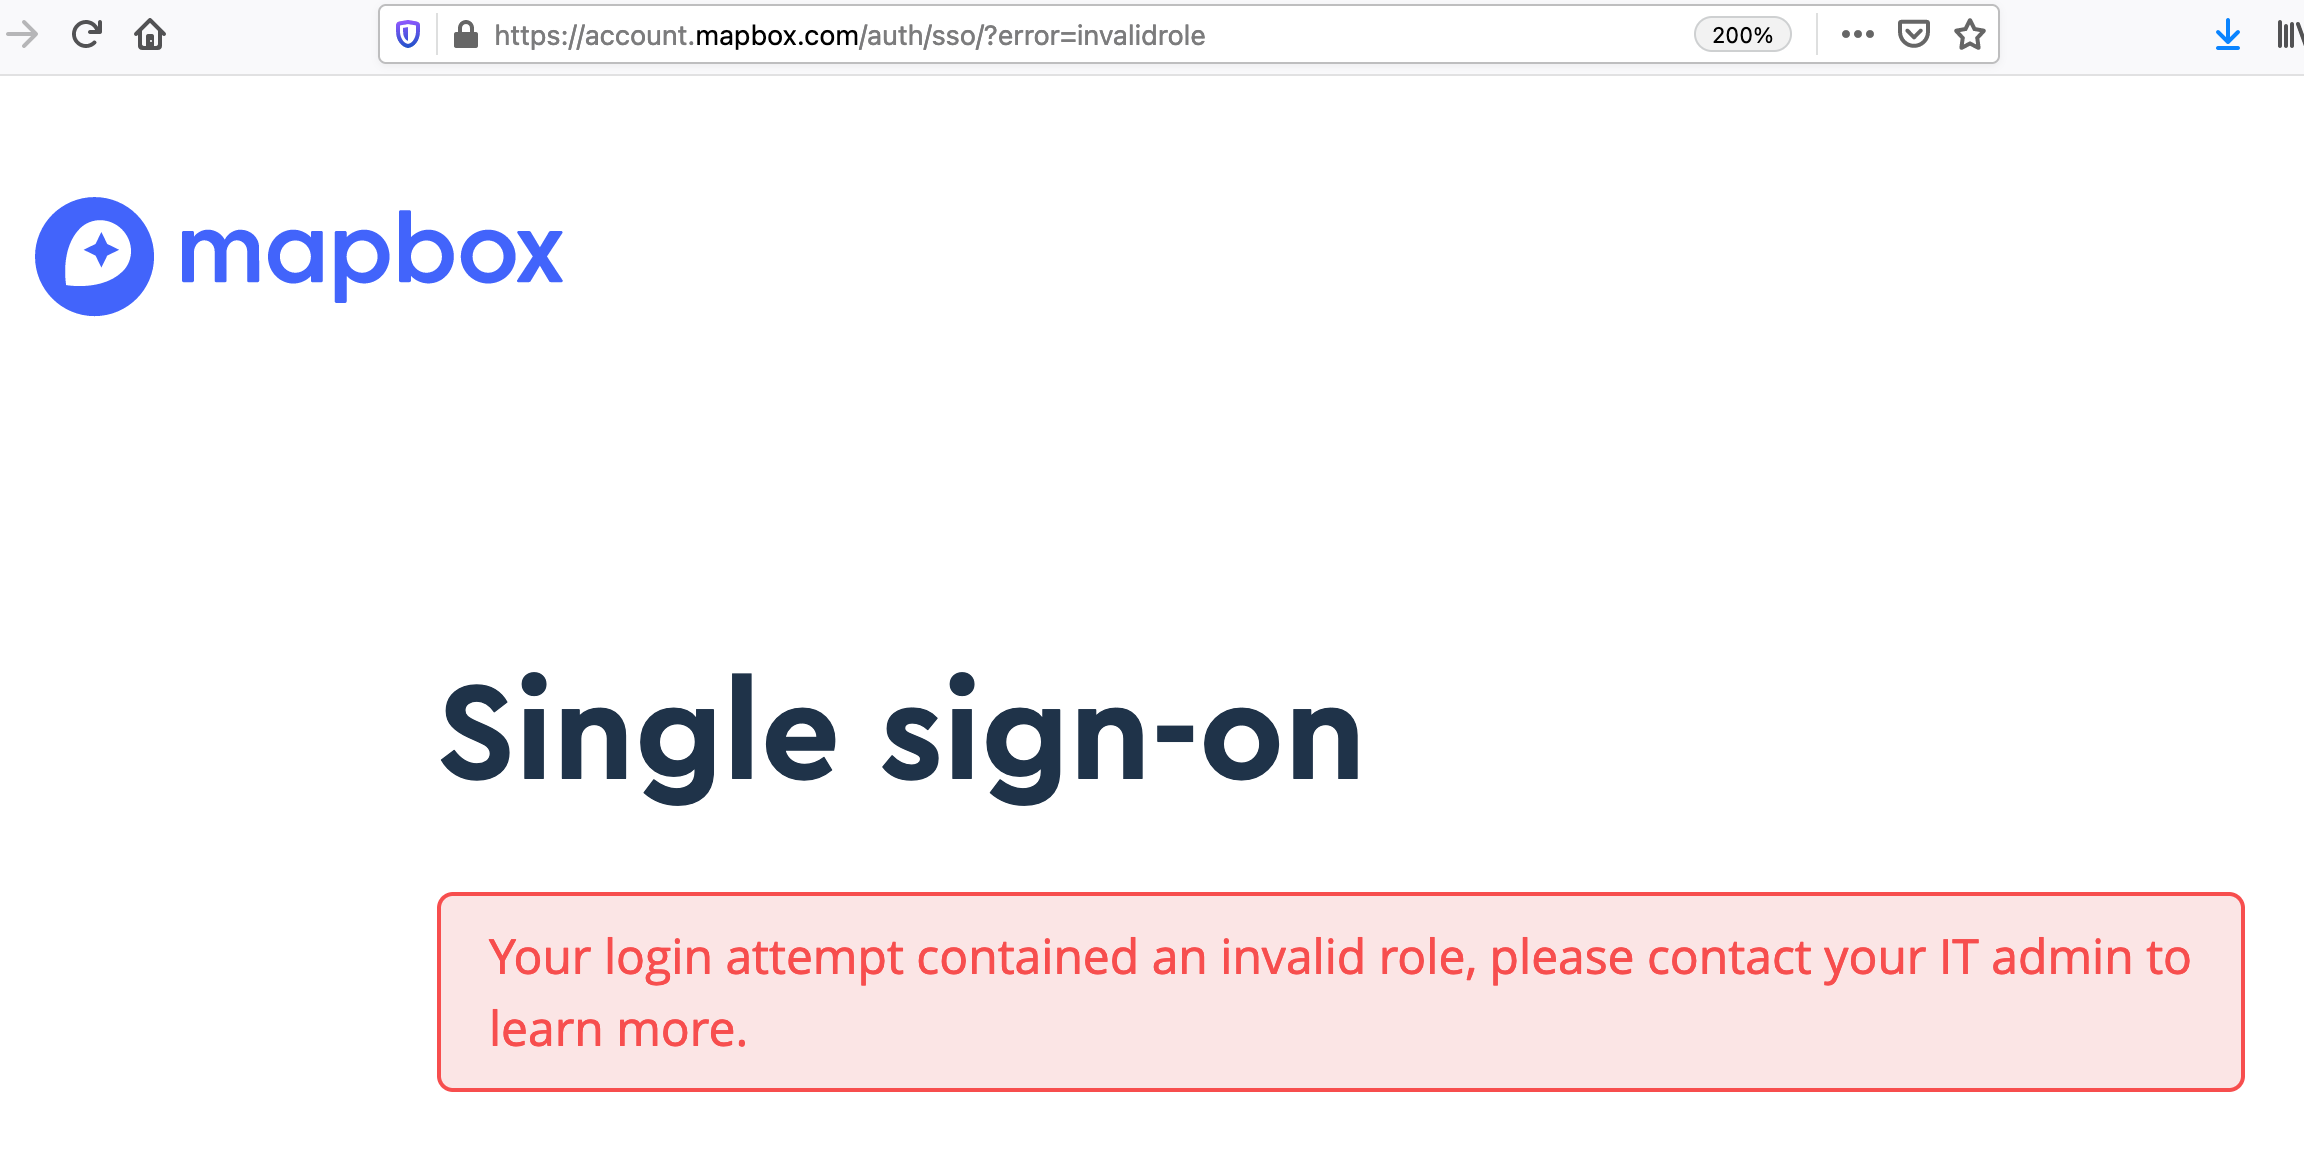
If you receive the following error, then you need to make sure you have set up the 1) create a custom field for "Role", 2) mapped the fields from Okta to Mapbox, and 3) make sure the user has "Admin" or "Root" on the field and it is not blank.
"Your login attempt contained an invalid role, please contact your IT admin to learn more."
Additional resources:
- How to Configure SAML 2.0 for Mapbox, https://saml-doc.okta.com/SAML_Docs/How-to-Configure-SAML-2.0-for-Mapbox.html
- Setting up SAML SSO for your Mapbox account, https://docs.mapbox.com/accounts/guides/settings/#setting-up-saml-sso-for-your-mapbox-account


