What is Microsoft Intune MDM?
How Microsoft Intune MDM works with Okta
- Microsoft Intune works with Okta by sending Okta a trust signal once Microsoft Intune has validated and enrolled a user's device onto their platform.
- From there, in Okta, we can prompt users and check the user for MFA (multifactor authentication), and then allow them access to the resources that they should have access to.
What does a user journey look like?
This is an example of a user's journey with Microsoft Intune integration with Okta.
- User signs into Okta End User Dashboard.
- Okta checks for MFA (multifactor authentication), based on a Sign On Policy (no changes required).
- User clicks on application.
- Okta checks for MFA, based on an Application Sign On Policy.
- User passes MFA, and is allowed access to the application.
- Prerequisites
- Add Microsoft Intune to your Okta instance
- Set up settings on Microsoft Intune
- Enrol device with Microsoft Intune
- Set up Microsoft Intune settings on Okta
- Test and confirm that it is working
Prerequisites
Before you can start setting up Microsoft Intune integration with Okta, we need to check the following:
- Access to Microsoft Endpoint Manager Admin Console - Confirm that you have administrator access to Microsoft Endpoint Manager Admin Console. https://endpoint.microsoft.com/#home
- Access to Okta Admin Console - Confirm that you have administrator access to Okta's Admin Console. If you do not have an Okta account, you can create a free Okta Trial account or Okta Developer account.
1. Add Microsoft Intune to your Okta instance
Log in to your Okta account as an administrator (with administrator access).
Go to Security> Device Trust.
Enable Device Trust for your device type
Click "Edit" on the applicable device type that you want to enable Device Trust for.
- Windows devices
- Apple iOS/ Android devices
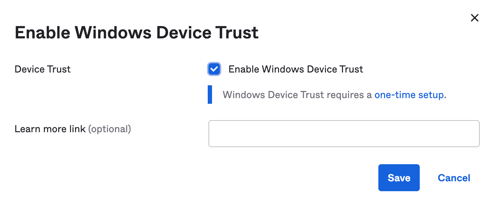
Windows devices
- Device Trust - "Enable Windows Device Trust"
- Learn more link (optional) - You can leave blank, please a link here if you would like.
Apple iOS/ Android Devices
To configure and enable Device Trust for Android and/or Apple devices, we will need to configure these MDM Provider settings.
Click "Edit".
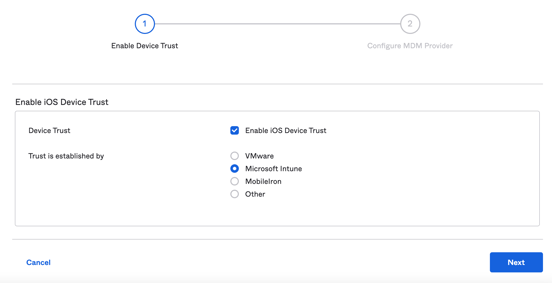
- Select Mobile device management provider - Microsoft Intune
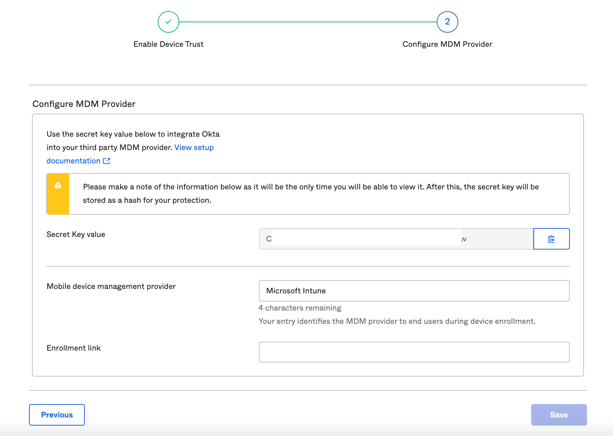
- Enrolment link - https://enrollment.manage.microsoft.com/enrollmentserver/discovery.svc For other MDM, you would enter a web address for redirecting end users with unenrolled devices. For example, you may want to redirect these users to a page with enrolment instructions or the enrolment page of your selected MDM (assuming the MDM provider supports web-based enrolment).
Copy "Secret Key value".
2. Set up settings on Microsoft Endpoint Manager
Log into your Microsoft Endpoint Manager account
In a new browser tab, log in to your Microsoft Endpoint Manager account as an administrator (with administrator access). https://endpoint.microsoft.com/#home
Your Microsoft Intune settings will be managed within the Microsoft Endpoint Manager
We will be doing two key things:
- Adding Okta Mobile application
- Create an app configuration policy
1. Adding Okta Mobile application
In Microsoft Endpoint Manager Admin Console, go to Apps > App.
Under Apps> Apps.
Click +Add

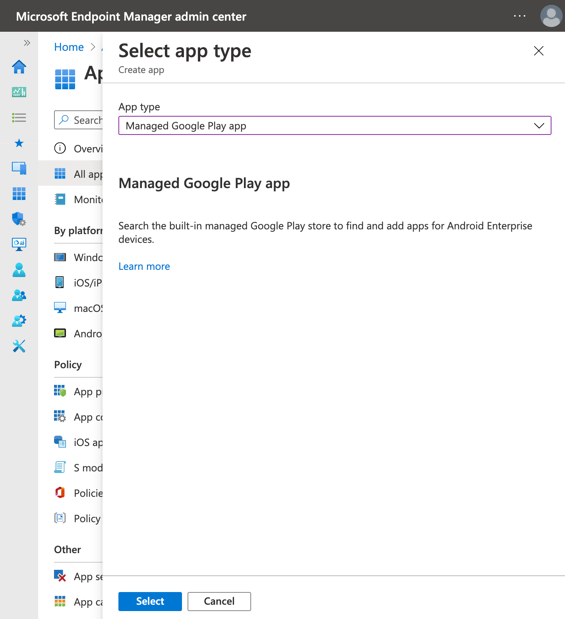
Select "Managed Google Play app" from the drop down menu.
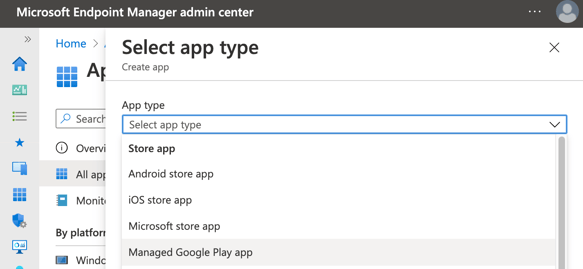
Once you have selected "Managed Google Play app", click "Select".
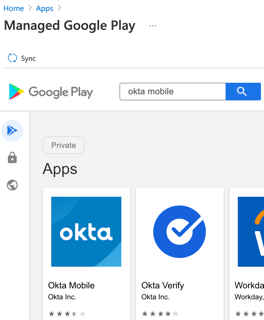
Search for "Okta Mobile", and click Approve and Approve.
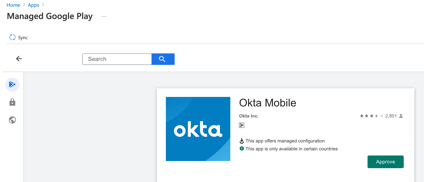
You should then see it available for you in the Apps> Apps summary page.

We can now create an app configuration policy that will refer to our "Okta Mobile" app.
2. Create an app configuration policy
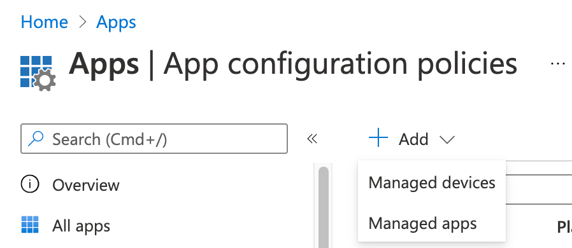
In Microsoft Endpoint Manager Admin Console, go to Apps > App configuration policies > Add > Managed devices.
Click "+ Add" and select "Managed devices".
Fill in your "Create app configuration policy" details and click Next.
- Name - Give your policy a name, for example "Android Policy".
- Description - You can fill in something here or leave it blank.
- Platform - Android Enterprise
- Profile type - All Profile Types (or one of the other options if you like)
- Targeted app - Select your Managed Google app as "Okta Mobile".
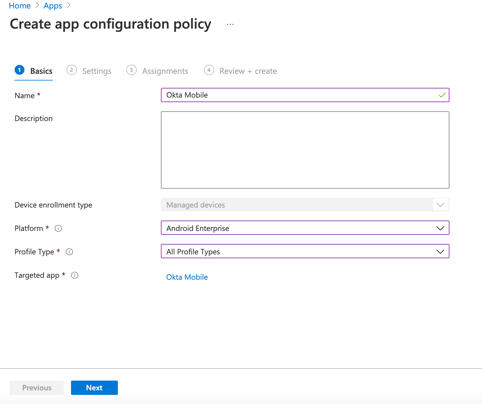
Click Next.
You can now set your "Configuration Settings".- Permission - You have the option to set the Permission state for each permission. You can choose from Prompt, Auto grant, or Auto deny.
- Configuration settings format - Select"Use configuration designer" or "Enter JSON data" from the dropdown menu.
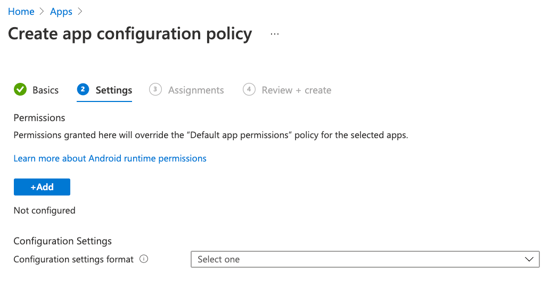
Select "Use configuration designer" from the dropdown menu and click Next.

On the pop up that pops up on the right of your screen, tick each of the checkboxes and OK.
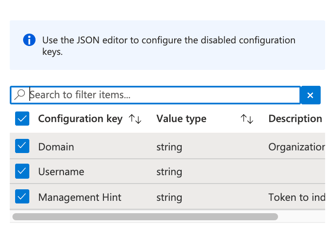
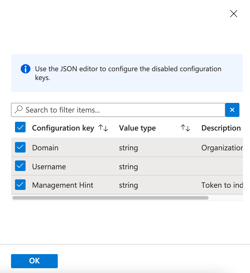
Then you will see options available for you to populate.
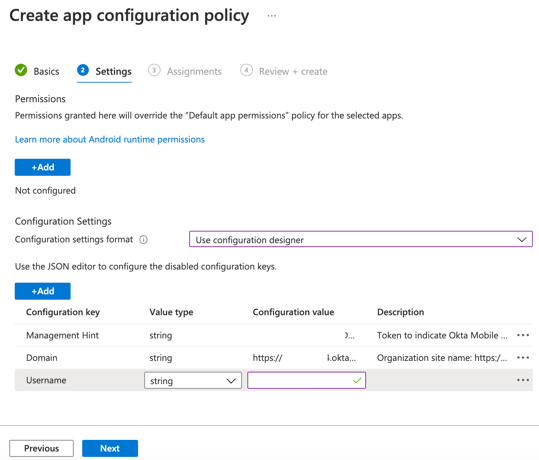
Please replace the text boxes "configuration value" with your Okta details.
- Domain (string) – Enter the URL of your Okta org. https://yourdomain.okta.com
- Username (string) – Enter your username for your Okta org. yourdomain
- Management Hint (string) – Enter the Secret Key value that you saved from Okta "Device Trust" page. This secret key token will indicate that Okta Mobile is managed by an MDM (Mobile Device Management) Provider.
If you prefer to "Enter JSON data" from the dropdown menu and click Next.

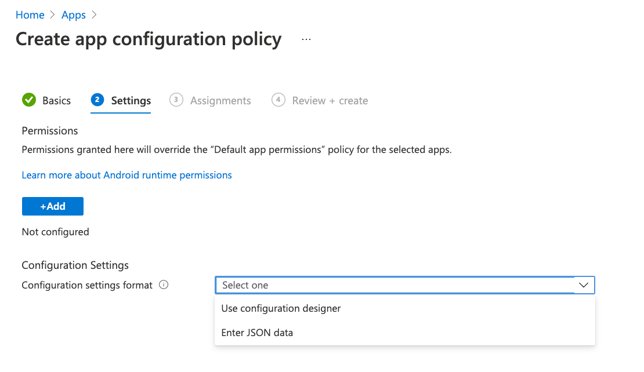
If you selected "Enter JSON data", then you will now be able to enter XML data.
For Android, you will use this xml format.
{ "kind": "androidenterprise#managedConfiguration", "productId": "app:com.okta.android.mobile.oktamobile", "managedProperty": [ { "key": "siteName", "valueString": https://yourdomain.okta.com }, { "key": "username", "valueString": yourdomain }, { "key": "managementHint", "valueString": secret-key-goes-here } ]}For Apple, you will use this xml format.
<?xml version=“1.0” encoding=“UTF-8"?>
<!DOCTYPE plist PUBLIC “-//Apple//DTD PLIST 1.0//EN” http://www.apple.com/DTDs/PropertyList-1.0.dtd>
<plist version=“1.0">
<dict>
<key>Domain</key>
<string>https://yourdomain.okta.com</string>
<key>managementHint</key>
<string>“secret-key-goes-here”</string>
</dict>
</plist>
Under the "included groups" section, click on "Add all users" (or your preferred groups).
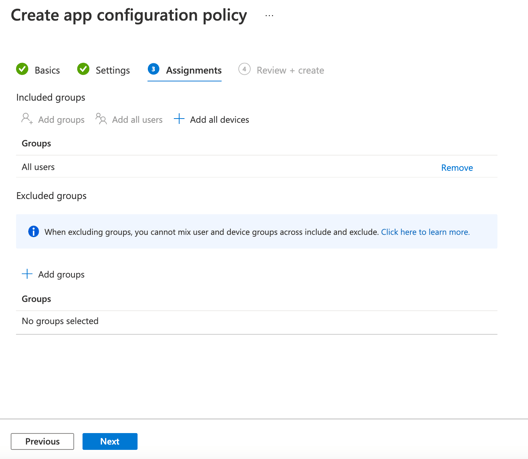
You will then be presented a "Review + create" page, review the details and then click on "Create".
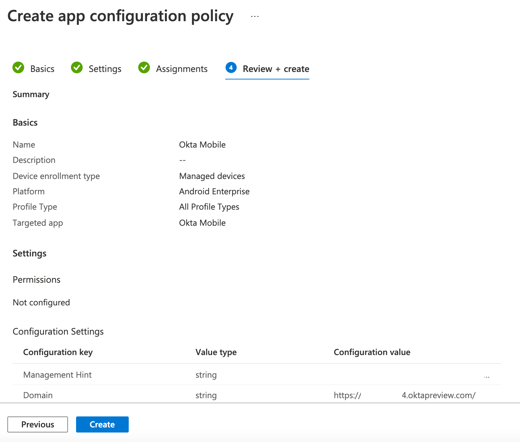
Once you have saved your app configuration policy. You should get a summary page like this:

We can now start enrolling devices onto Microsoft Intune to test.
If you have not already, we will need to first configure Microsoft Intune with Android and/or Apple enrolment, as that will allow us to manage devices through their operating system platforms.
I have detailed this optional section at the end of this article which walks you through enrolment for Android, Apple and Windows 10 devices.
3. Enroll a device with Microsoft Intune
Assuming you have done configured Google and/or Apple to allow us to manage devices on their operating systems, then we can start enrolling a device to test with Microsoft Intune.
- Add users to Microsoft Intune to manage
- Install Company Portal on our mobile device
If you need help enrolling your device, I have also written a guide to share how you can enroll your devices into Microsoft Intune here.
Add users to Microsoft Intune to manage
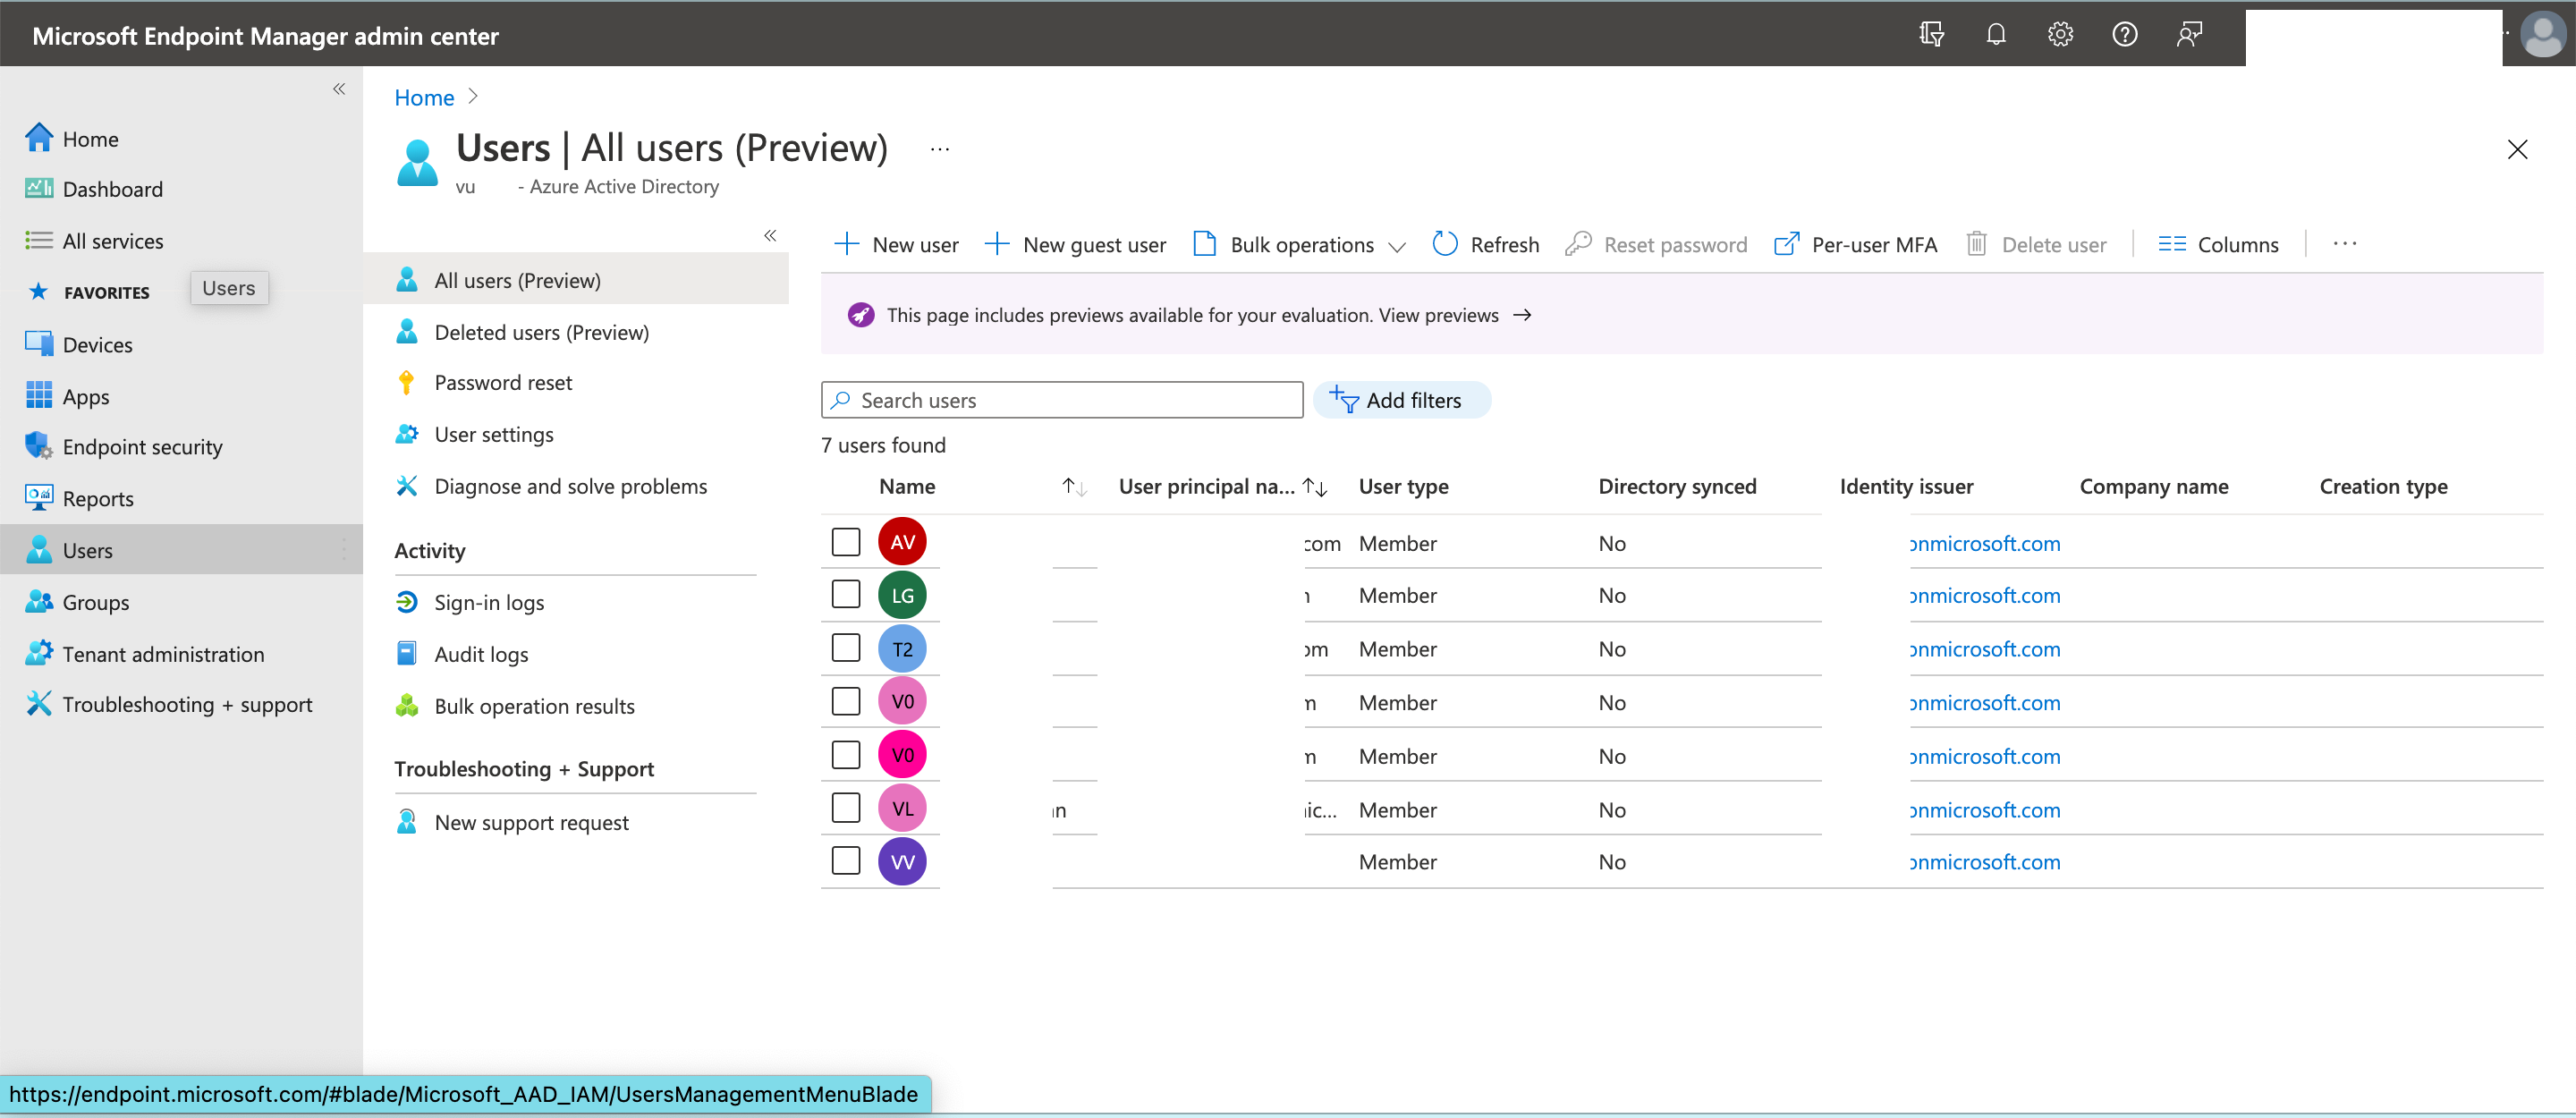
If you have not already added users. You can add users to Microsoft Intune to manage.
You will notice in my environment that my users are stored in Azure Active Directory, as these are also my Microsoft Office 365 users. This may be the case for you as well, as that is perfect, as we can use one of those users as our test user to log into Microsoft Intune on our mobile device later on.
Install Company Portal on our mobile device
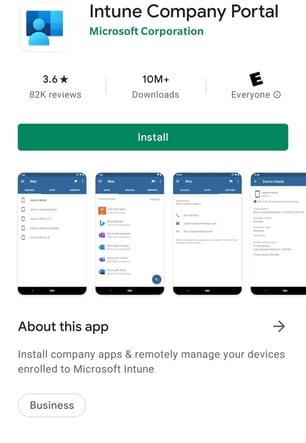
On your Android mobile device, open Google Play store.
Search for "Intune Company Portal" by Microsoft and install this on your Android phone device.
Click "Install".
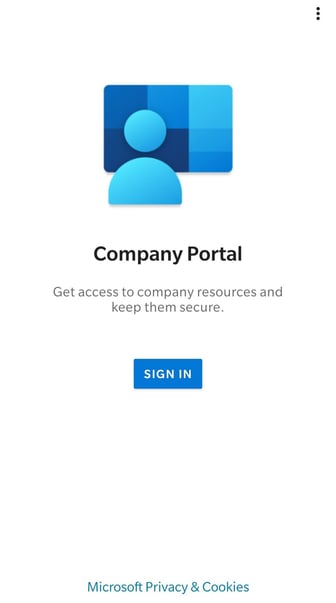
Once installed, we can sign into our device. Click "Sign in".
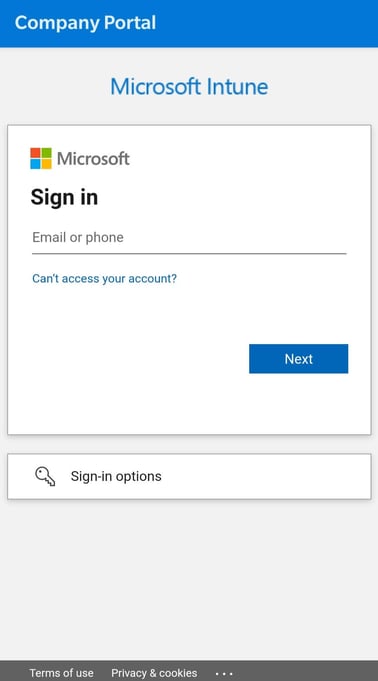
We will be asked to sign in with our Microsoft credentials.
We will use one of our test users from our Microsoft Azure Active Directory here.
It will inform me to sign into my organisation's sign in page.
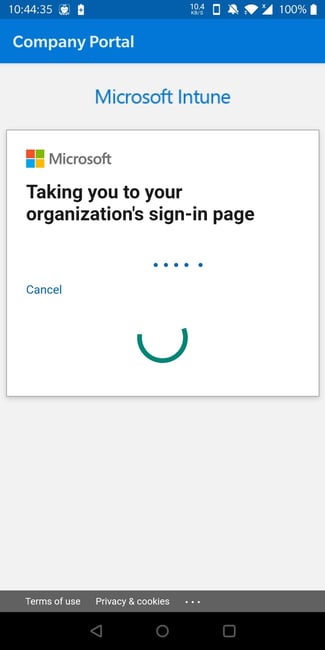
As I configured my Okta to be the Identity Provider for Microsoft Office 365 via WS-Federation Single Sign On (SSO) integration, it will prompt me for my Okta username and password. I will log in with the corresponding test user that I have in Okta and Microsoft Azure Active Directory.
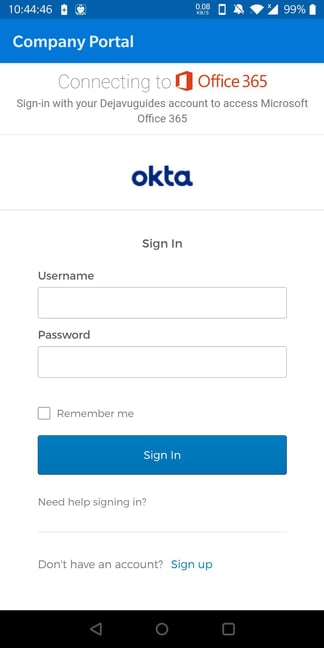
After entering my username and password successfully, I may be prompted for multifactor authentication (MFA), based on the Sign On policy in Okta.
I will complete my multifactor authentication (MFA) step. In this example, I will press "Yes" on my Okta Verify mobile application.
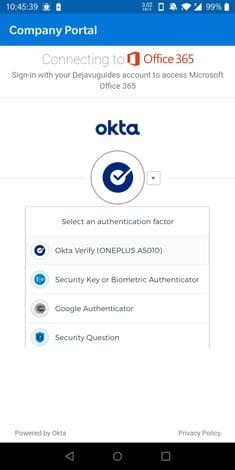
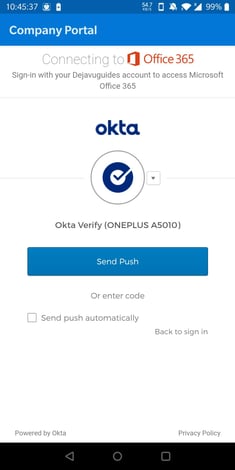
(Optional) You will notice that if I click on the arrow, I have some multifactor authentication factor options to choose from if I preferred to use another multifactor form factor that I may have more accessible to me.
I will wait for Microsoft to connect and sign me in now.
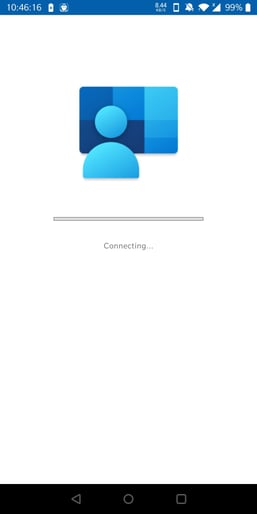
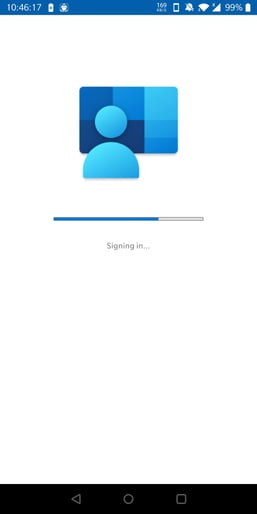
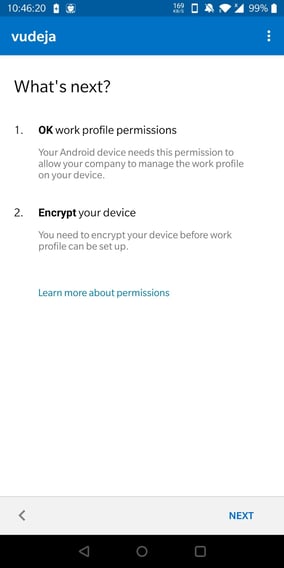
I will be then asked to:
- OK work profile permissions, and
- Encrypt my device
Click "Next".
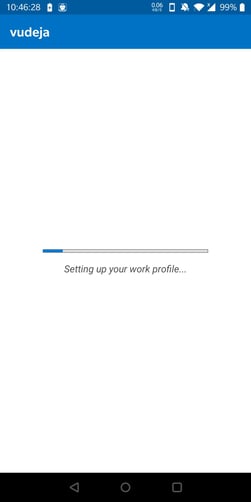
It will then advise me that it is creating a "work profile" on my phone.
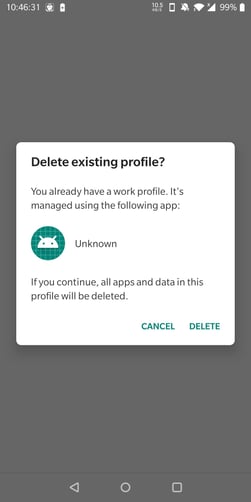
(Optional) It may ask me to "delete existing profile" if I ever had a work profile on my phone before, so click "Delete" if that is the case.
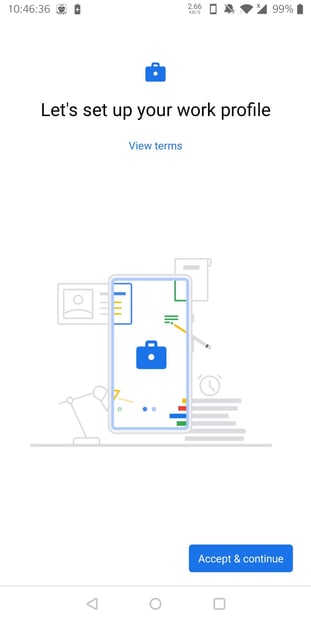
Once completed, I will be presented with the "Let's set up your work profile" screen. Click "Accept & Continue".
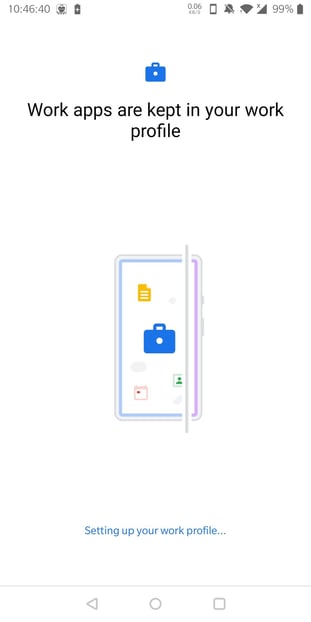
Wait for Google to set up your work profile. Then click "Next".
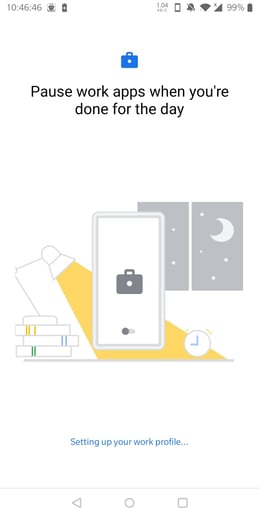
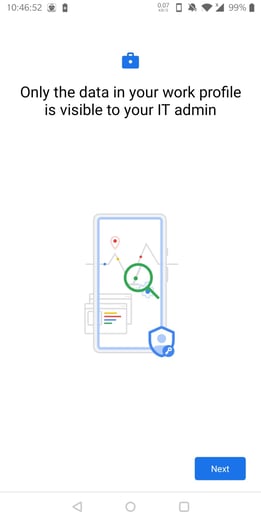
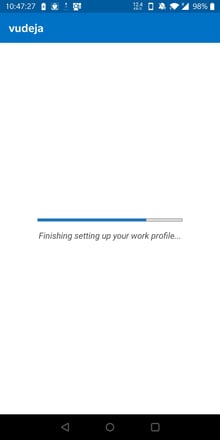
Company portal will then be updated so that Microsoft Intune will register your device.
Microsoft Intune will add your device to Company Portal.
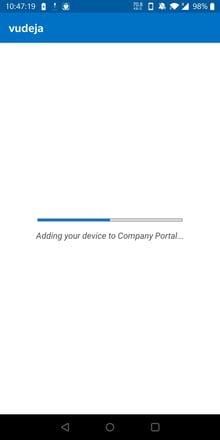
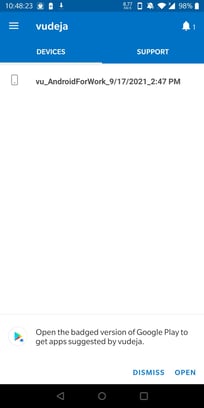
Once your device successfully added to Company Portal, you will get a summary with your device listed.
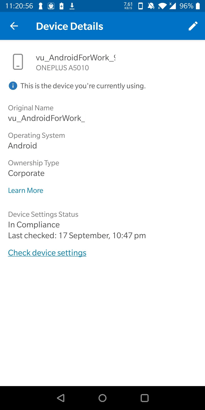
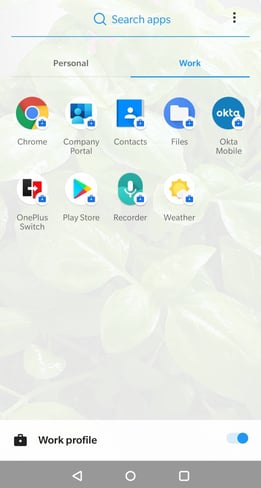
After a while, your Android phone will be populated with Company Portal's applications.
So you can check your test user's Android phone device has access to the applications that we assigned to users via Microsoft Intune now.

3. Set up settings on Okta
In Okta Admin Console, choose an application to set an Application Sign On Policy (App Sign On policy).
The Application Sign On Policy will allow us to configure more granular access to your app, including looking at Users/ Groups and their Location. However, for our testing, we will focus on the 1) Client types and 2) Device Trust. That is:- Client Type - Mobile (iOS, Android, Other mobile), Desktop (Windows, macOS)
- Device Trust - Any, Trusted, or Not Trusted.

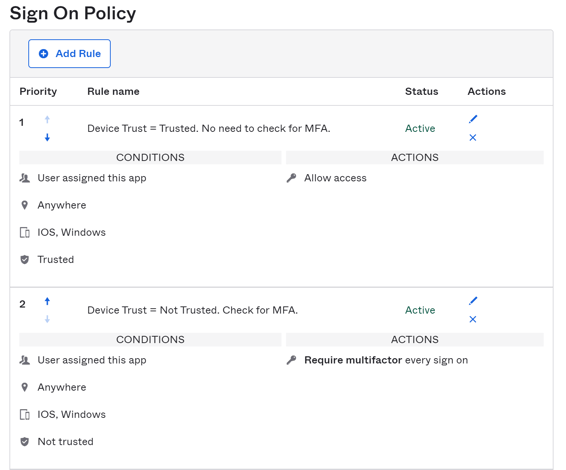
Let's create two "Application Sign On Policy" for our "Google Workspace" application, with each one with these goals:
- Device Trust = Not Trusted. Check for MFA.
- Device Trust = Trusted. No need to check for MFA.
In Okta Admin Console, go to Applications> Applications.
Scroll down and choose "Google Workspace" application (or your preferred application).

Click "Sign On" tab.
Scroll down and look for "Sign On Policy" section. This is where we will set our Application Sign On Policy (App Sign On policy).

Click on "Add Rule".
Let's create our first Application Sign On Policy rule. Then we can create our second Application Sign On Policy rule as well.
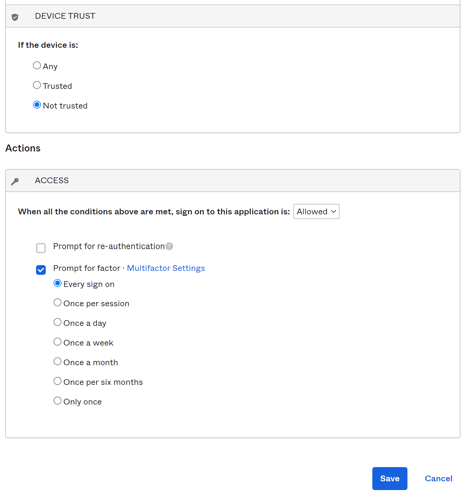
1. Device Trust = Not Trusted. Check for MFA.
We will set a rule here that will do the following logic check.
"IF I am using a Device that is Not Trusted,
THEN check for MFA."
To do this, we can fill in our App Sign On Rule as follows:
- Rule name - Device Trust = Not Trusted. Check for MFA.
- Conditions
- People - Who does this rule apply to? Leave as default, "Users assigned this app".
- Location - If the user is located: "Anywhere".
- Client - Leave the defaults, if needed just tick the checkboxes that align to your Device Trust client form factor types configured in Okta (under Security> Device Trust).
- Device Trust - Select "Not Trusted"
- Actions
- Access - When all the conditions above are met, sign on to this application is "Allowed".
- Prompt for factor - Ticked.
- Select "Every sign on".

2. Device Trust = Trusted. No need to check for MFA.
We will set a rule here that will do the following logic check.
"IF I am using a Device that is Trusted,
THEN there is no need to check for MFA."
To do this, we can fill in our App Sign On Rule as follows:
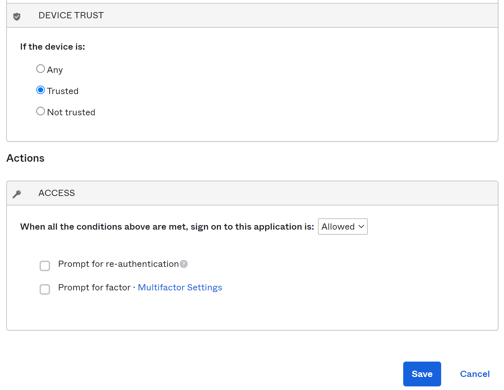
- Rule name - Device Trust = Trusted. No need to check for MFA.
- Conditions
- People - Who does this rule apply to? Leave as default, "Users assigned this app".
- Location - If the user is located: "Anywhere".
- Client - Leave the defaults, if needed just tick the checkboxes that align to your Device Trust client form factor types configured in Okta (under Security> Device Trust).
- Device Trust - Select "Trusted"
- Actions
- Access - When all the conditions above are met, sign on to this application is "Allowed".
- Prompt for factor - Unticked.

Here's a summary of what we just set up for our Application Sign On Policies.
(Optional) Application Sign On Policy (App Sign On Policy)
For easy reference, this is a summary of how the Application Sign On Policy is structured.
Application Sign On Policy
For Users/ Groups, check:
IF Conditions:
- Location (Anywhere, In Zone, Not in Zone), OR
- Client Type - Mobile (iOS, Android, Other mobile), Desktop (Windows, macOS), OR
- Device Trust - Trusted or Not Trusted
THEN take the following Action:
- Allowed or Denied access, and
- Prompt for factor/ MFA
- Every sign on, Once per session, Once a day, Once a week, Once a month, Once per six months, Only once
I will be testing on my mobile phone and on my Windows 10 computer.
On my Android mobile phone with Intune installed
1. Log into your Okta End User dashboard, that is https://yourdomain.okta.com
2. Sign in as our test user
3. Click on a "Google Workspace" application. This can be "Google Workspace Mail", "Google Workspace Calendar", "Google Workspace Keep".
4. Based on our App Sign On Policy, our test user should be allowed to progress to the next step (with no prompt for multifactor authentication (MFA).
5. Our test user should then be able to access our "Google Workspace" application.
On my Windows 10 with no Intune installed
1. Log into your Okta End User dashboard, that is https://yourdomain.okta.com
2. Sign in as our test user
3. Click on a "Google Workspace" application. This can be "Google Workspace Mail", "Google Workspace Calendar", "Google Workspace Keep".
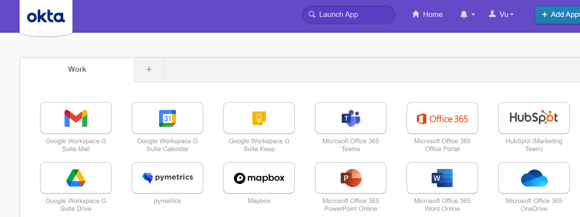
4. Based on our App Sign On Policy, our test user should be prompted for Multifactor Authentication (MFA).
5. Our test user should then be able to access our "Google Workspace" application.
(Optional) Check our Systems Log (Syslog)
An additional way to check is by reviewing our Systems Log, so we can search the following phrase in our testing timeline to see the system logs.
Search for:
Authentication of device
Then it should give you the following System Log event outputs.

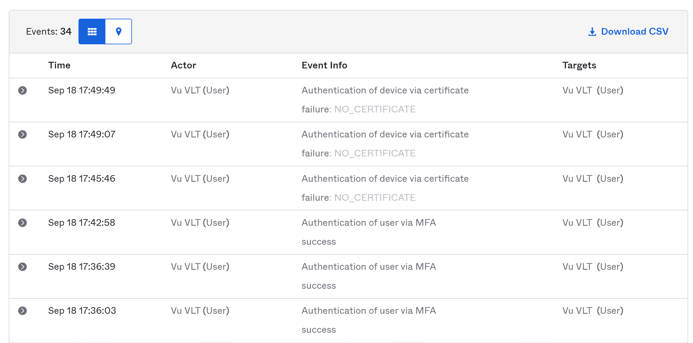
If you click on the "down arrow" on any of the System Log rows, you will be able to see more details about the event.
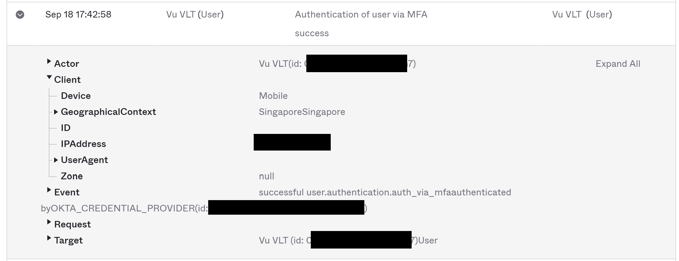
Android mobile phone with Intune installed
You will notice that my testing on my mobile device showed an "Authentication of user via MFA success" and Client > Device = Mobile.
This is expected, as I install Microsoft Intune Company Portal software on my mobile phone . So it could find any certificate that validates that my device is in a "trusted" device status state.
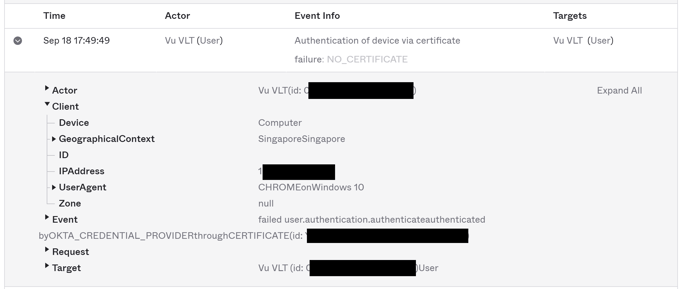
Windows 10 with no Intune installed
You will notice that my testing on my Windows 10 computer showed an "Authentication of device via certificate failure: NO_CERTIFICATE" and Client > Device = Computer.
This is expected, as I did not install any Microsoft Intune Company Portal software on my Windows 10 computer. So it cannot find any certificate that validates that my device is in a "trusted" device status state.
You're all set!
Troubleshooting:
Intune Device Certificate installed on Windows 10 device?
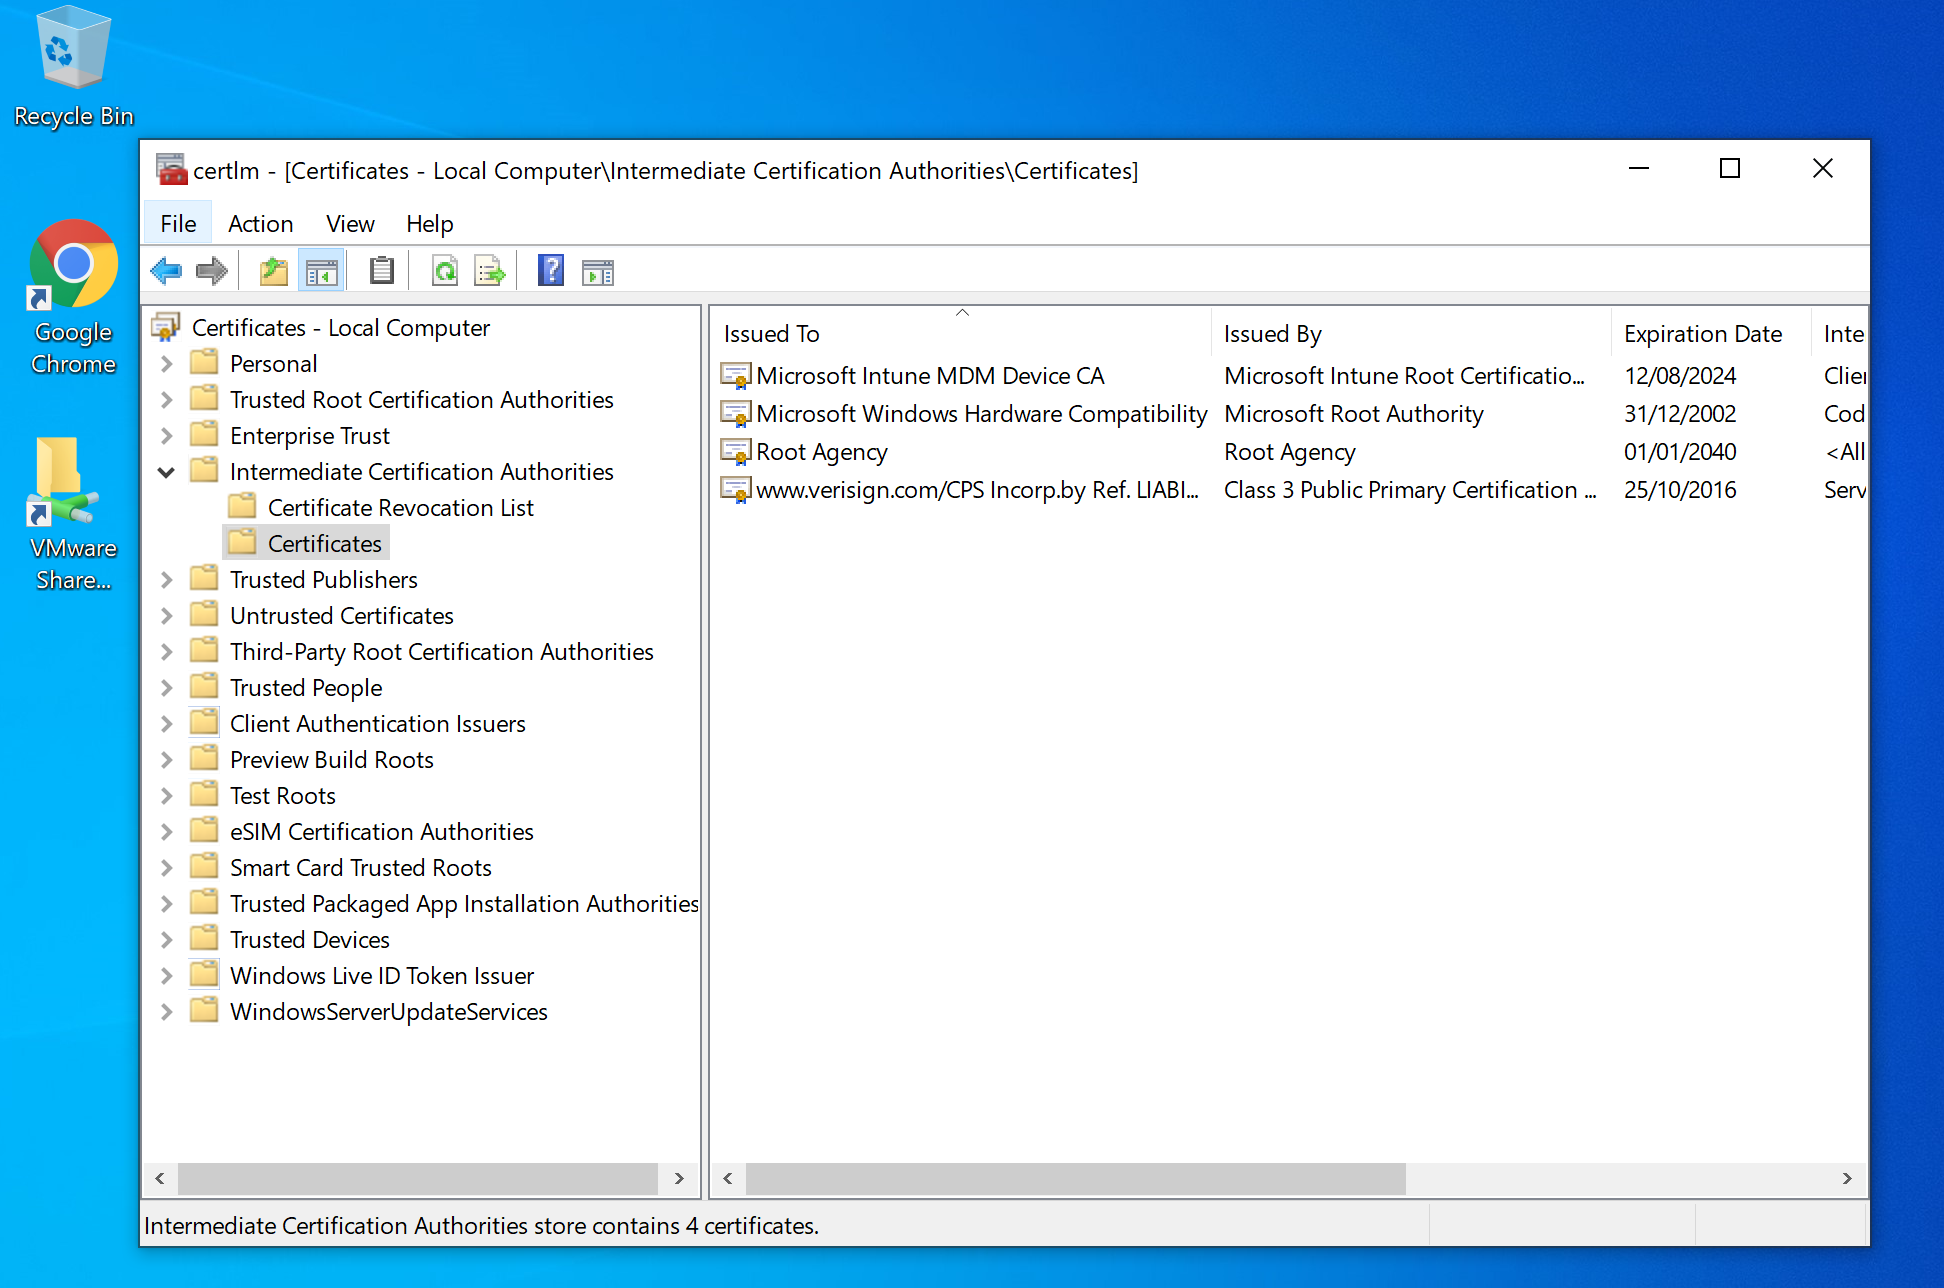
If you are not too sure if your Intune Device Certificate has been installed on your Windows 10 device, go to your Windows 10 computer, go to "Certificate Manager".
In Certificate Manager, go to Certificates> Intermediate Ceritfication Authorities> Certificates folder.
Then you should see "Microsoft Intune MDM Device CA" listed as a row there.
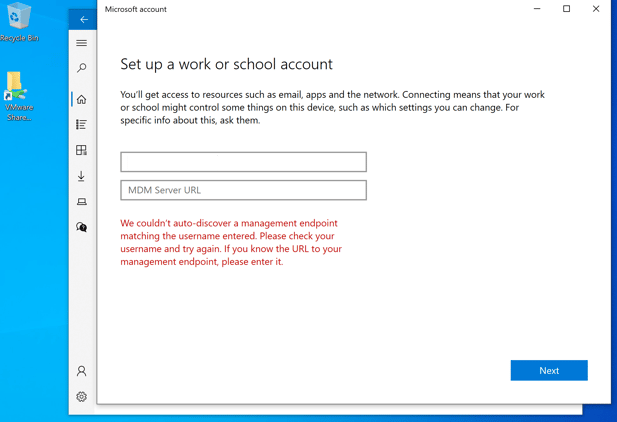
MDM Management endpoint error
If you get the error:
"We couldn't auto-discover a management endpoint matching the username entered. Please check your username and try again. If you know the URL to your management endpoint, please enter it".
Solution:
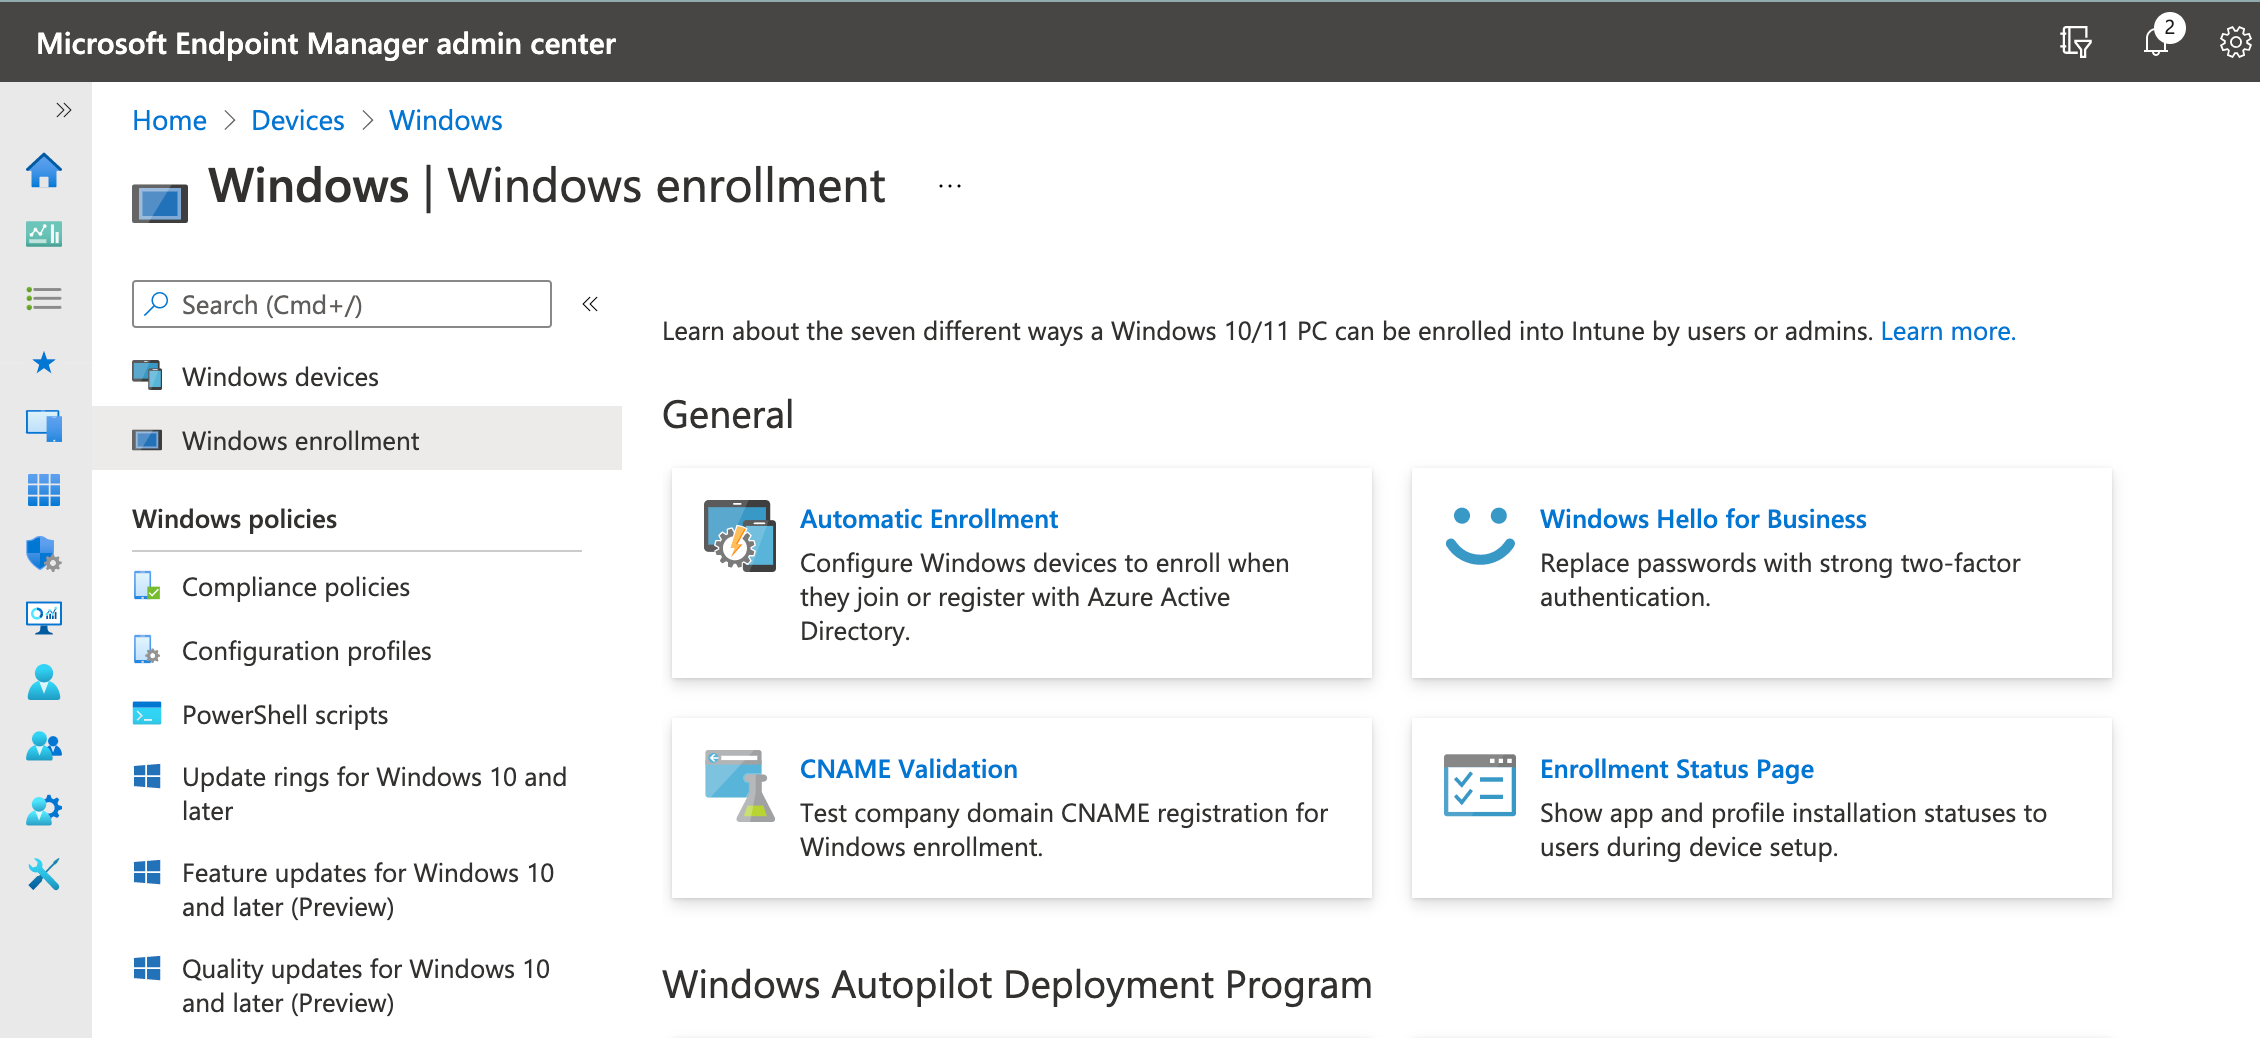
Set your management endpoint/ MDM Server URL/ MDM discovery URL as the following - https://enrollment.manage.microsoft.com/enrollmentserver/discovery.svc
You will also find this detail under Windows> Windows enrolment > Automatic enrolment.
Compliance and security policies
This device does not meets company compliance and security policies. You can access resources like company email with this device.
Solution:
Create a Compliance policy in Microsoft Endpoint Manager
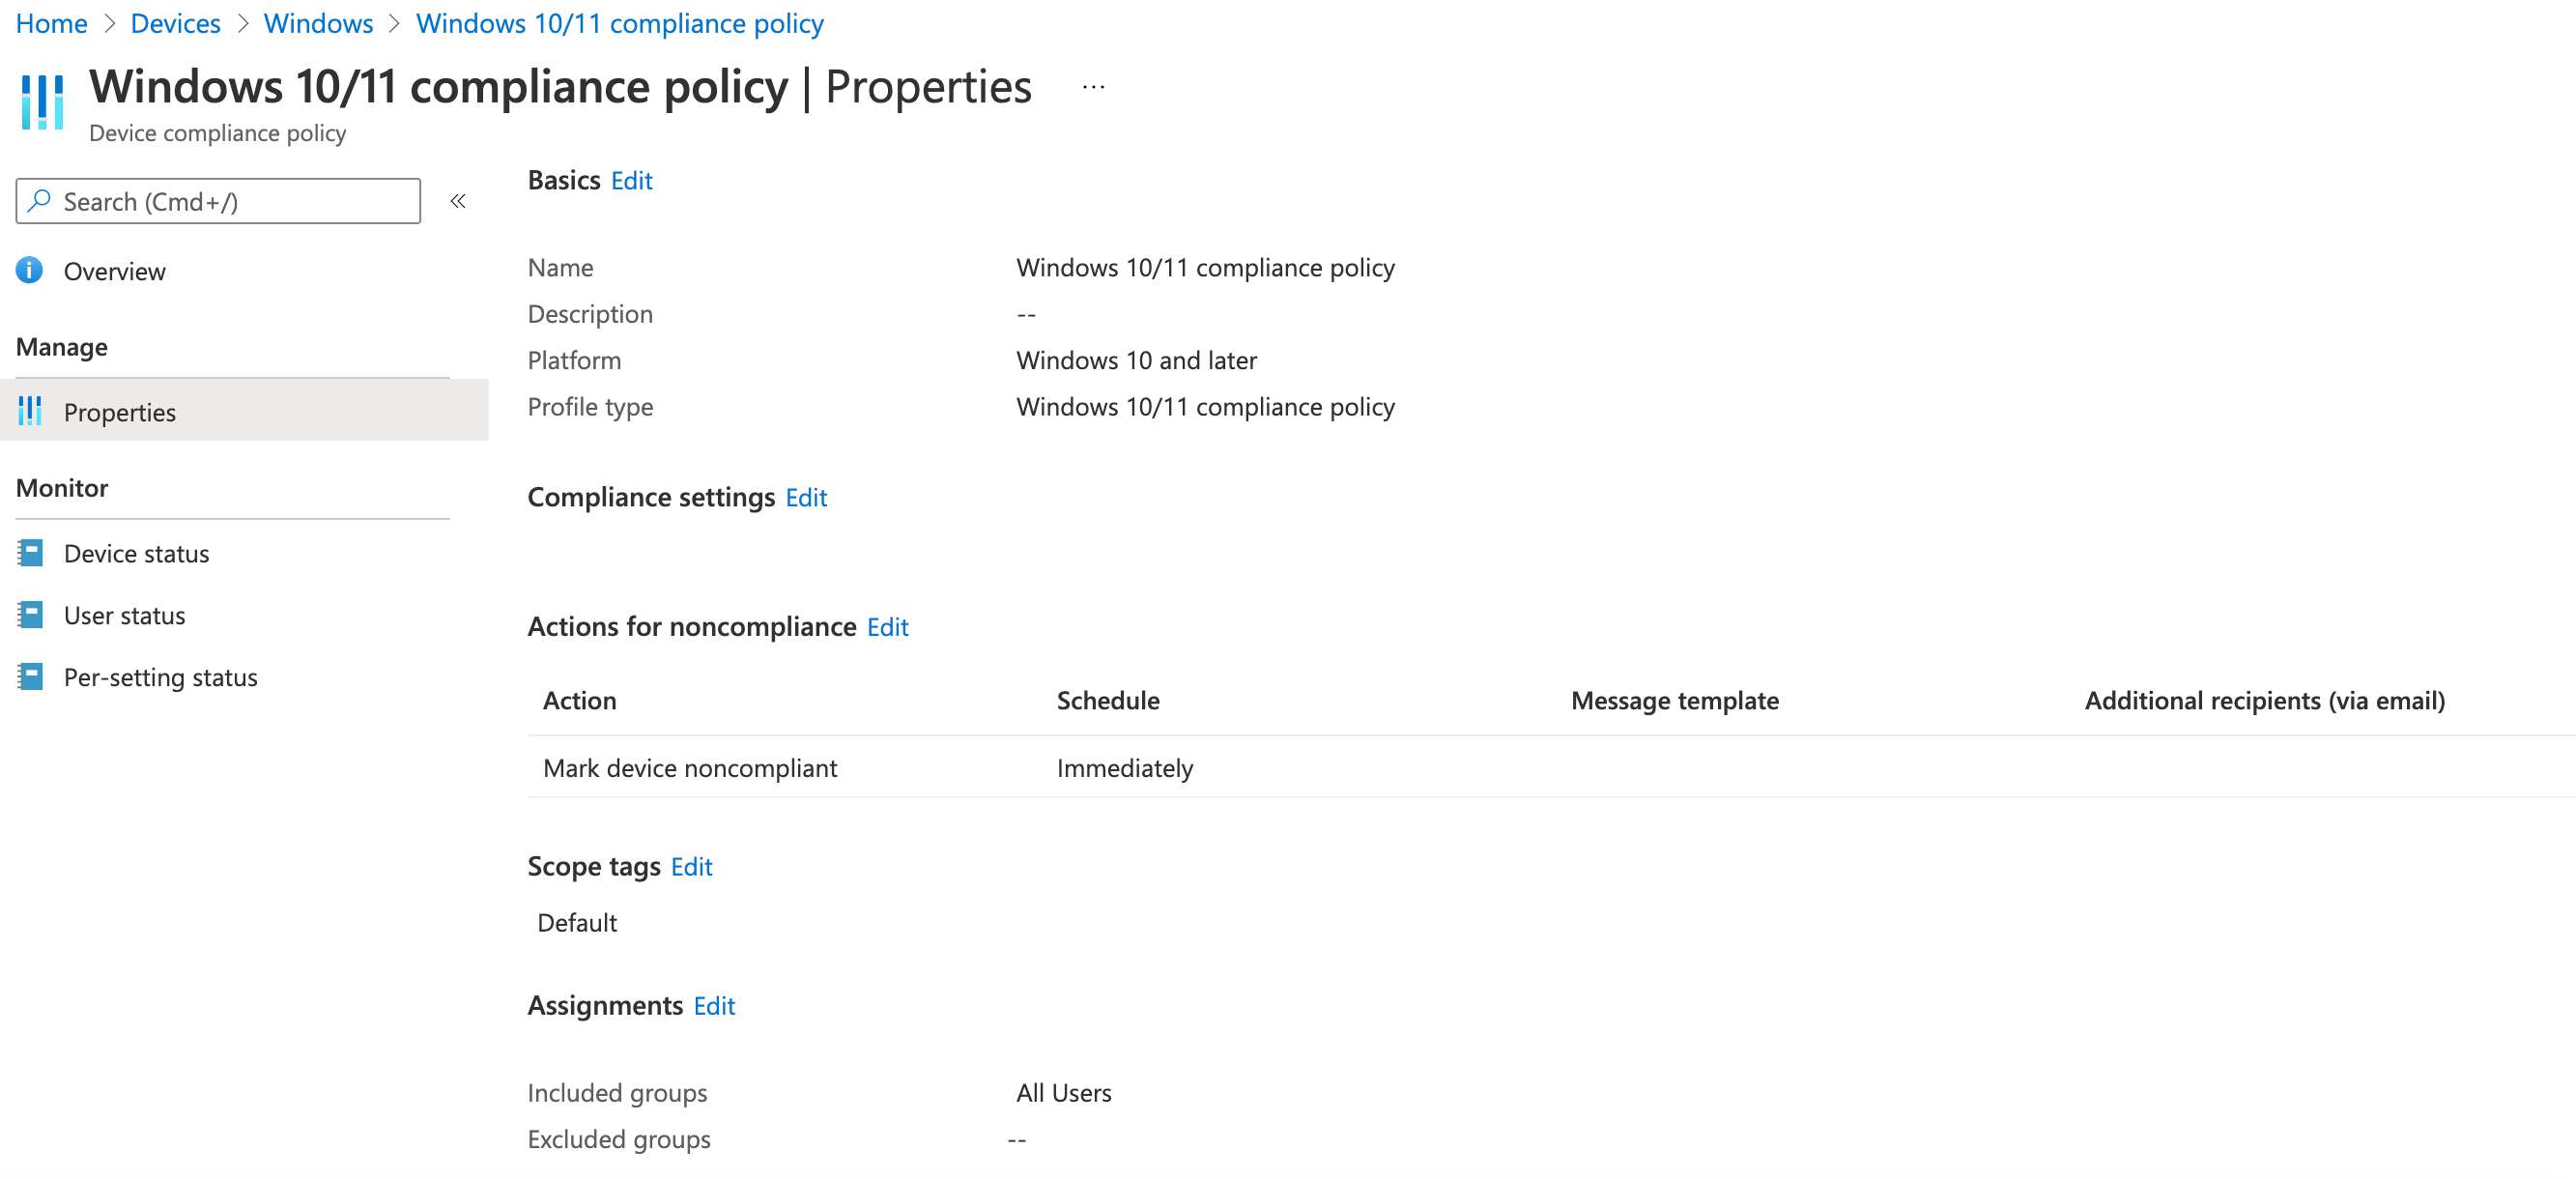
Make sure that there Compliance policy set to the Windows device in Microsoft Endpoint Manager Intune.
That is, as Administrator, go to Microsoft Endpoint Manager> Devices> Windows> Compliance policies> Create Policy.

You will notice that I have set one up, so you can see "Windows 10/11 compliance policy" there. I selected the default settings and assigned to "All users".
On Windows 10 device, recheck "Device status"
On the end user's Windows 10 device, you can ask the user to:
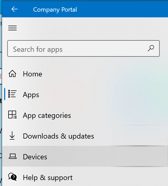
- Open "Company Portal" application on Windows device
- Click on "Devices" tab.
- Click on "Check access"
- Wait for Microsoft Intune to update advise on where there is a compliance policy in place. It should say something like the following, once it has completed its check. It may take 5-10 minutes or more to process.
This device meets company compliance and security policies. You can access resources like company email with this device.
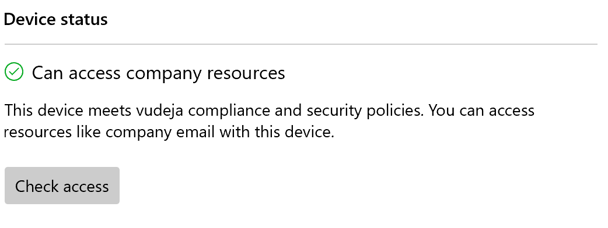
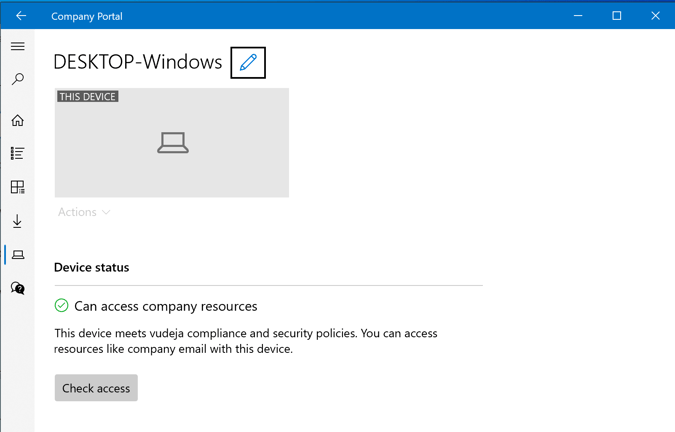
Once it says that you "Can access company resources".
Then if you click on the "Apps" tab in the "Company Portal" application.
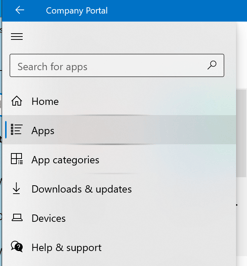
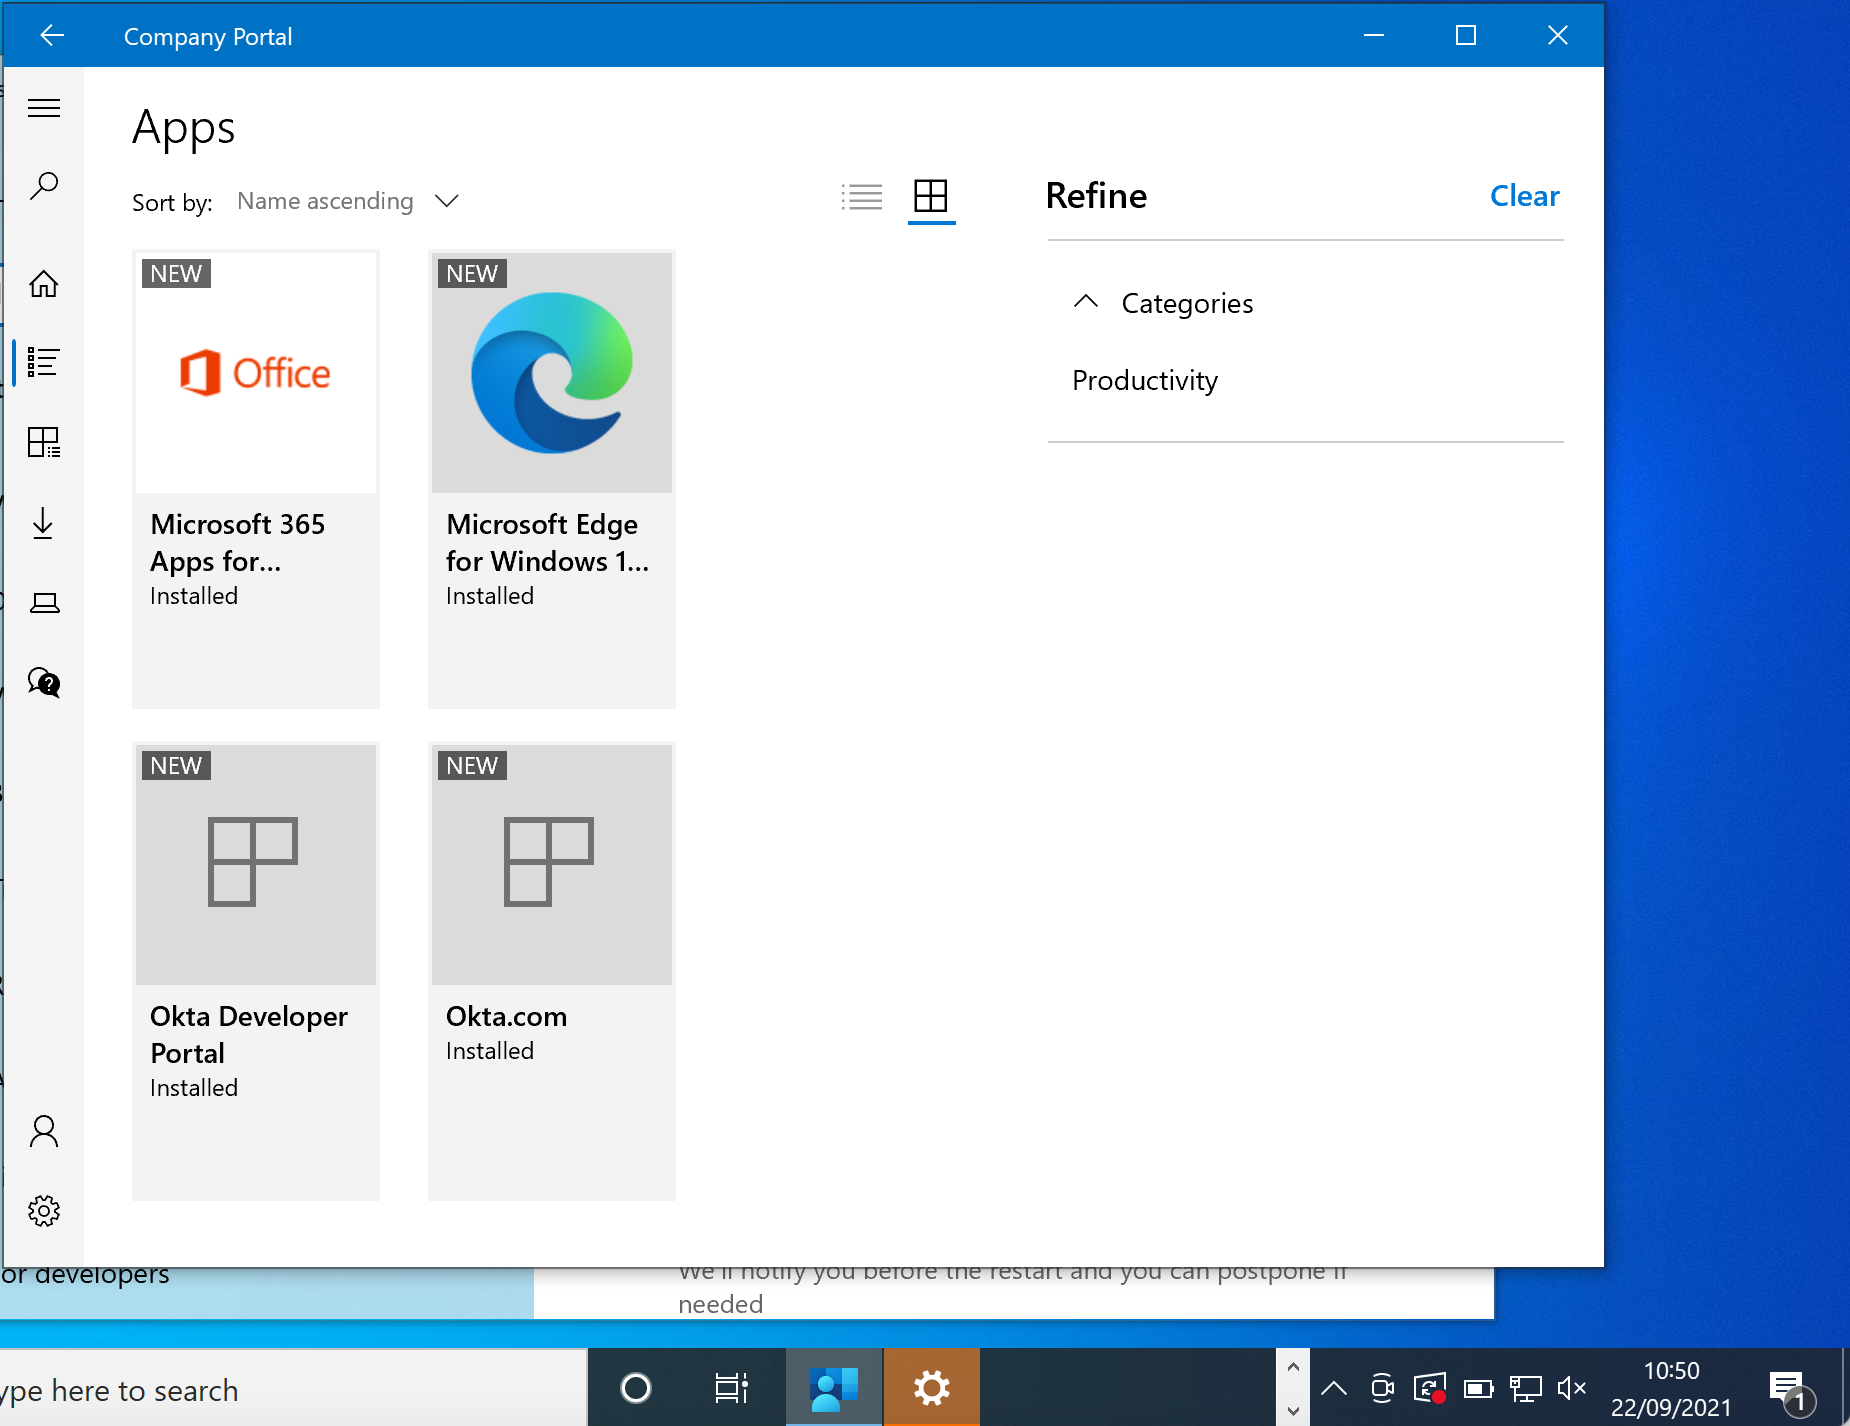
Then you will see the applications (apps) that have been assigned to you.
Here is an example below:
More information:
- Microsoft - What is Microsoft Intune app management?
- Microsoft - App configuration policies for Microsoft Intune
- Microsoft - How to add an app to Microsoft Intune
- Microsoft - How to sign in to Company Portal
- Okta - Okta Device Trust solutions
- Okta - Enforce Okta Device Trust for Native Apps and Browsers on MDM-managed Android devices
- Okta - Enforce Okta Device Trust for Native Apps and Safari on MDM-managed iOS devices


