

- Prerequisites
- Add Wrike SAML app to your Okta instance
- Set up SSO settings on Wrike
- Set up SSO settings on Okta
- Test and confirm that it is working
Prerequisites
Before you can start setting up Single Sign On (SSO) for Zoho SAML and Okta, we need to check the following:
- Access to Wrike Admin Console - Confirm that you have administrator access to Wrike Admin Console.
- Access to Okta Admin Console - Confirm that you have administrator access to Okta's Admin Console. If you do not have an Okta account, you can create a free Okta Trial account or Okta Developer account.
- (Recommended) Use the same email address for your Wrike administrator account as your Okta administrator account. This will make it easier for you to administer the accounts.
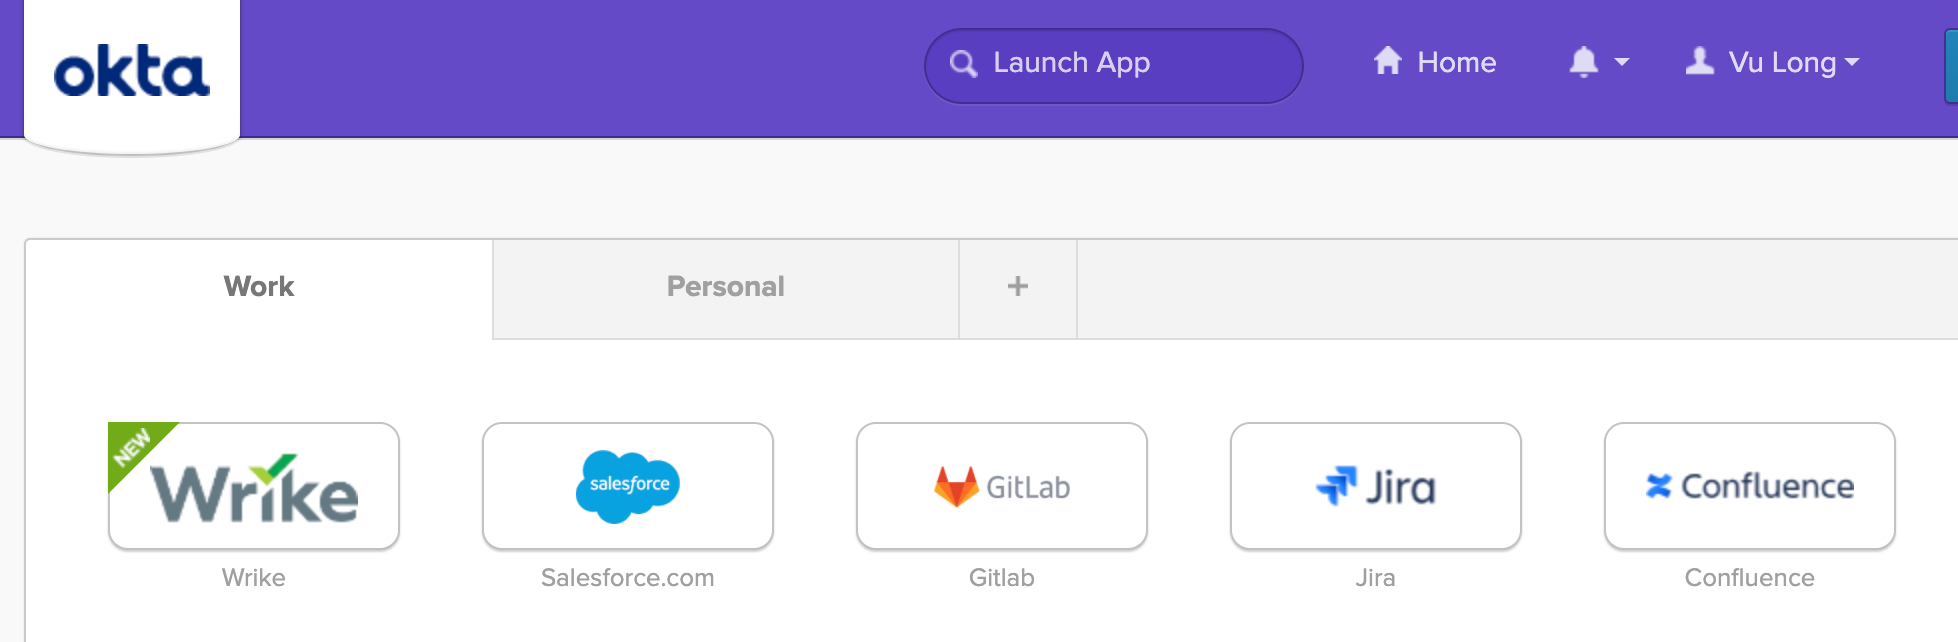
1. Add Wrike app to your Okta instance
Log in to your Okta account as an administrator (with administrator access).
Under Applications> Applications, search for the Wrike app in the Okta Integration Network (App Integration Catalog).

Add Wrike app in.
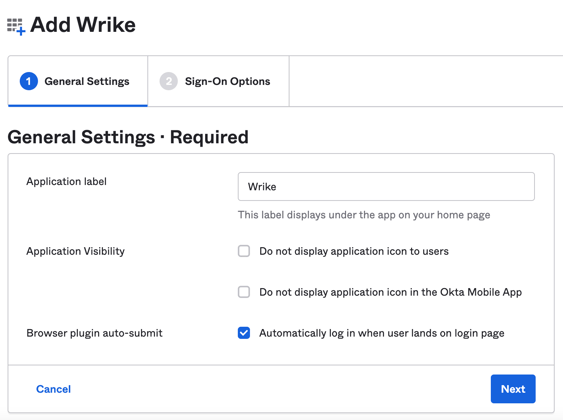
Fill in the Wrike options and click Next.
- Application label - Name your Wrike app.
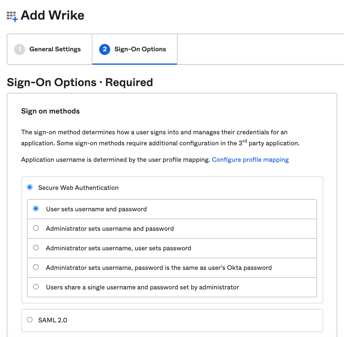
On the Sign On Options, you are presented Sign on methods.
- Secure Web Authentication (SWA) is a good placeholder option, if you are waiting for Admin access to your Write Admin Console yet.
- If you have Wrike Admin access, select SAML2.0. This will be also the focus of our next steps.
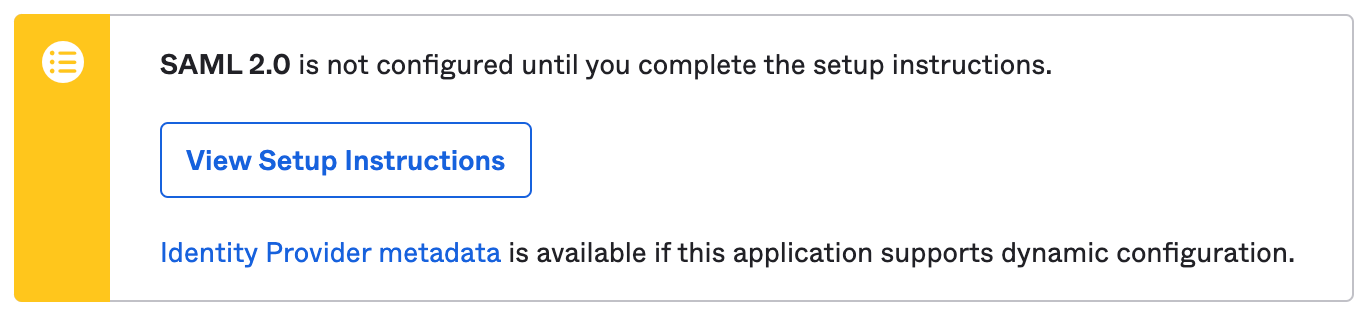
Select SAML 2.0.
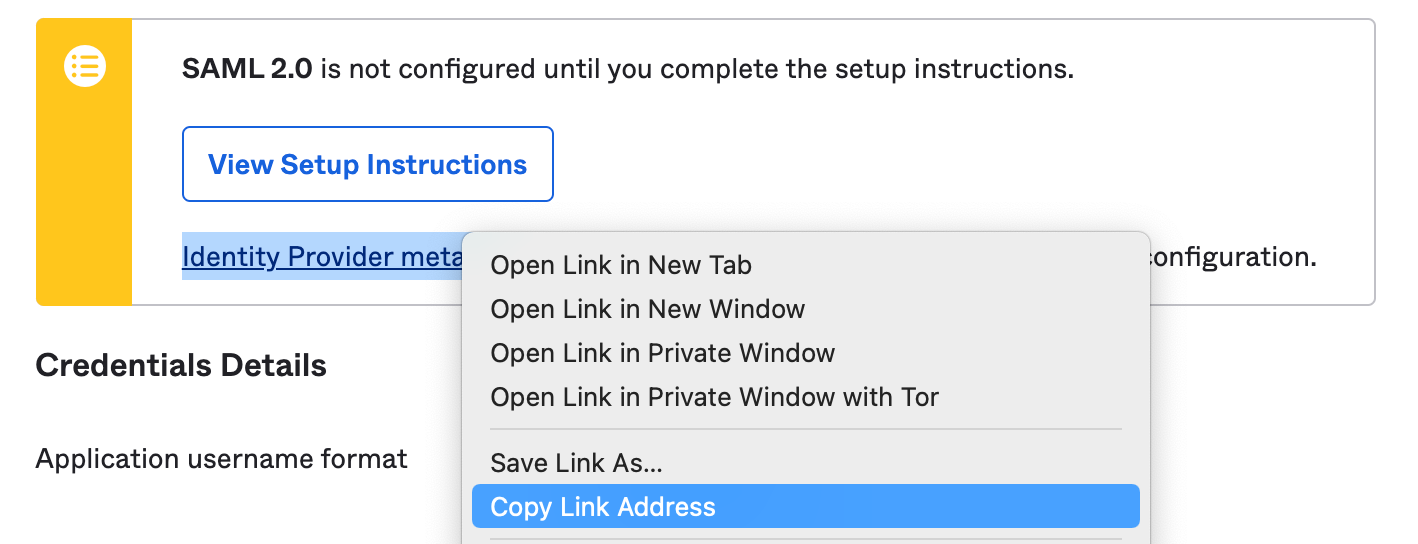
Save your Identity Provider metadata
After clicking on SAML 2.0, you are presented with Identity Provider metadata link. We need the details from the "Identity Provider metadata" link.

So we can choose one of two ways to save our "Identity Provider metadata" details.
- "Copy Link Address" - Right-click Identity Provider metadata and copy the link and paste it somewhere temporary like a textpad. Later we will copy and paste into Wrike (via the SSO settings in Wrike where we will be able to input the link into the Use URL to provide XML field in Wrike).
- Copy "Identity Provider metadata" - Click Identity Provider metadata to open it in a new tab. Copy the metadata and paste it somewhere temporary like a textpad. Later we will copy and paste into Wrike (via the Enter XML field in SSO settings in Wrike).
I find the "Copy Link Address" as the easiest option, but it's up to you which approach you prefer.
Click Done.
2. Set up SSO settings onWrike
Log into your Wrike account
In a new browser tab, log in to your Wrike account as an administrator (with administrator access).
Open Single Sign-On Settings
In Wrike, open your Single Sign-On (SSO) settings.
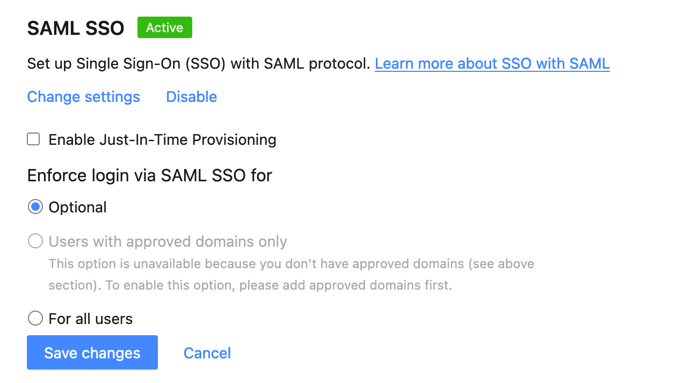
Wrike> Admin > Account Management > Security > SAML SSO
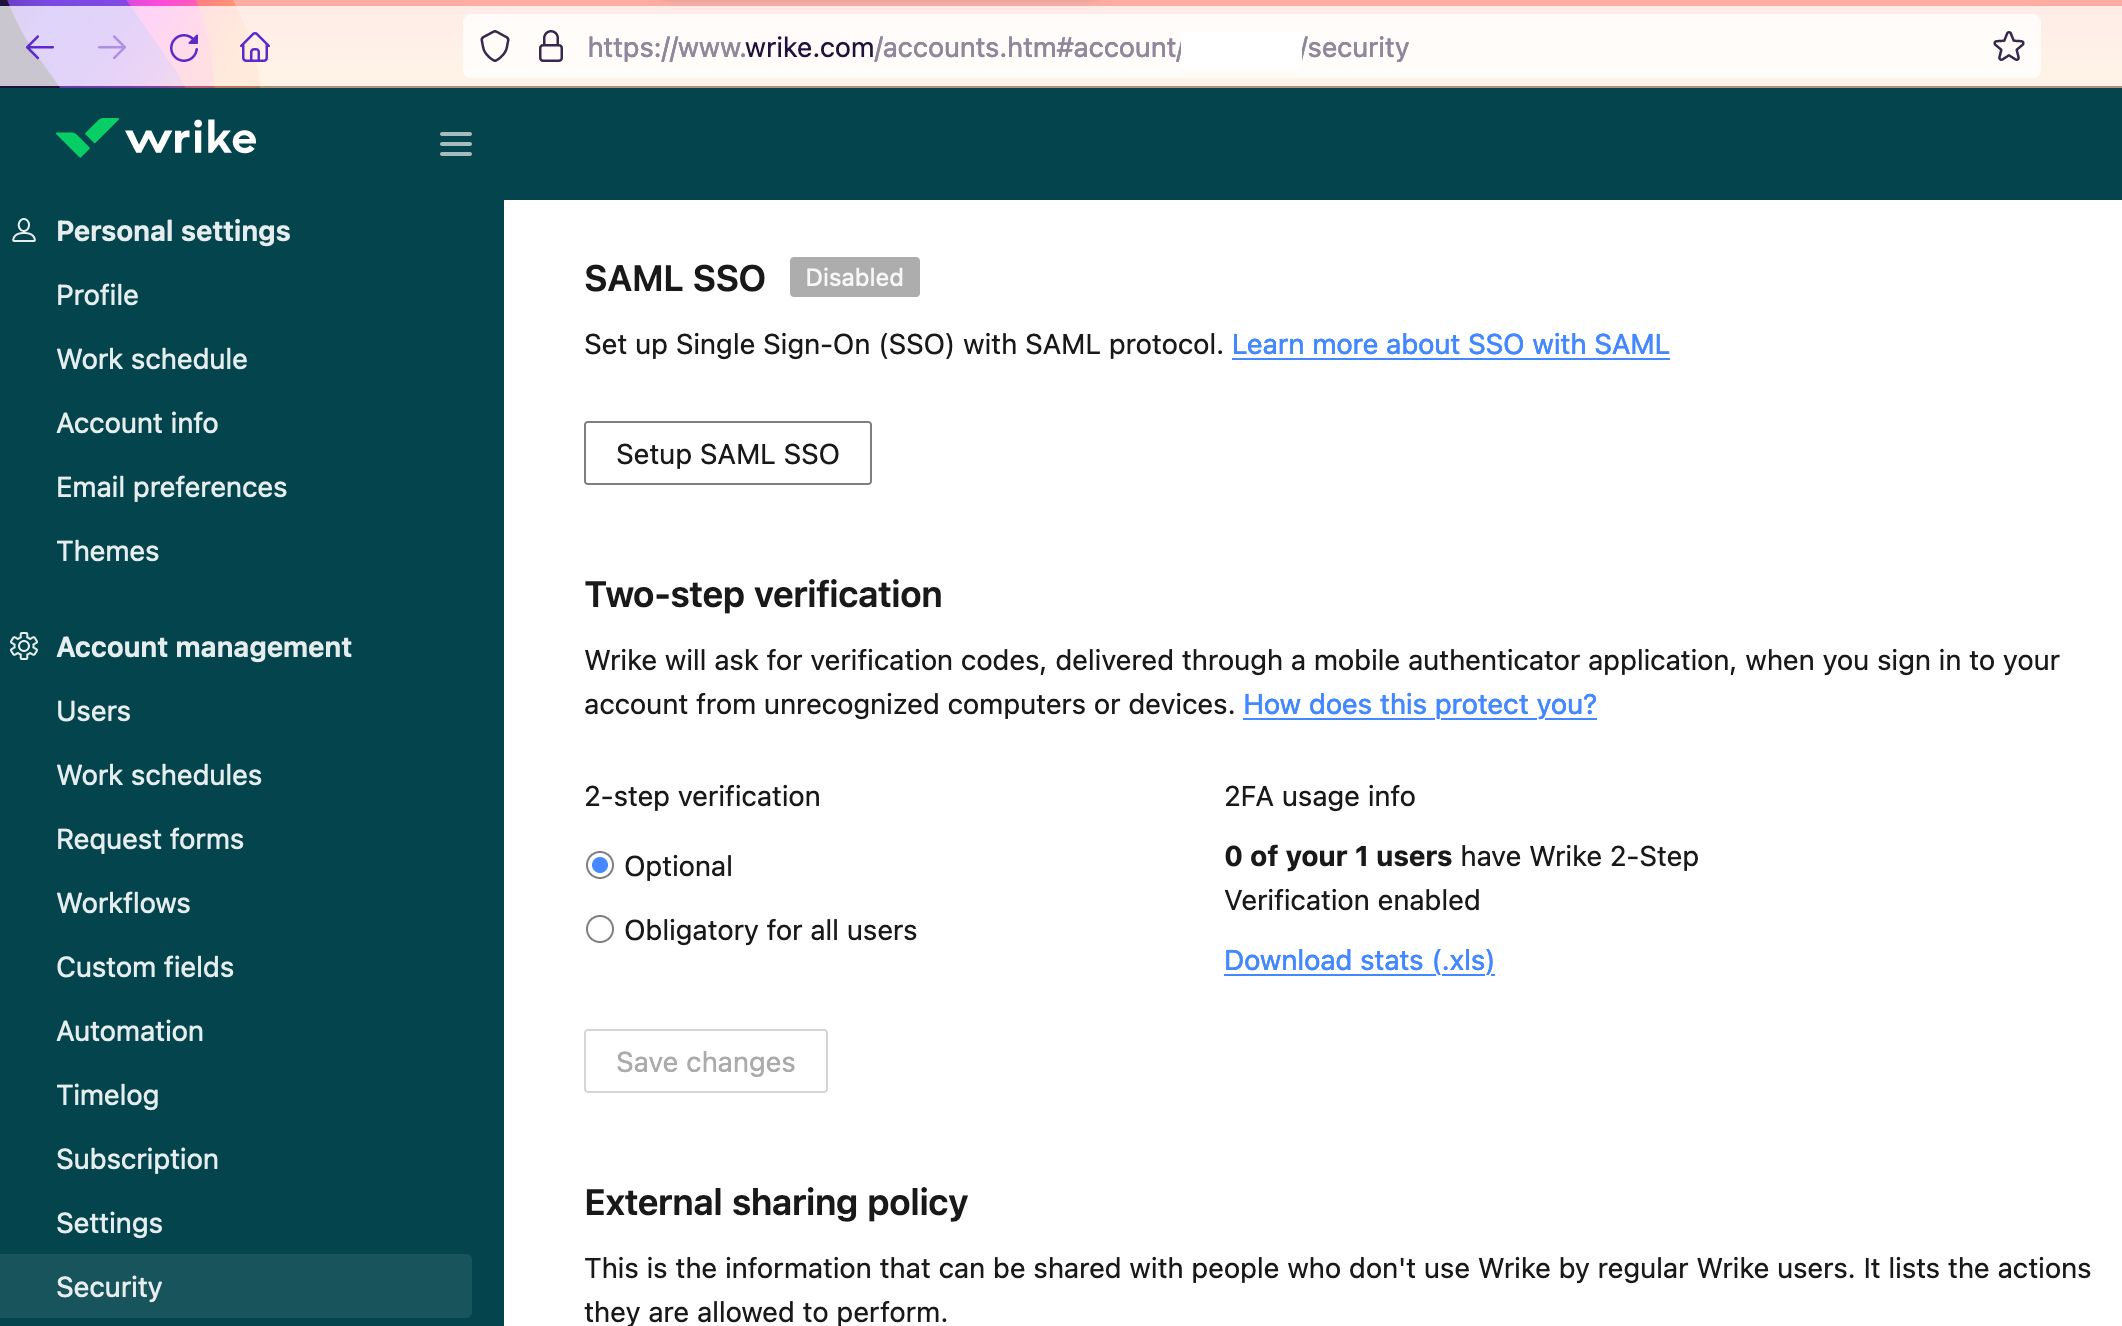
If you have trouble finding it, you can try this direct link to SAML settings, https://www.wrike.com/accounts.htm#account/yourwrikeaccountnumber/security
You should see something like this "SAML SSL" section.
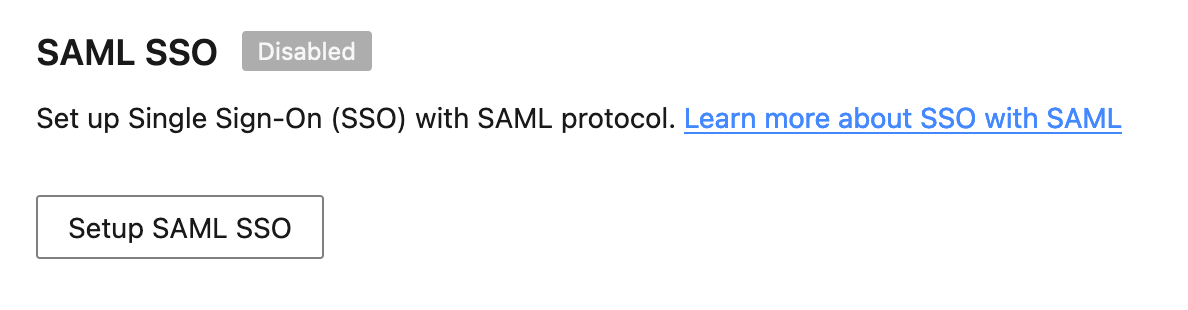
Click on "Setup SAML SSO".
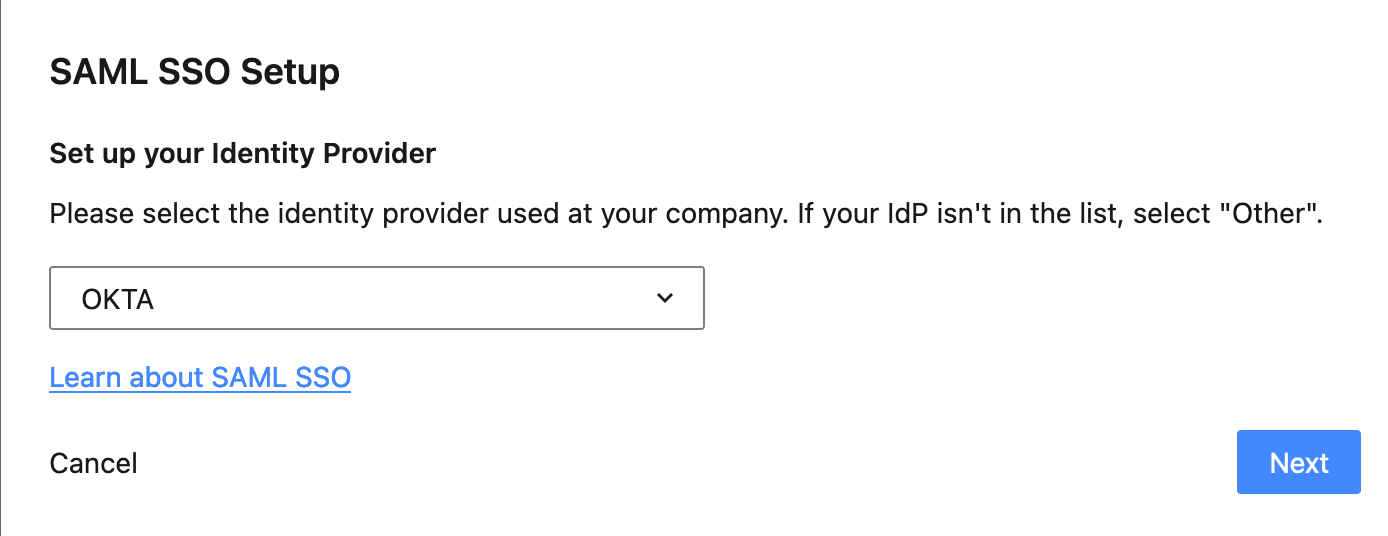
In the popup "SAML SSO Setup", select "Okta" from the dropdown menu.
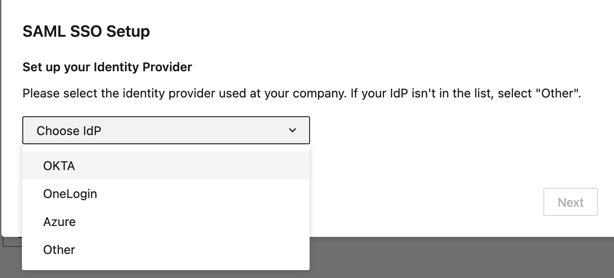
Then click Next.
You are then presented with options to help you with set up. Click Proceed.
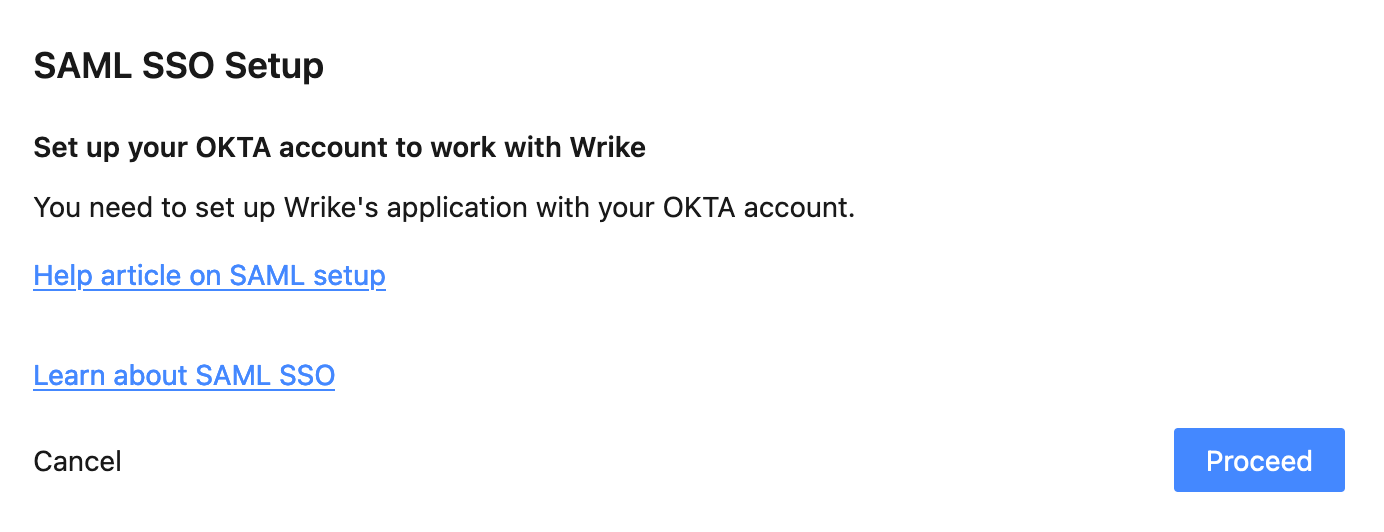
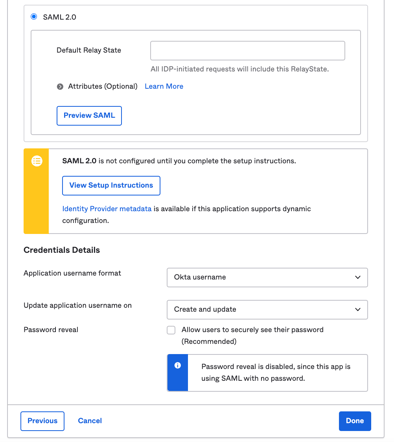
SAML SSO Setup
Set up your OKTA account to work with WrikeYou need to set up Wrike's application with your OKTA account.
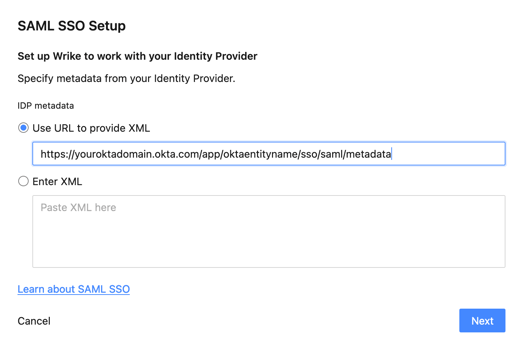
Help article on SAML setup- Enter a link to provide XML
- Enter the XML as a text.

If you remember from earlier, we saved these details in a temporary place like a textpad. Copy and paste these details into the appropriate field here now. That is,
- User URL to provide XML - Copy and paste the "Identity Provider metadata" URL from Okta. Sample Okta identity provider metadata URL here https://youroktadomain.okta.com/app/oktaentityname/sso/saml/metadata
- Enter XML - Copy and paste "Identity Provider metadata" metadata and paste it into the Enter XML field in Wrike.
Click Next.
You will then be prompted with the following. When you are ready, click "Enable SAML settings".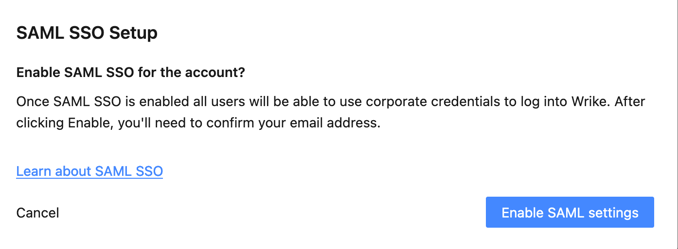
"Enable SAML SSO for the account?
Once SAML SSO is enabled all users will be able to use corporate credentials to log into Wrike. After clicking Enable, you'll need to confirm your email address."
You are now prompted to verify your email as part of the SAML SSO Setup.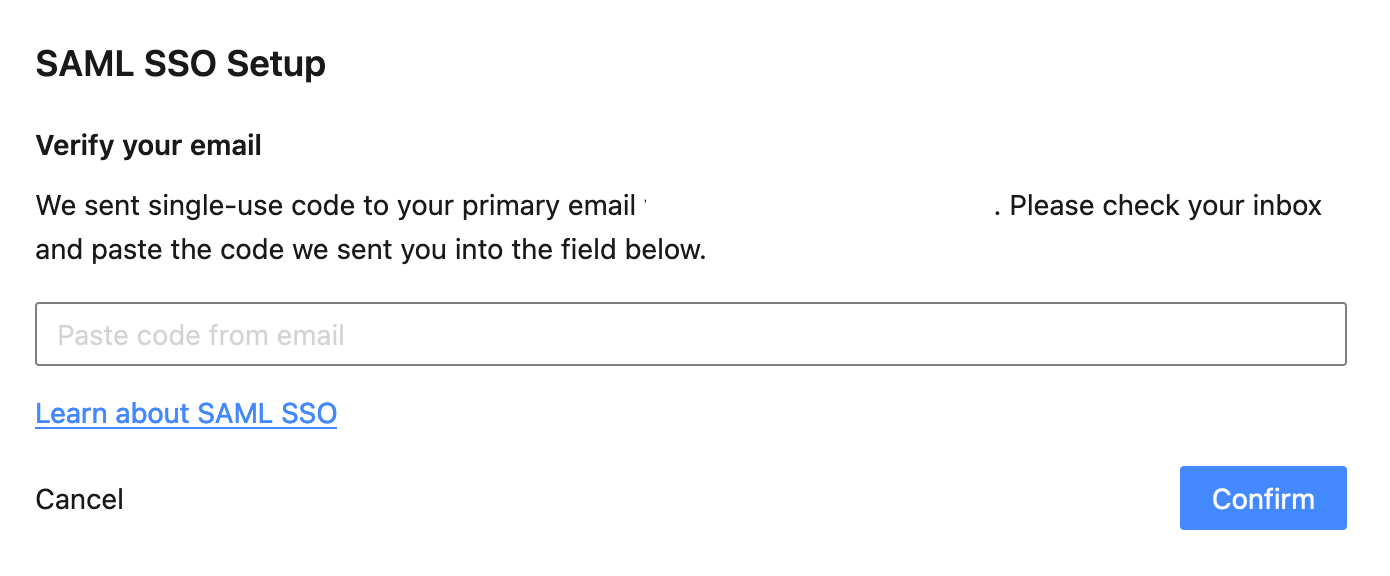
An email will be sent to you with the code to confirm the implementation of SSO.
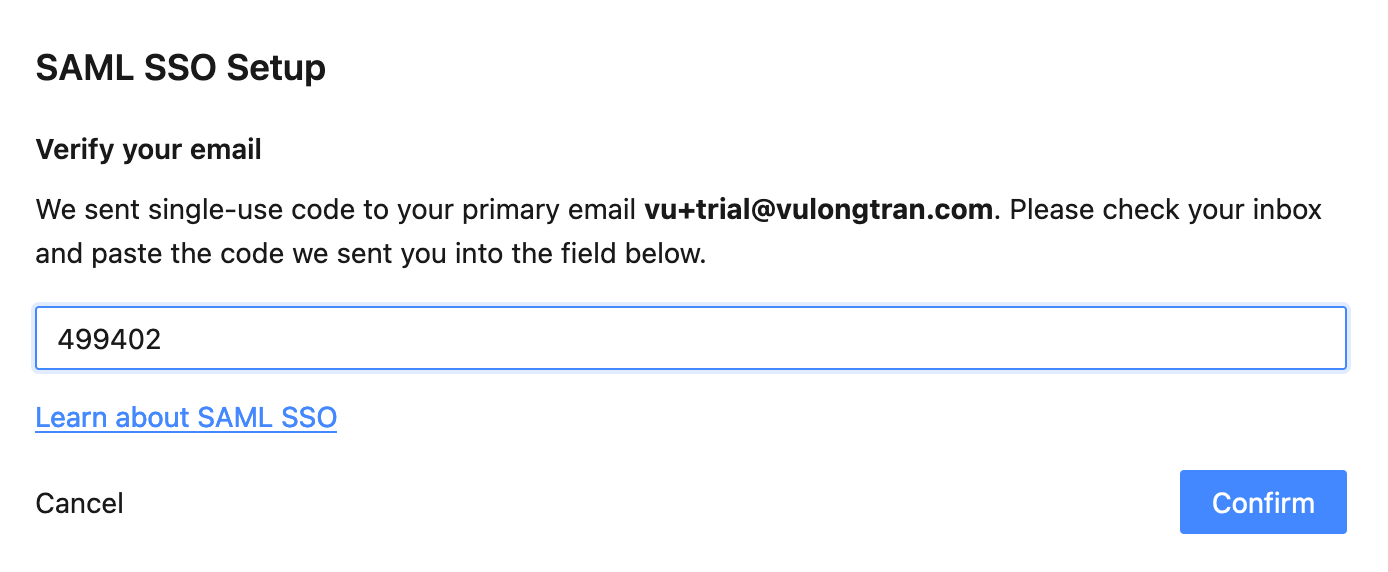
Copy and paste the code from the email.

Enter the code in Wrike and click Confirm.
You are now presented a completion message. When you're ready, click "Save SAML Settings".
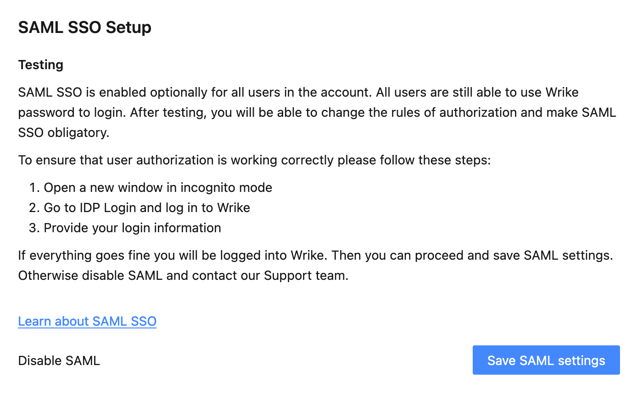
SAML SSO will now be active with Wrike now.
3. Test that SSO is working on Wrike
When you are ready, let's test that it works.
In Okta Admin Console, let's assign a user to the application. (Applications> Applications> Wrike app)
Go to "Assignments" tab. (Applications> Applications> Wrike app> "Assignments)
Select "Assign" and "Assign to People".
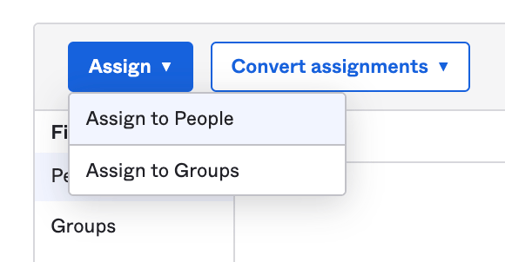
Select our test user, click "Assign" and then "Done".
Now let's log into our Okta instance as a test user. You may need to refresh your browser if you had the browser window already open.
Then click on "Wrike" application icon (chiclet).
Success, you will be logged in successfully to your Wrike account!
Troubleshooting:
We couldn't find the proper XML using the provided link. Check your link or contact support.
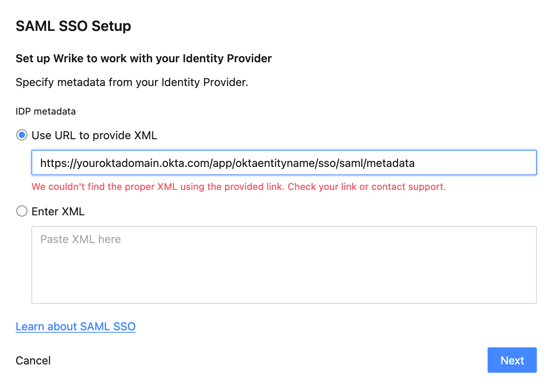
Solution:
Check your Okta identity provider metadata XML link used here.
It should look like the following, but with your own specific customer details.
https://youroktadomain.okta.com/app/oktaentityname/sso/saml/metadata
If you not too sure where to find your "Identity Provider metadata" link.
Go to your application via Applications> Applications> Wrike app.
Click on the "Sign On" tab. 
Click on "Identity Provider metadata".
You will then be sent to your own specific "Identity Provider metadata" for Wrike.


