

Let's add agent node/s to our Puppet setup.
That way, we can create "Puppet Agents" to puppet master from the "Puppet Master"!
We can choose a Linux or Windows device to be a "Puppet Agent" here by installing a Puppet "agent" on them. Examples: Linux, ,Windows, macOS, Solaris, and AIX devices.
How to add agent nodes to your Puppet Enterprise set up
Step 1 - Create new instance nodes and install operating system.
Step 2 - Set up our new instance nodes to reference our Puppet Master
Step 3 - Check Puppet settings in Puppet Enterprise Console for your new instance nodes
Step 4 - Install Puppet agent/s onto each of your new instance nodes
Step 5 - On the Puppet Agent, run it's next run
Step 6 - Check that a certificate is in place
Step 7 - Configure your agent/s
Step 8 - You are all set with your agent now!
Step 1 - Create new instance nodes and install operating system
For the purposes of this demonstration, we will create new instance nodes and install operating systems (OS) onto them, so that we can later install the agent onto.
I recommend using Google Cloud Platform (GCP) or Amazon Web Services (AWS) to create a new instance with, and create them within the 'free tiers' so that you can learn with minimal costs.
If you are wondering, what is a node?
Node is a catch-all term for any single network-connected device such as a server, laptop, virtual machine or switch. - Puppet
Step 2 - Set up our new instance nodes to reference our Puppet Master
We want to set up our new instances to reference our Puppet Master. We do this editing the /etc/hosts file on both servers (instance nodes), and have them map to the private IP of the master to its FQDN (fully qualified domain name), that is something like the following:
PRIVATEIP yourfutureintendeddomain.com
So let's ssh into your first server machine, then we want to edit the /etc/hosts file.
$ sudo vi /etc/hosts

Once you have opened up the /etc/hosts file.
Since we have used a vim editor (vi refers to vim editor), we can:
- Press "i", which allows us to insert and edit the file
- Type in the private IP address and hostname
- Press "ESC", and type ":wq" and press "ENTER" (as the way to write save a file in Vim and quit the editor is :wq)
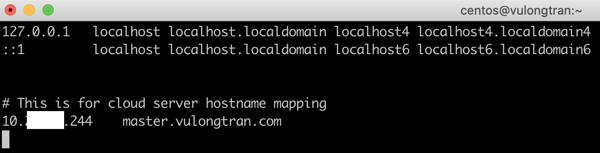
PRIVATEIP yourfutureintendeddomain.com master
PRIVATEIP yourfutureintendeddomain.com puppet-node1
PRIVATEIP yourfutureintendeddomain.com puppet-node2
Do this for each of the agent server nodes that you want to manage in this test.
Step 3 - Check Puppet settings in Puppet Enterprise Console for your new instance nodes
Check Puppet settings in Puppet Enterprise Console for your new instance nodes. We will be going to:
- Puppet Enterprise Console> Node group
- All Nodes> > Node group details > PE Infrastructure> PE Master
We want to check and update these settings in the Puppet Enterprise Console, as there is a script that we will run later that will check our new instance nodes operating systems.
Here are some visuals to help guide you.
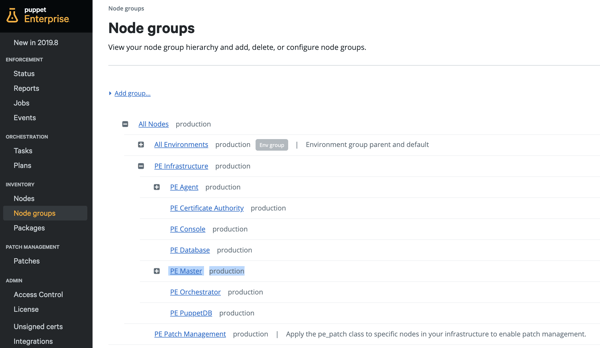
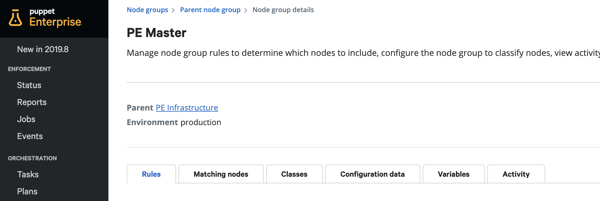
Once you're in, you'll see the "PE Master" page.
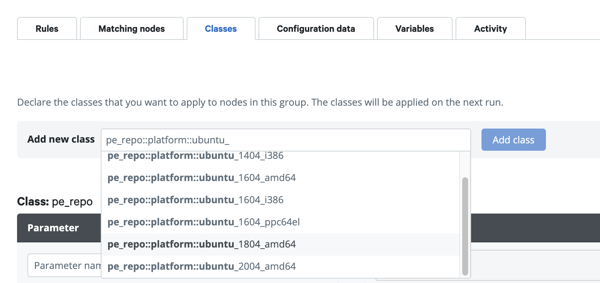
Click on the "Classes" tab, then check the classes on this page and make sure that the operating systems (OS) and distributions you have used for your new instance nodes are listed here.
If any are missing, just add them in.
As this allow the script we want to use in the next step to work, as it will look out for these operating system types that we are working with.
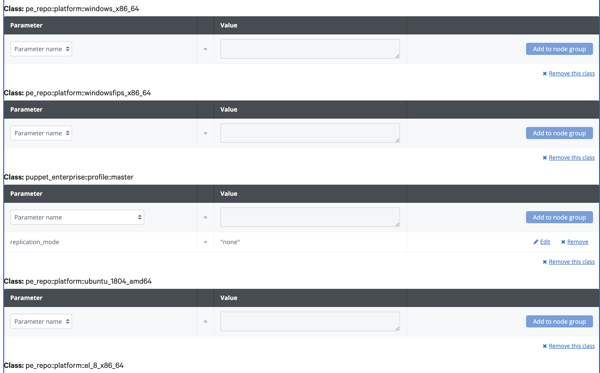
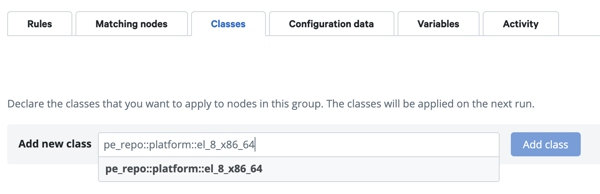
Use the "Add new class" function to add any operating systems that are missing.
Operating systems:
- Ubuntu 18.04 - Class: pe_repo::platform::ubuntu_1804_amd64
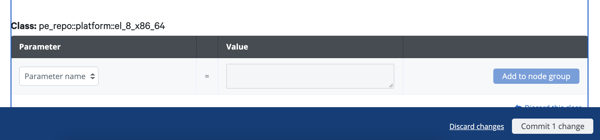
- Centos 8 - Class: pe_repo::platform::el_8_x86_64
- Centos 7 - Class: pe_repo::platform::el_7_x86_64
When you are ready, Commit n change.
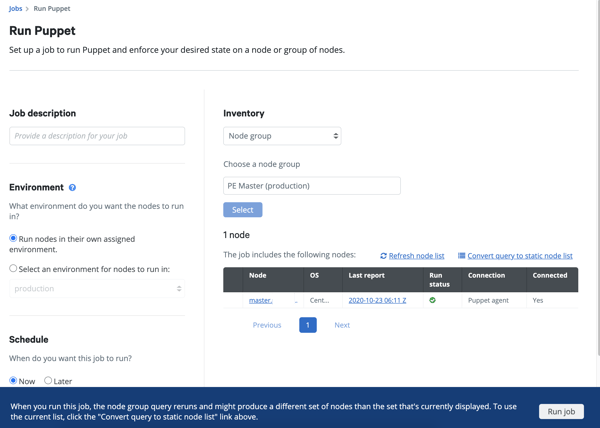
Then click on Run, Puppet.
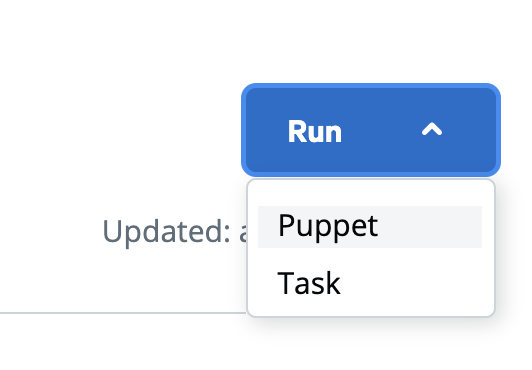
You will then be presented to the "Run Puppet" page when you can Run job.
Step 4 - Install Puppet agent/s onto each of your new instance nodes
Once you are ready, you can install an agent node on each of your new instance/s.
There are a few ways to install the Puppet agent/s. I will be showing you the Puppet Enterprise Console first, as that is the most straightforward as you learn how more about Puppet.
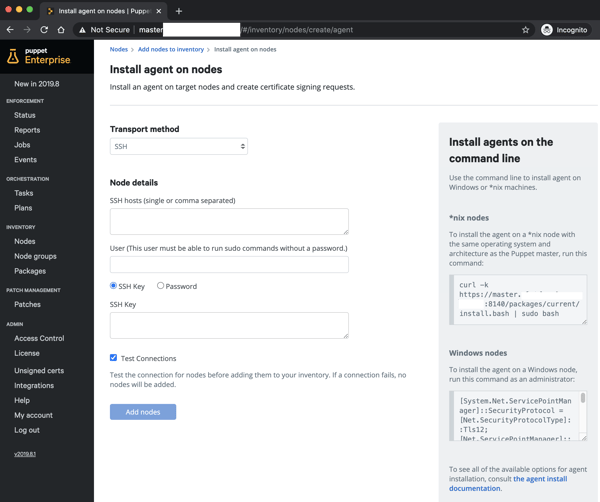
Option 1 - Install agent using the Puppet Enterprise Console
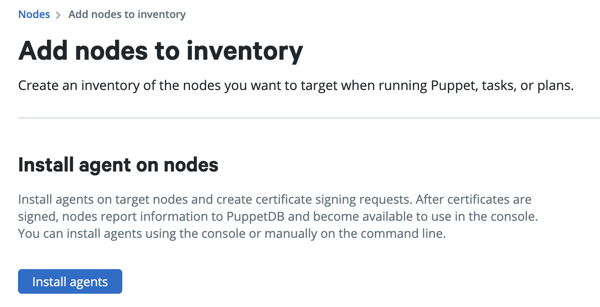
1. In the console, on the Nodes page, click Add nodes.

2. Click Install agents under the "Install agent on nodes" header.
3. Select a transport method.
- SSH for *nix targets
- WinRM for Windows targets
4. Enter the target host names and the credentials required to access them. If you use an SSH key, include begin and end tags.
 5. Click Add nodes when you're ready.
What happens after you click on "Add nodes", agents are installed on the target nodes and then they automatically submit certificate signing requests (CSR) to the master. That is, there the system will have list of unsigned certificates is updated with these new targets (nodes).

Your node "10.222.222.11" was not added.Unable to establish a connection to 10.222.222.11" because "Failed to connect to 10.222.222.11: Expected openssh-key-v1 at start of decoded private key".
You can also consider adding a node using the "password" instead of "SSH key".
Option 2 - Install agent using the Puppet install script
Another option that is recommend leveraging the install script that Puppet has set up as an option to use.
As the install script installs and configures the agent on target nodes using installation packages from the PE package management repo. As part of the script, it will creates a basic puppet.conf file and then kicks off a Puppet run to make the changes take effect.
We will use the following command line commands to install agent on Windows and/or *nix machines.
*nix nodes
To install the agent on a *nix node with the same operating system and architecture as the Puppet master, run this command:
curl -k https://master.vulongtran.com:8140/packages/current/install.bash | sudo bash
Windows nodes
To install the agent on a Windows node, run this command as an administrator:
[System.Net.ServicePointManager]::SecurityProtocol = [Net.SecurityProtocolType]::Tls12; [Net.ServicePointManager]::ServerCertificateValidationCallback = {$true}; $webClient = New-Object System.Net.WebClient; $webClient.DownloadFile('https://master.vulongtran.com:8140/packages/current/install.ps1', 'install.ps1'); .\install.ps1 -v
If you want something specific for your set up, you can see these command line scripts in your Puppet Enterprise console as well. You will see them on the right side.
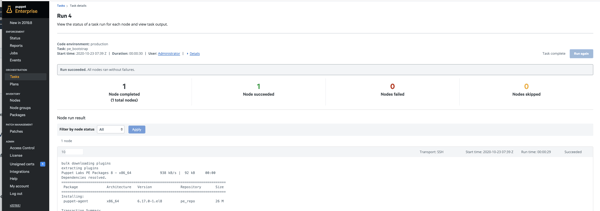
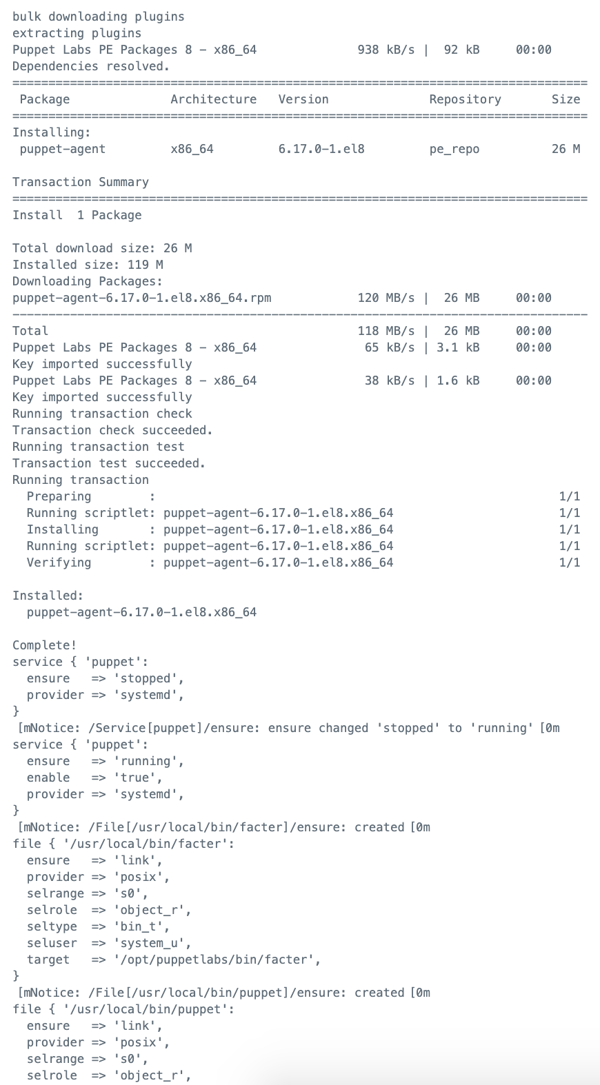
Once the script runs, you will see something like the following output:
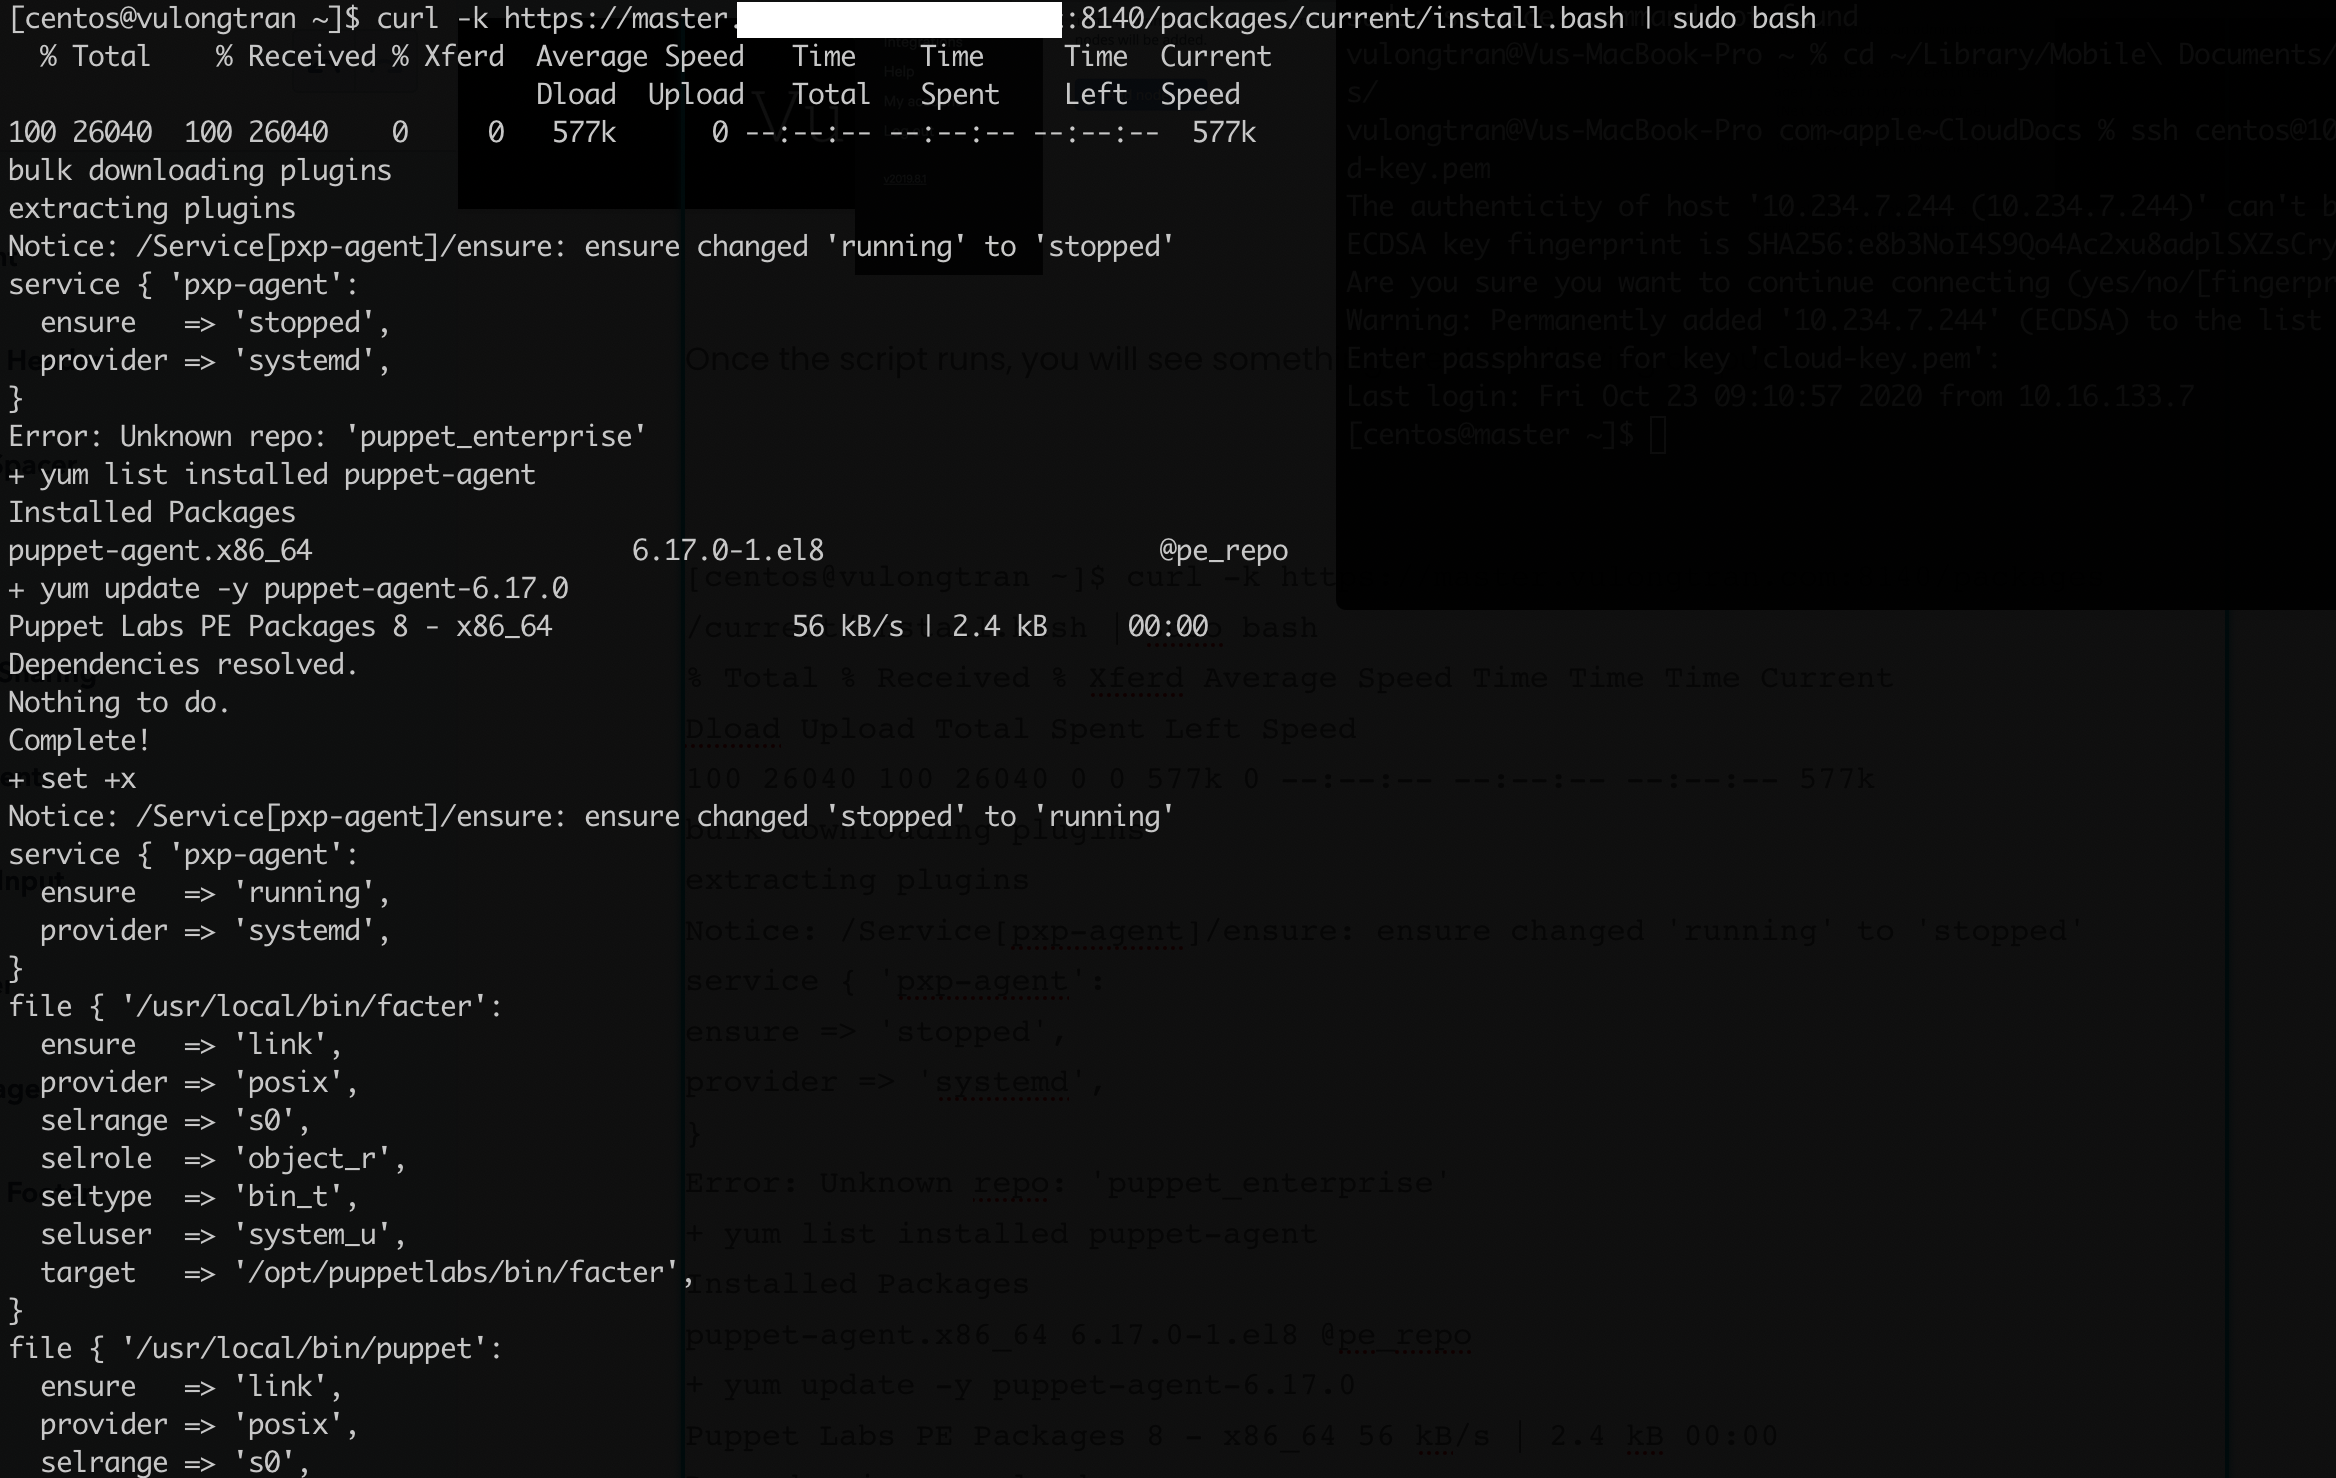
[centos@vulongtran ~]$ curl -k https://master.vulongtran.com:8140/packages/current/install.bash | sudo bash% Total % Received % Xferd Average Speed Time Time Time CurrentDload Upload Total Spent Left Speed100 26040 100 26040 0 0 577k 0 --:--:-- --:--:-- --:--:-- 577kbulk downloading pluginsextracting pluginsNotice: /Service[pxp-agent]/ensure: ensure changed 'running' to 'stopped'service { 'pxp-agent':ensure => 'stopped',provider => 'systemd',}Error: Unknown repo: 'puppet_enterprise'+ yum list installed puppet-agentInstalled Packagespuppet-agent.x86_64 6.17.0-1.el8 @pe_repo+ yum update -y puppet-agent-6.17.0Puppet Labs PE Packages 8 - x86_64 56 kB/s | 2.4 kB 00:00Dependencies resolved.Nothing to do.Complete!+ set +xNotice: /Service[pxp-agent]/ensure: ensure changed 'stopped' to 'running'service { 'pxp-agent':ensure => 'running',provider => 'systemd',}file { '/usr/local/bin/facter':ensure => 'link',provider => 'posix',selrange => 's0',selrole => 'object_r',seltype => 'bin_t',seluser => 'system_u',target => '/opt/puppetlabs/bin/facter',}file { '/usr/local/bin/puppet':ensure => 'link',provider => 'posix',selrange => 's0',selrole => 'object_r',seltype => 'bin_t',seluser => 'system_u',target => '/opt/puppetlabs/bin/puppet',}file { '/usr/local/bin/pe-man':ensure => 'link',provider => 'posix',selrange => 's0',selrole => 'object_r',seltype => 'bin_t',seluser => 'system_u',target => '/opt/puppetlabs/bin/pe-man',}file { '/usr/local/bin/hiera':ensure => 'link',provider => 'posix',selrange => 's0',selrole => 'object_r',seltype => 'bin_t',seluser => 'system_u',target => '/opt/puppetlabs/bin/hiera',
}
Option 3 - Install agent/s using your own package manager
Alternatively, if you prefer, you can also use the following to install using your package manager.
Run via the packages for your applicable operating system distribution:
Yum (for Centos)
$ sudo yum install puppet-agent
Apt (for Ubuntu)
$ sudo apt-get install puppet-agent
Option 4 - Install agent/s using a tarball package
You can download the agent from the Puppet website and install it. This is a great option if the machine you want to test this on has no access to the internet.
For example, for Ubuntu ver. 18.04 (amd64) Ubuntu ver. 18.04 (amd64)
curl -JLO 'https://pm.puppet.com/puppet-agent/2019.8.1/6.17.0/repos/deb/bionic/puppet6/puppet-agent_6.17.0-1bionic_amd64.deb'
sudo dpkg -i puppet-agent_6.17.0-1bionic_amd64.deb
If you get the following error, then you will need to make sure you have added the operating system as a class per the earlier step (Step 3), where you add this via the Puppet Enterprise Console via the Node Groups> PE Master> Classes.
The agent packages needed to support el-8-x86_64 are not present on your master. To add them, apply the pe_repo::platform::el_8_x86_64 class to your master node and then run Puppet. The required agent packages should be retrieved when puppet runs on the master, after which you can run the install.bash script again.
More details on installing agents available from Puppet Documentation here.
Step 5 - Once installed, Puppet Master needs to accept and sign off certificates for each Puppet agent/s
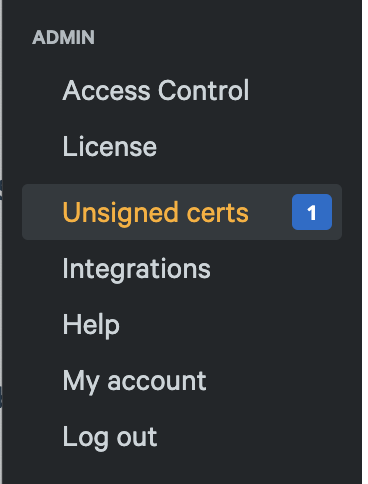
After you install a Puppet agent on a node, you will need accept its certificate signing request and begin managing it with Puppet Enterprise (PE)> Admin> Unsigned certs.
We can do this per individual node and/or all.
Once you get to the Unsigned certificates page you can Accept All.
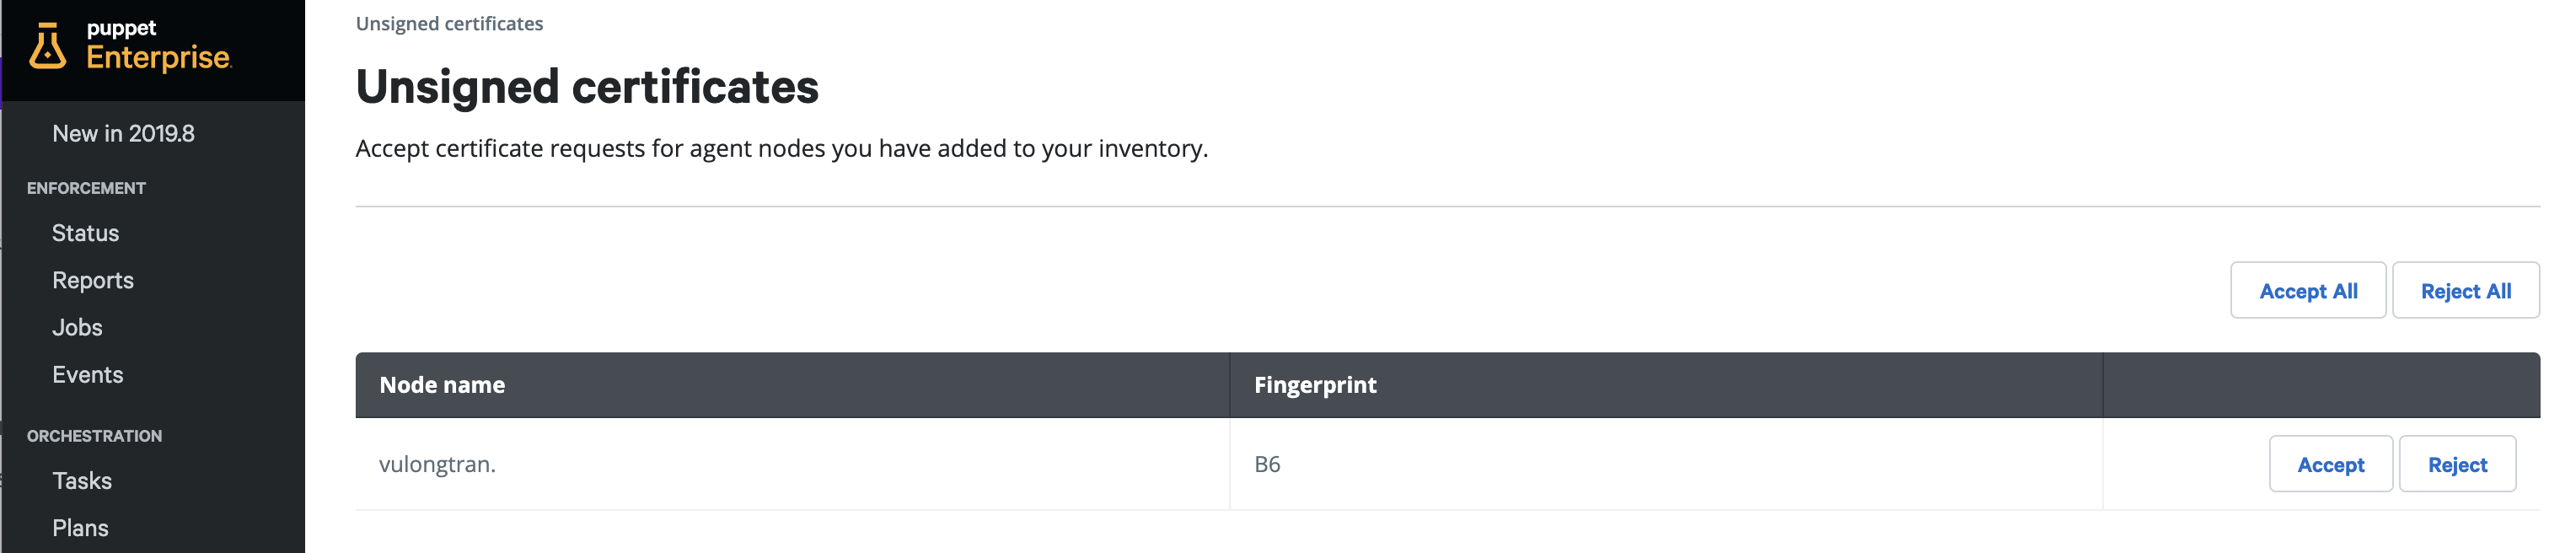
You will get an "accepted" note on it once successful, which you will see in my example below*.

*note - I signed this in the Puppet Enterprise Console for another agent node
If you prefer using the command line. You can also run the following commands on the Puppet server (where you installed the Puppet Enterprise). Please do make sure you are on the Puppet Master and not the Puppet agent nodes.
Listing of your current Certificate Authority (CA) certificates that are currently being requested. $ puppetserver ca list

If you can sign the certificates for your instance node/s.
$ sudo puppetserver ca sign --certname <puppet_agent_hostname>
$ sudo puppetserver ca sign --certname agent.vulongtran.com
OR you can choose to sign them all in one go.
$ puppetserver ca sign --all

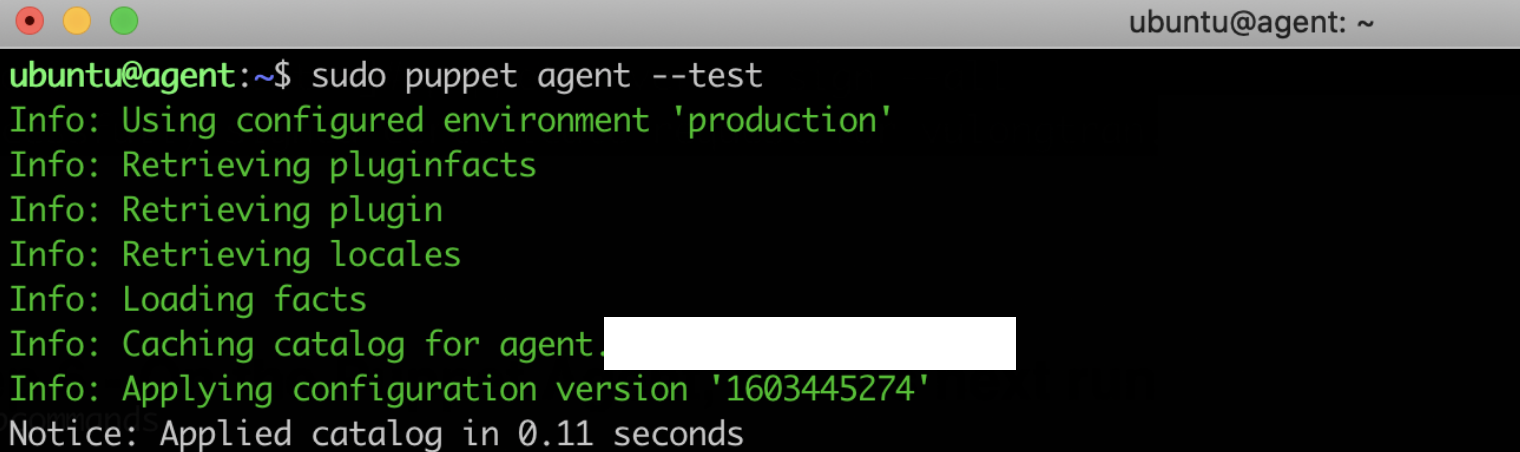
Step 6 - On the Puppet Agent, run it's next run
Then on the Puppet Agent machine, it will fetch the signed certificate from the Puppet Master on it's next run. So let's run it.
On the Puppet Agent, run this command
$ sudo su
$ puppet agent --test
Step 7 - Check that a certificate is in place
On your Puppet Agent, you can check that a certificate has been received from the Puppet Master and in place by running the command command.
$ sudo puppet agent --fingerprint

If you get the following note, you need to check to make sure you do not have any unsigned certificates (you can run "puppetserver ca list" to check this).

Step 8 - Configure your agent/s
You can now configure your agent, including giving your new certificate a certificate name. This ensures that your agent/s which are successfully linked to your Puppet Master.
To set the certname for the agent, run the following command which edits puppet.conf from the command line without opening up the file.
$ /opt/puppetlabs/bin/puppet config set certname agent.vulongtran.com
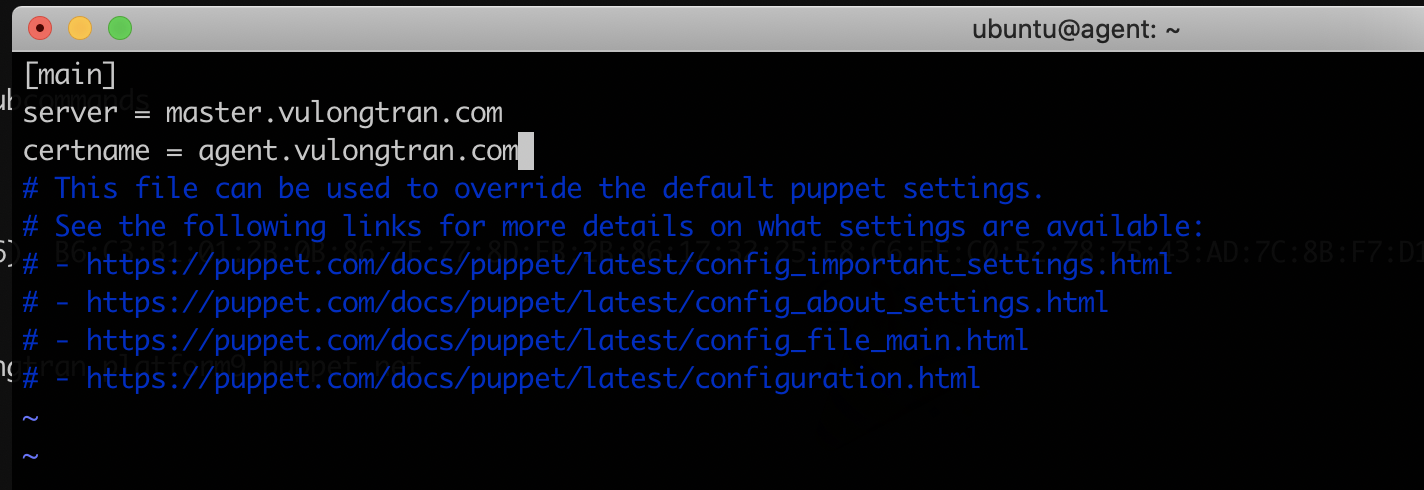
Alternatively if you prefer, you can edit and/or add additional configuration to agents by directly editing /etc/puppetlabs/puppet/puppet.conf. That is:
$ sudo vi /etc/puppetlabs/puppet/puppet.conf
where
server = <master-fully qualified domain name (FQDN)>
certname = <agent-fully qualified domain name (FQDN)>
Step 9 - You are all set with your agent now!
Congratulations!
You are all set up now.


