

Here are instructions on how to change your website from HTTP to HTTPS That is, for your website link to show https:// instead of http://.
This is using my example of using Wordpress that is hosted on GCP (Google Cloud Platform) and using the Bitnami version of Wordpress.
My guide here aims to compliment with some examples and colour on the Bitnami guides.
How to update your website to HTTPS on Google Cloud Platform with Bitnami Wordpress?
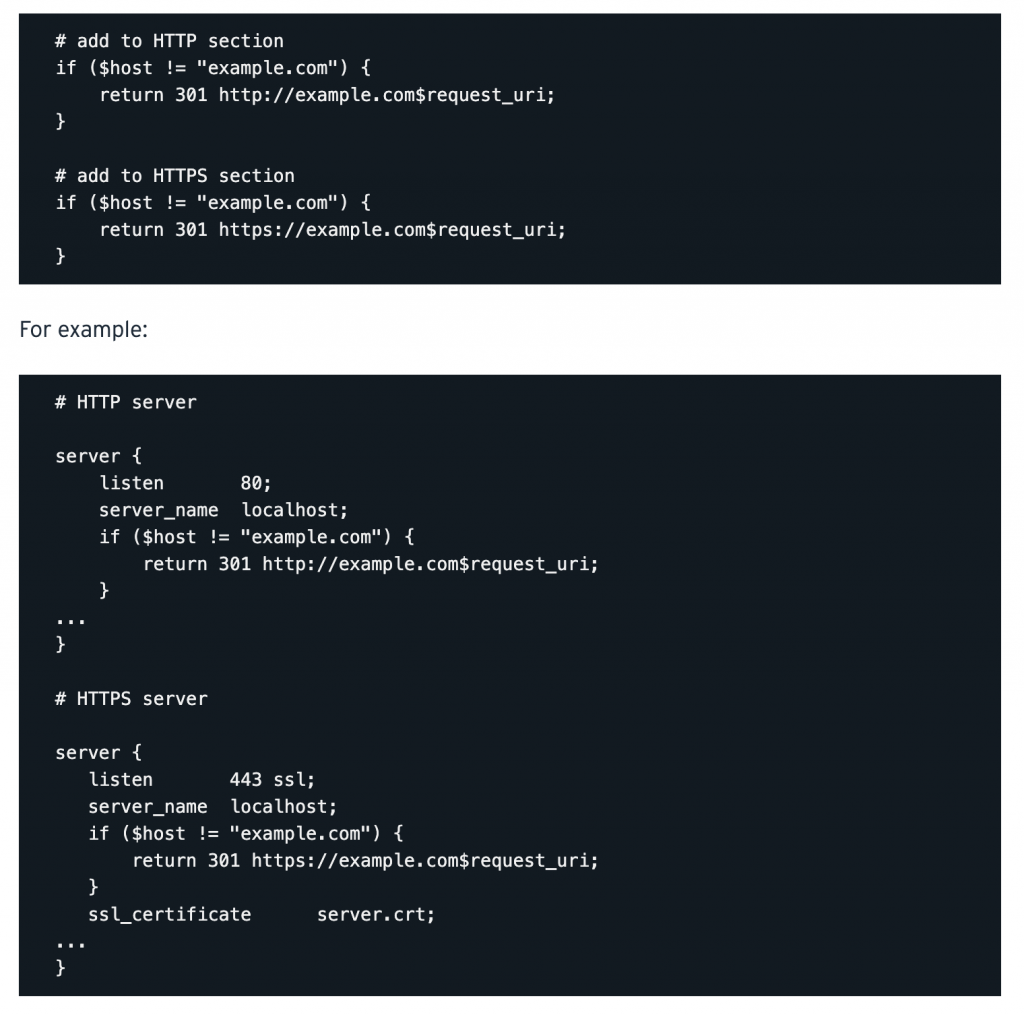
- To redirect all these domains to your own domain, we will need to modify the existing HTTP and HTTPS configuration in the /opt/bitnami/nginx/conf/bitnami/bitnami.conf file and add the lines below in each case.
- Remember to replace dejavuguides.com with your own domain and note that the URL prefix is http or https depending on which section is being modified.
This is an example from Bitnami.
How to update your website to HTTPS on GCP with Bitnami Wordpress
Here is a step-by-step guide on how to do this.
Please note that this assumes that you have logged onto your GCP (Google Cloud Platform) and have opened up SSH for your server on your computer.
Step 1 - Let's make changes to the config file on your server
We will need to access /opt/bitnami/nginx/conf/bitnami/bitnami.conf in sudo mode so we have permissions to edit.
sudo nano /opt/bitnami/nginx/conf/bitnami/bitnami.conf
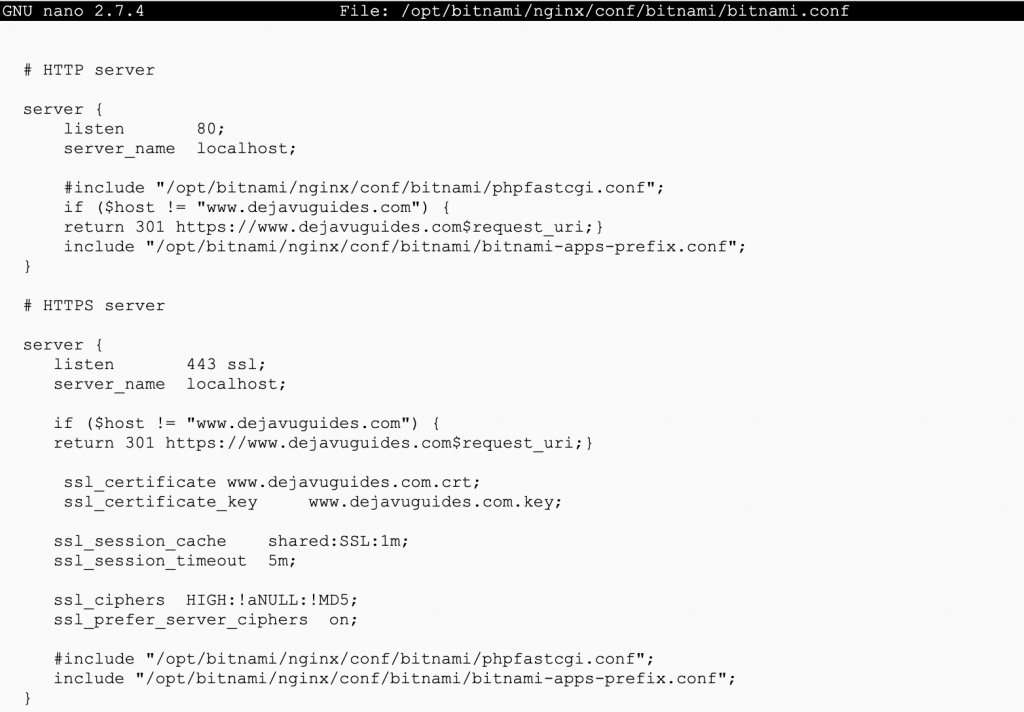
Step 2 - Add the following lines into your config file
Add the following lines to your config file. This will tell the system to redirect visitors to your website with the HTTPS.
# add to HTTP sectionif ($host != "dejavuguides.com") {return 301 http://$host$request_uri;}}
# add to HTTPS sectionif ($host != "www.dejavuguides.com") {return 301 https://www.dejavuguides.com$request_uri;}
Example below
STEP 3 - Save the config updates
Save the config updates when you're ready. On a Mac, you can do this by pressing Control + O (Write Out) and accepting the write updates.
STEP 4 - Restart your server
We will then need to restart our server for changes to be update. I am using ngnix for my server, so I will restart my using the following script:
sudo /opt/bitnami/<a rel="noreferrer noopener" href="http://ctlscript.sh/" target="_blank">ctlscript.sh</a> restart nginx
STEP 5 - Enjoy your HTTPS!
References
References and more details available here:
- https://community.bitnami.com/t/how-to-force-non-www-to-www-on-nginx-server-with-https-already-working/65547/4
- https://docs.bitnami.com/aws/infrastructure/nginx/administration/use-single-domain-nginx/


